How Can We Help?
SmartSearch Settings – User Guide


As part of the Onboarding module in FibreCRM you can conduct AML checks within the CRM via an integration with SmartSearch. To do this you will need to add your SmartSearch details to your system and set up preferences using the SmartSearch settings in FibreCRM
To use the Smart Search Triple Check functionality you will need to add your Firms Smart Search details to the Smart Search settings. For Smart Search Triple Check this set up no longer takes place in each users profile and uses a set login using the Smart Search API V3.
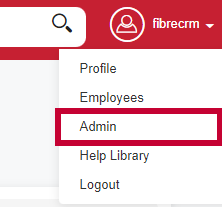
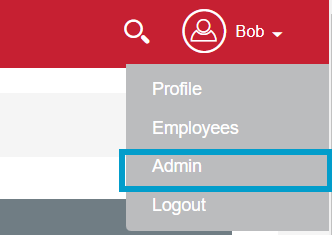
To add your firms Smart Search details, first navigate to your user name in the top right hand corner and select Admin.
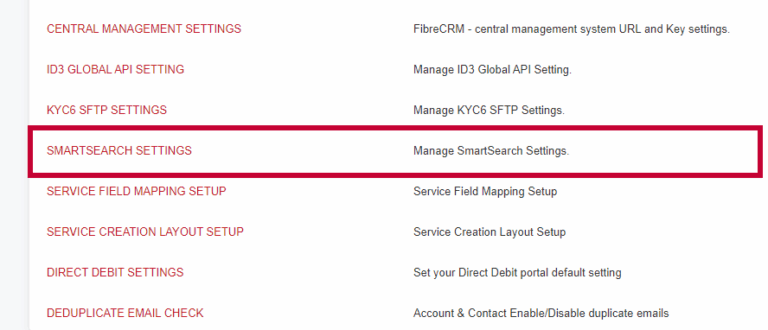
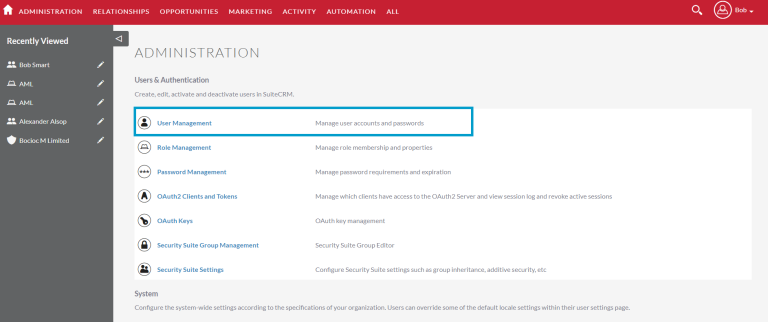
In the Admin settings scroll down to FibreCRM Modules section and select SmartSearch Settings.
In the Smart Search Settings options you will see three tabs;
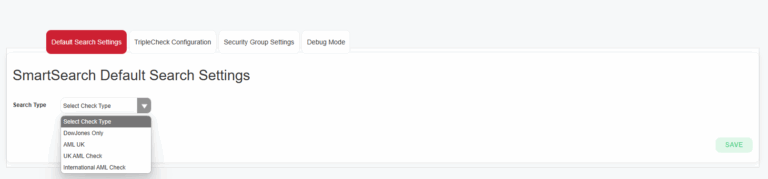
The first tab is the Default Search Settings tab where you can choose from the drop down the default search you would like to use for your AML searches. This could be Dow Jones Only, AML UK, Triple Check or International Search.
Select your default search setting and select Save once done.
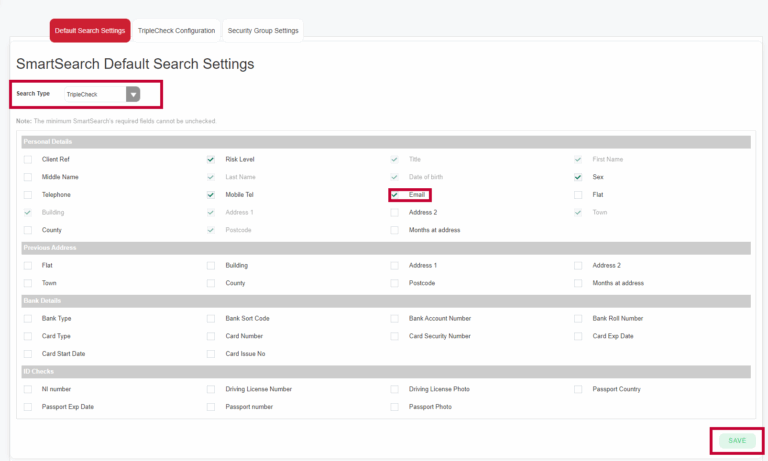
If you select AML UK or Triple Check you’ll then be able to select the Default Values for that search. On the screen you’ll see some fields are greyed out, these fields are the minimum required for that SmartSearch and you’ll not be able to toggle them on or off.
The rest of fields you can choose whether they are part of the fields automatically ticked as a default value. To do this use the Tickboxes to select which fields you’d like. Once done click Save.
The fields you have selected will now be already ticked in the pop up when conducting an AML Check/TripleCheck once you’ve selected your Search Type.
Fields that aren’t selected as Default Values but are required for a particular search can still be selected using the tick boxes.
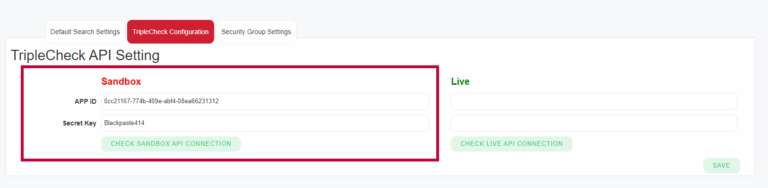
In the Triple Check Configuration tab, this is where you will put your API details from Smart Search. There will be two options in the tab, the first one is the sandbox column you’ll need to enter your details here if you want to use test or demo check checks in the System. In the Sandbox column you will need to enter an APP ID and your Secret Key which you’ll need to get from Smart Search. Once you’ve entered your details click Save.
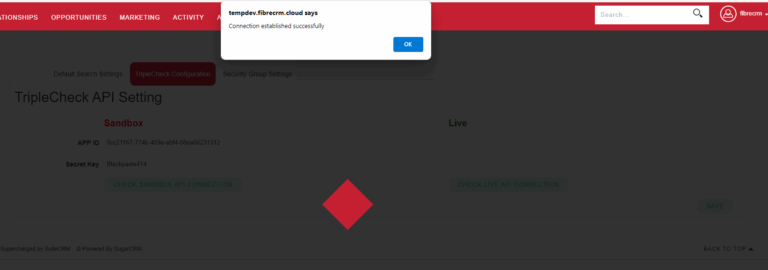
To check the connection is successful click the Check Sandbox API Connection, a popup will appear either saying the Connection is Successful or has Failed. If the connection check your details and try again.
You will need to enter your Smart Search details again in the live column again for Live Checks. Enter your APP ID and your Secret Key and then click Save. To check the connection is working, select Check Live API Connection. A popup will appear to say connection established successfully or has failed. If the connection fails check your details and try again. If the fail still occurs contact one of the FibreCRM team for assistance.
To switch between Sandbox and Live mode each user will need to go to their user profile, select the Smart Search API tab and in the API Mode drop down switch between Sandbox and Live mode.
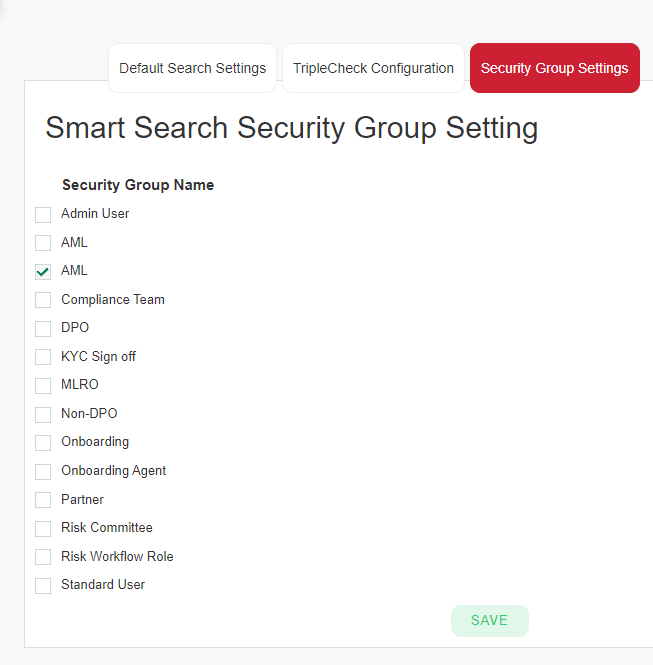
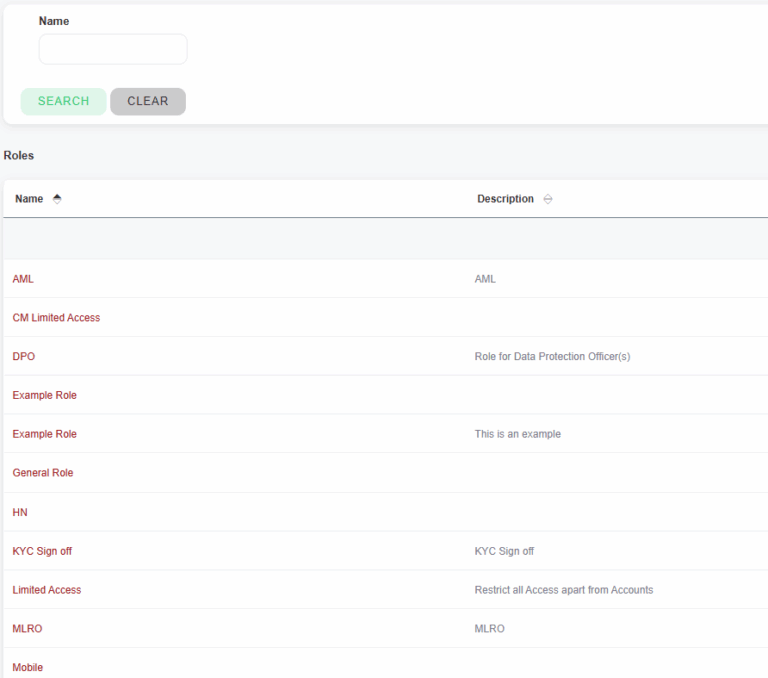
The third tab in Smart Search Settings is the Security Group Settings. From the drop downs you can select which security groups the AML searches apply to this will list all of your available security groups most customers will default to AML security role.
Once you’ve set all your smart search settings click Save, your settings will then be applied ready for your AML searches.
To add SmartSearch details to a user profile first
navigate to your username in the top right hand corner and select Admin.
On the Admin page select User Management.
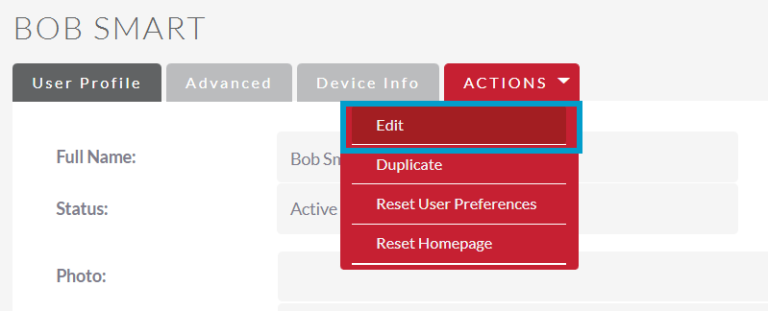
Then select the User you’d like to add the SmartSearch details from the list of users.
In the User Profile select Edit from the Actions Menu.
*Note if you’re adding Smartsearch to your own profile select Profile from the dropdown list from your username this will take you straight to the Edit page of your User Profile.
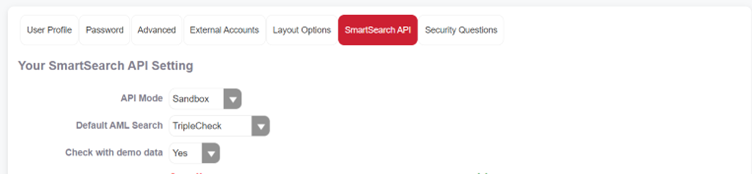
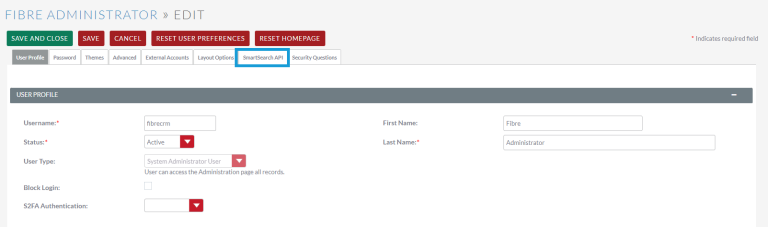
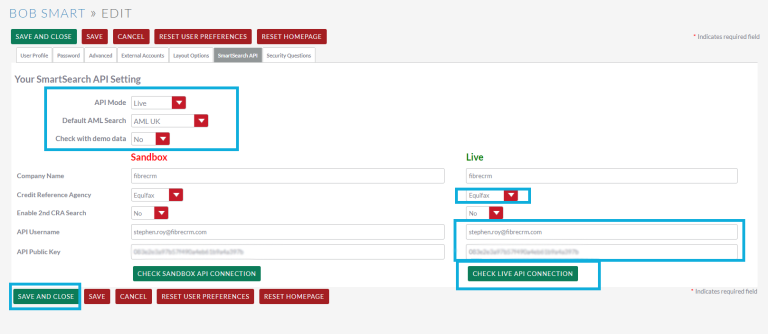
In Edit Mode select the SmartSearch API tab.
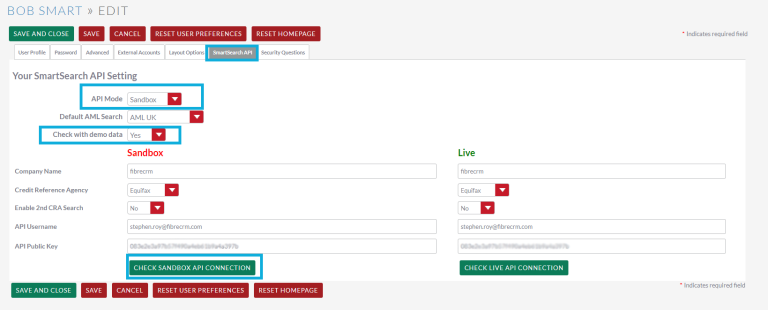
The SmartSearch API tab is where you’ll add the details. To do a live search you will you need the API Mode drop down set to Live. You will also need to choose a default search from the drop down too. The use demo data will also need to be set to No as that will send dummy data to Smart Search when conducting an AML check.
Below that go over to the Live column and enter your Smart Search details such as Company Name. Also choose the Credit Reference Agency required from the drop down.
In the API Username field in the Live column and enter the Username related to SmartSearch that this user will be using and also enter the API Key which you can find out from your SmartSearch account. Once done click Save. You can then check to see if the user details are successfully working by selecting the Check Live API Connection option.
Once done click Save & Close.
If you need to do dummy AML searches enter your information also in the Sandbox column. To use test dummy data as well in a search select Yes in the Check With Demo Data drop down this will pull through demo data and give you a result record.
If a results comes back as Fail or Refer you can set it so another search will happen automatically through a second credit agency. You can toggle this feature on and off in your user profile by going to Enable 2nd CRA Search drop down and selecting either On/Off.
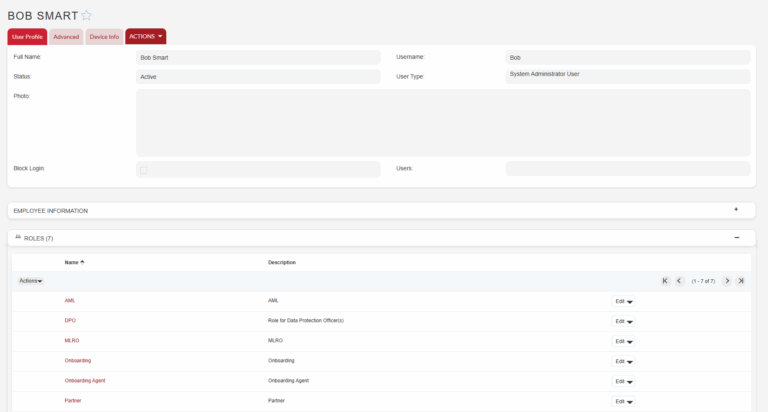
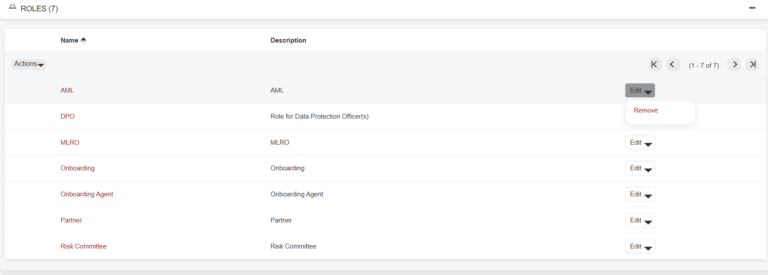
Now that the SmartSearch details have been added to the user profile before they can conduct AML checks you will need to make sure they have been added to the AML role. To do this scroll down to the Roles subpanel when the User Profile is in Detail View. There will be a list of Roles the User has been added to.
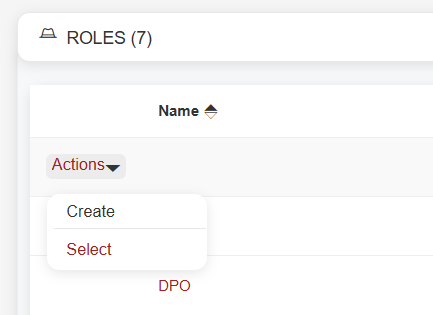
If the AML role needs to be added to the user profile select
the Actions button in roles and then click Select.
If you need to remove the role at any point select the Edit
button in the Roles subpanel and then select Remove.