How Can We Help?
Admin Guide – Editing the Available Fields for Dashlet Editing View
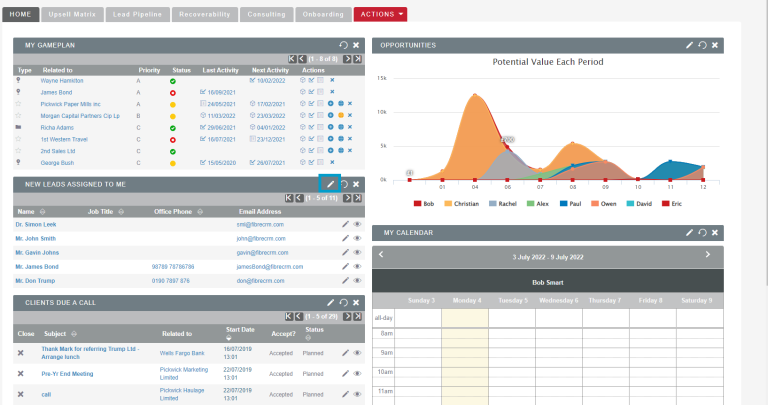


Dashlets are customisable sections of your Dashboard and can be changed to display information from the CRM such a Reports, Client Data, Tasks, Opportunities and Onboarding Information.
A user can customise which fields of information they’d like to see in the Dashlet by selecting the Pencil edit icon on the Dashlet.
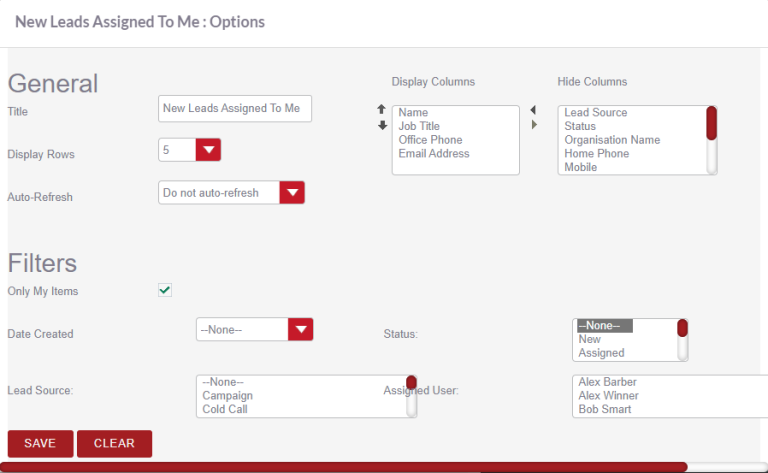
In the Pop Up they can make edits to the Dashlet in the General section. To change what fields and information is shown in the Dashlet they can toggle the fields between the Display and Hide columns. There is also a Filter which has search criteria that a user can use to narrow down the results displayed.
As an Admin of CRM you can customise what fields the
user can choose and filter by when customising a Dashlet on their Dashboard. The
Dashlet views are available to configure for each module able to be displayed as
a Dashlet so the information you’d like to see on a Lead dashlet does not
have to contain the same information as an Opportunity dashlet.
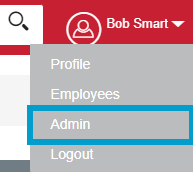
To edit a the fields that are available for a user when editing a Dashlet first navigate to your username in the top right hand corner and in the drop down list select Admin.
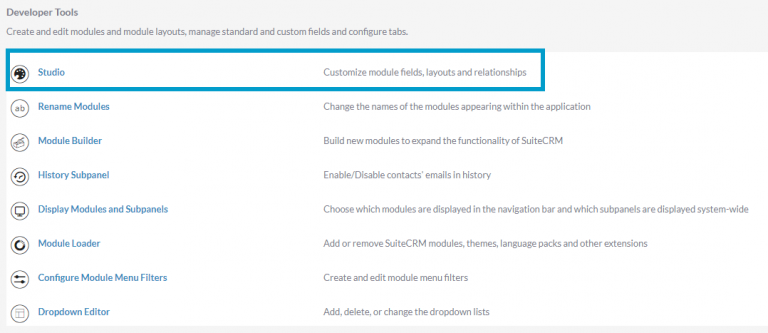
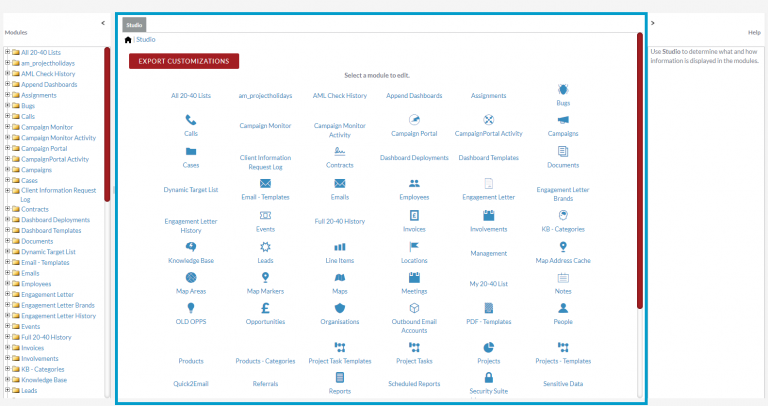
In Admin scroll down to Developer Tools and select Studio
In Studio select the module you’d like to edit.
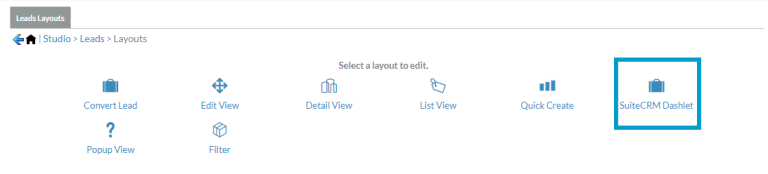
You’ll then have options for which module component you’d like to edit, select the Layout option.
Select the SuiteCRM Dashlet icon.
You’ll then have two options SuiteCRM List View and SuiteCRM Search you can select to edit. These options will let you decide the fields that are shown when a user edits their Dashlet.
SuiteCRM Dashlet List View lets you decide what fields are available for a User to choose from in the Display and Hide column when they are editing the Dashlet.
The SuiteCRM Dashlet Search lets you choose which filters are available for a user to narrow down results of what is shown in their Dashlet.
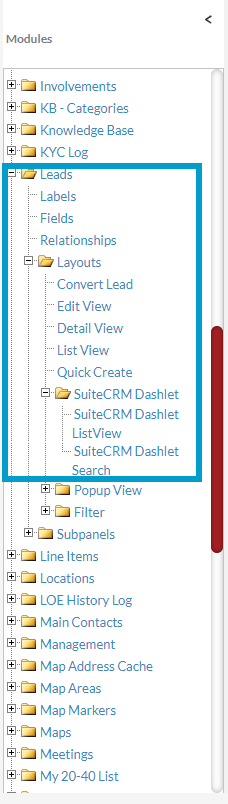
You can also navigate to which layout you’d like to edit by using the tree on the left hand side. Select the + button next to the module name to open up the options. Then select the + button next to Layouts, to find SuiteCRM Dashlet. Use the + button again to open up the SuiteCRM Dashlet List View or SuiteCRM Dashlet Search options.
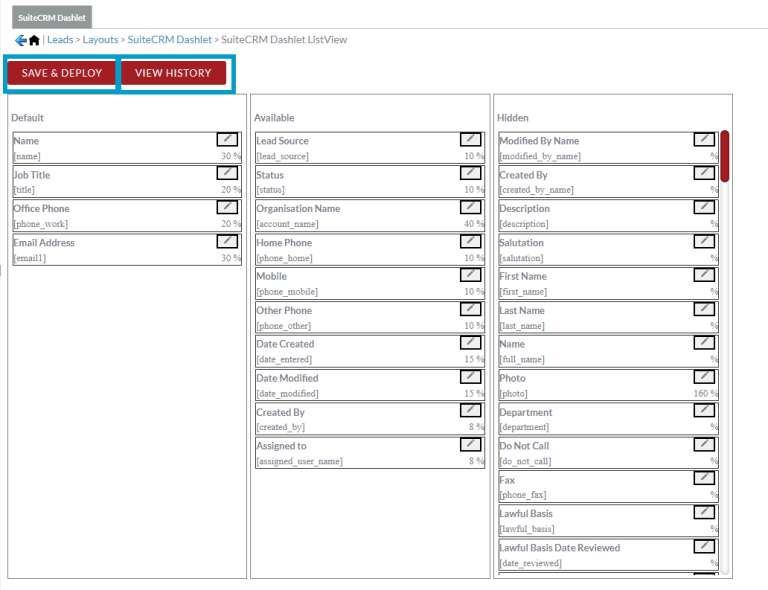
In the SuiteCRM Dashlet List View edit page you’ll see three columns where all the fields that can be displayed in the Display and Hide columns located in the General section when the user is editing their Dashlet appear here. The Default column contains fields that will be seen in the Display column that will show by default when adding a Dashlet. The Available column contains fields that are available to a user from the Hide column when editing. The Hidden column contains fields that a user won’t be able to see or pick from. The Pencil icon is an edit button where you can rename a label of a field however it is not recommended to change labels here. To make changes drag and drop the fields into the columns you would like them in. You can view previous layouts by select View History. Once you’re happy with your changes select Save & Deploy.
The fields you have chosen will now be available for a User to choose from when editing their Dashlet in the Display and Hide columns located in the General section.
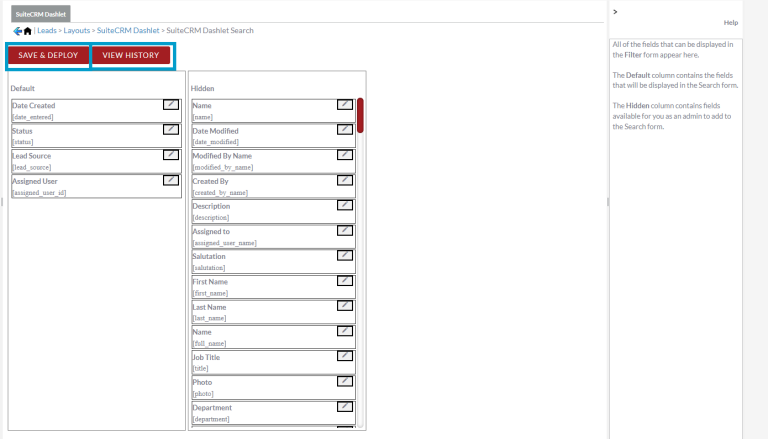
In the SuiteCRM Dashlet Search edit screen all the fields that can be displayed are listed either in the Default or Hidden column. The Default column contains the fields that a user can filter/search by. The Hidden column contains fields that are available to filter by but can not be seen by a user in the Dashlet edit screen. Drag and Drop fields between the Default and Hidden column to choose which fields you would like users to filter by. The Pencil icon is an edit button where you can rename a label of a field however it is not recommended to change labels here. You can view previous layouts by select View History. Once you’re happy with your changes select Save & Deploy.
The fields you have chosen will now be available for a User to Filter by when editing their Dashlet located in the Filters section.
To download the Editing the Available Fields for Dashlet Editing View cheat sheet click here