AML Searches with Credit Safe Integration – User Guide
Updated
Introduction
As part of your new client onboarding process, you can use FibreCRM to conduct your Anti-Money
Laundering checks for both businesses and individuals. Integrated with your
Creditsafe software, you can run a search and view the results of the search
all within CRM. The results can then be stored and used as part of your KYC.
Client Information Request
Before an AML search can be performed within CRM information on the Person/Organisation needs to be obtained and added to the fields in their sensitive data records such as; Address, Proof of Address, ID,Passport and other sensitive pieces of client information. This information will need to be obtained so the AML search can be completed.
To do this you can send a client information request to your client. For information on how to send a Client Information Request and how to save the information and document your client submits please see our user guide: Sending a Client Information Request – FibreCRM Support Portal
Once you have all the information and documents from the client that you require you can then move on to conducting an AML check.
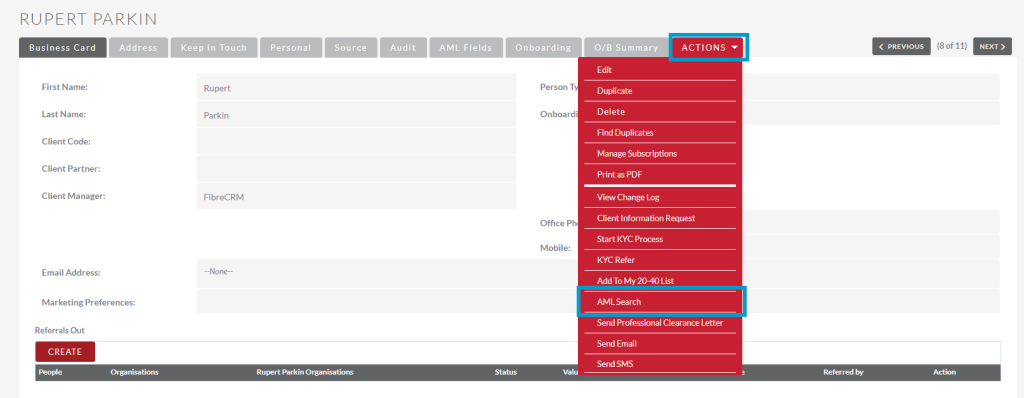
Conducting an AML Search on a Person record using Creditsafe
To conduct the AML check, navigate to the Person record you wish to conduct the AML check against. In the Person record select the AML Search option in the Actions Menu.
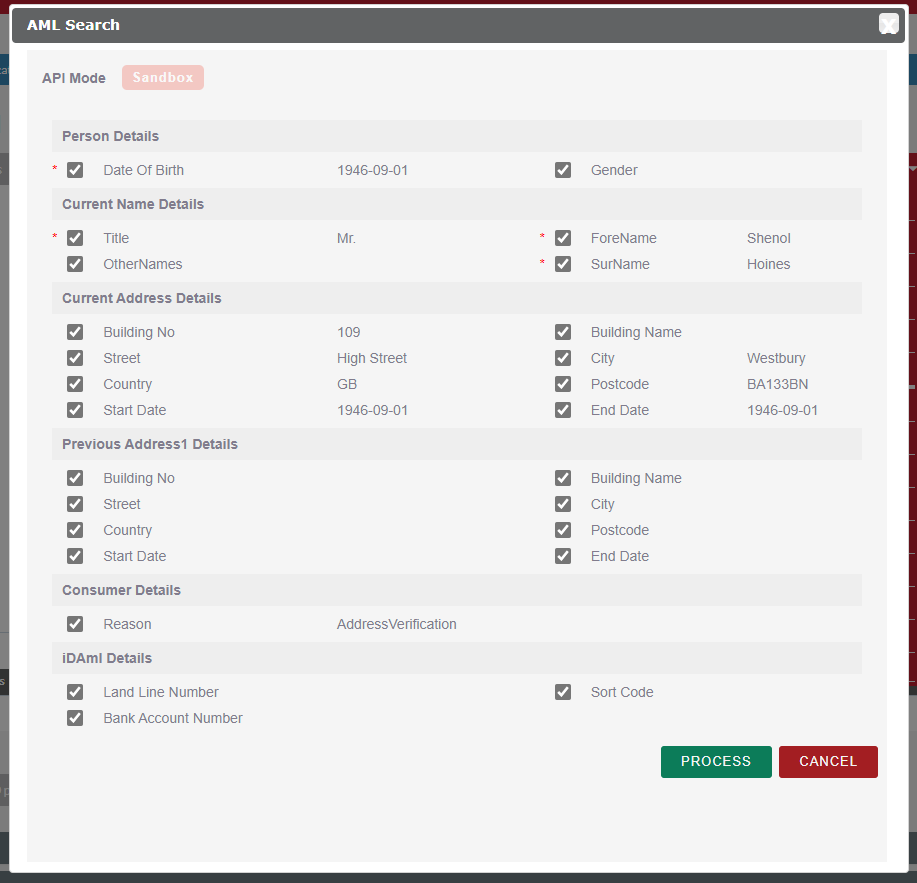
A pop up box will appear with ticked fields that will be run through Creditsafe. Mandatory Fields that are required for the search have a red * next to them. You won’t be able to run the check if these fields are not filled in.
For the other fields you are able to untick any field boxes you don’t wish to run through Creditsafe. Once you are happy with your selection scroll to the bottom of the dialog box and select Process. Alternatively, you can click cancel to return to the Person record to amend any information before starting the AML search again.
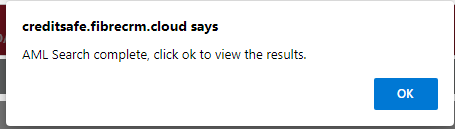
The AML search will then occur, once completed a pop up box will appear. Click Ok to view the results.
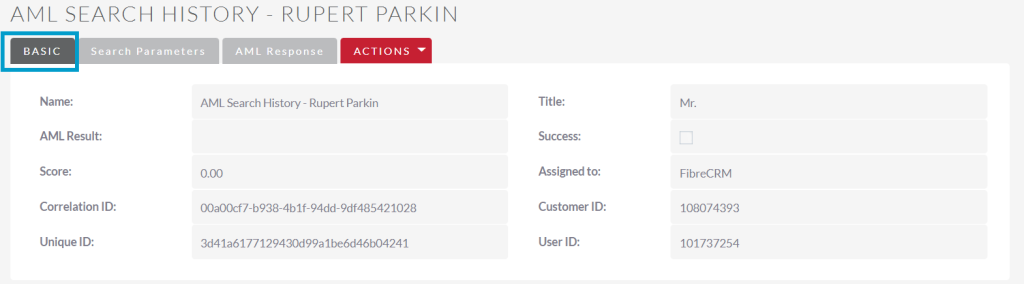
Once the
check has been completed you’ll be taken to the AML search record. In the record there are 3 tabs containing
information from the conducted AML search. In the Basic tab you’ll be
able to see; the name of the record, the AML results and Score. You’ll also be
able to view the; Correlation, Unique, Customer and User
ID. If the AML search was successful the tick box will be ticked.
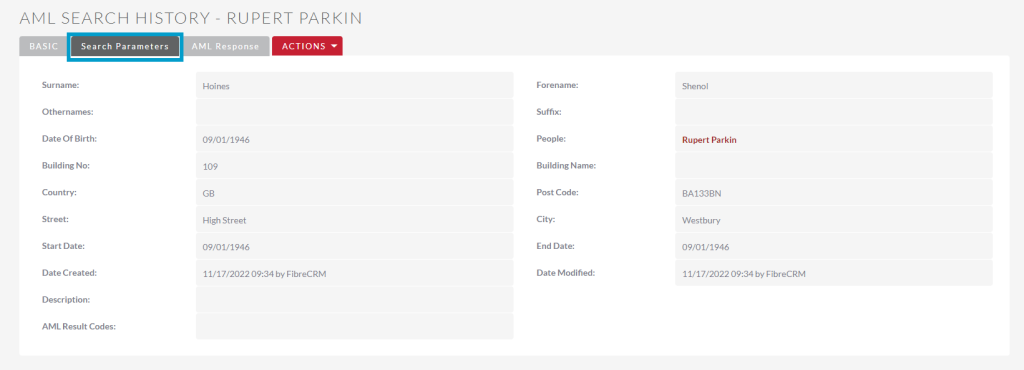
In the Search Parameter tabs you’ll be able to see what the information has been sent to Creditsafe and used in the AML search. It also includes AML Result Codes.
If your customer has not passed the AML search you can use AML Response tab to go into more detail as to why they have not passed.
The results of the AML search will then be seen in the Onboarding tab in the Person record in AML Subpanel. In the panel you can see the AML Date, Score, Notes and Status.
You can
also view any AML Searches that have occurred by scrolling down to the Creditsafe
AML Subpanel in the relevant Person
record. To view click the blue hyperlink which will take you to
the AML search record.
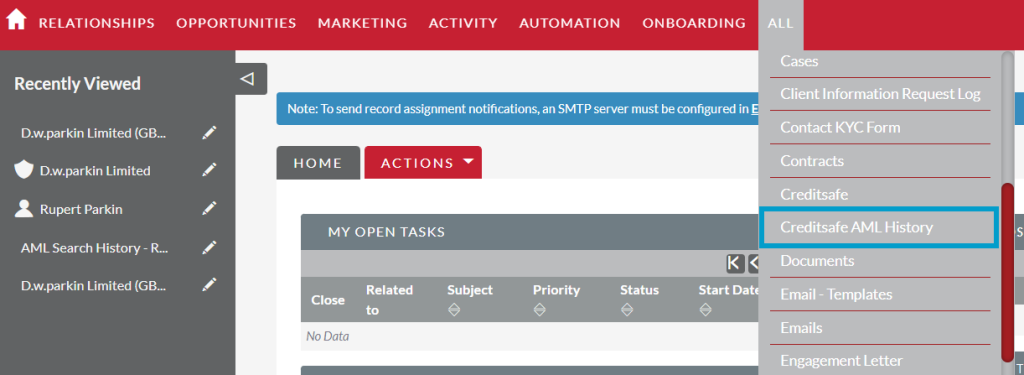
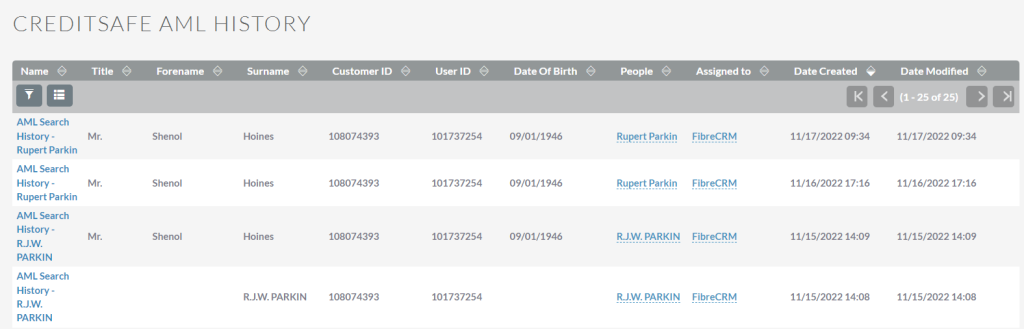
You can also view AML checks by selecting the All option in the Navigation Menu and clicking Creditsafe AML History.
All AML searches
performed from within FibreCRM will be listed here, you can use the filter
system to search for a specific person. Select the hyperlink under the name
column to view the details.
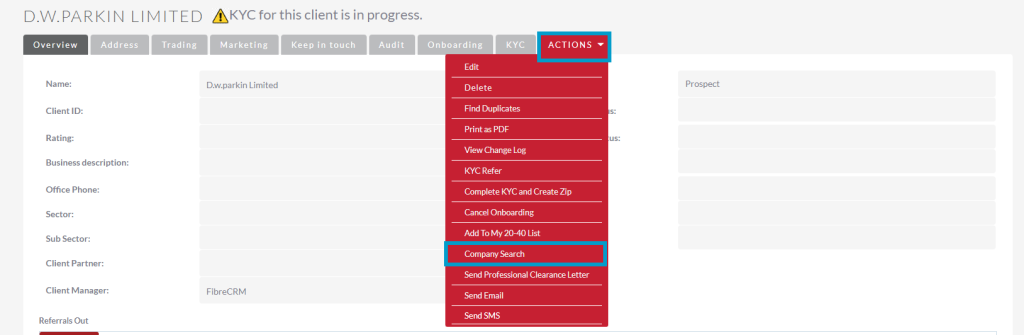
Conducting a Company Search using Creditsafe on a Organisation Record
To conduct a
Company Search, navigate to the Organisation record you wish to
conduct the Search against. In the Organisation record select the Company
Search option in the Actions Menu.
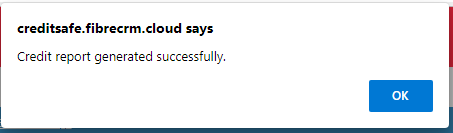
A pop up box will appear saying that the Credit Report has been created. Click OK.
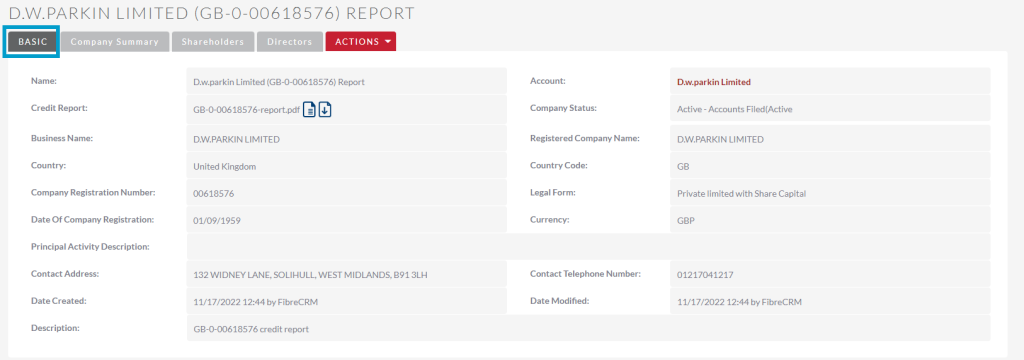
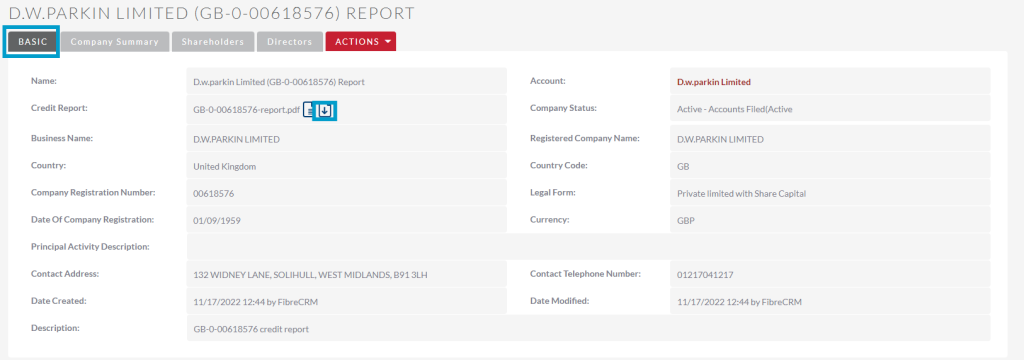
You will
then be taken to the Company Search Report record. The record contains 4
tabs. In the Basic Tab you will
be able view information related to that company that is in the report.
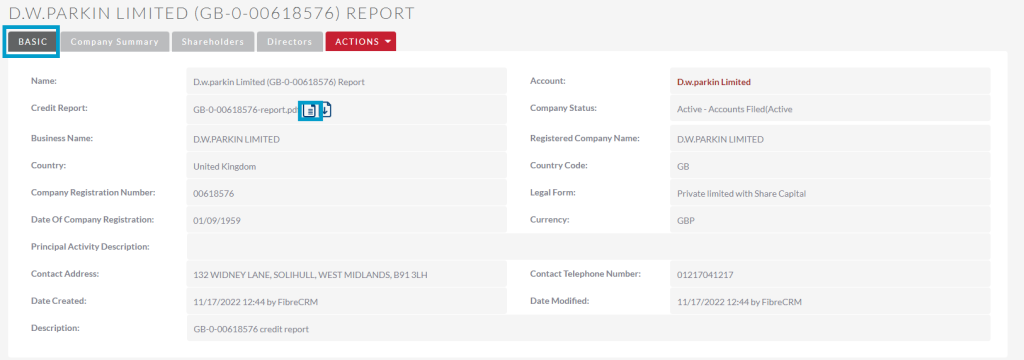
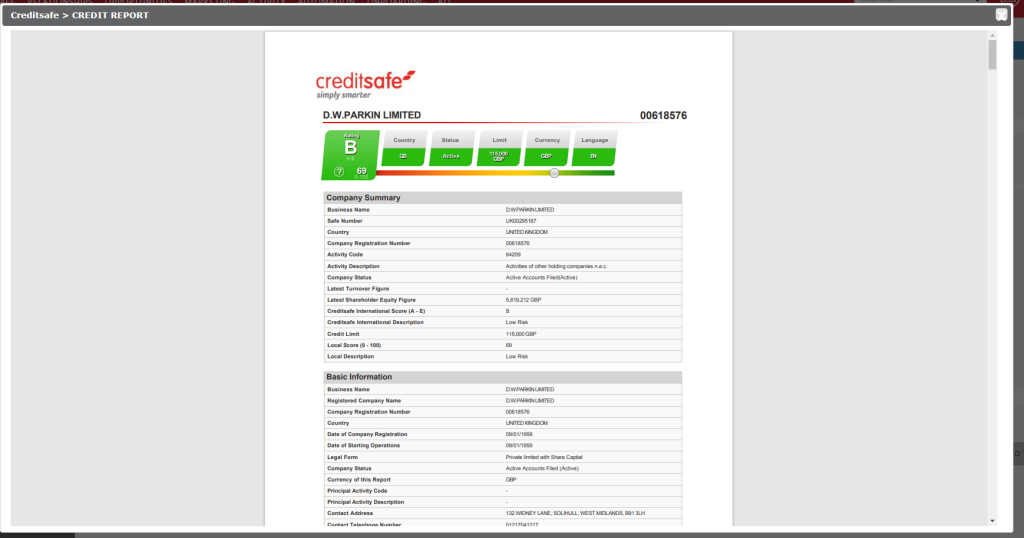
In the Credit Report Field there are two icons. If you select the View icon you will be take to the Creditsafe Credit Report which contains all the information about the business you will need for your Company Search check.
If you
select the Download icon in the Credit Report Field the report will be
downloaded as a PDF to your computer.
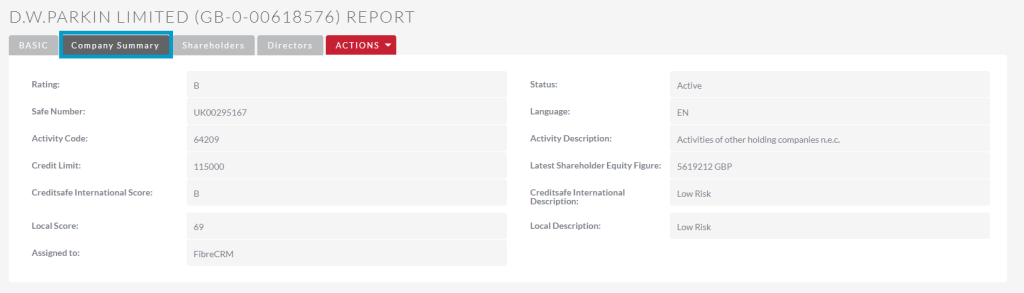
In the Company
Summary tab you’ll be able to view information such as; Rating, Credit
Limit, Safe Number and Creditsafe International Score.
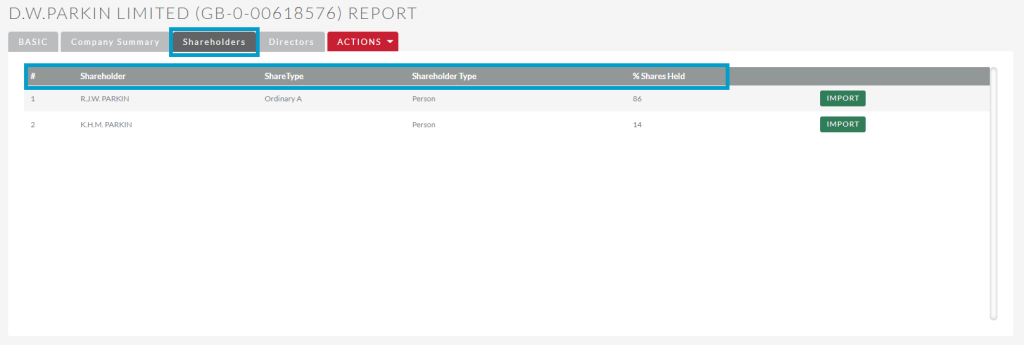
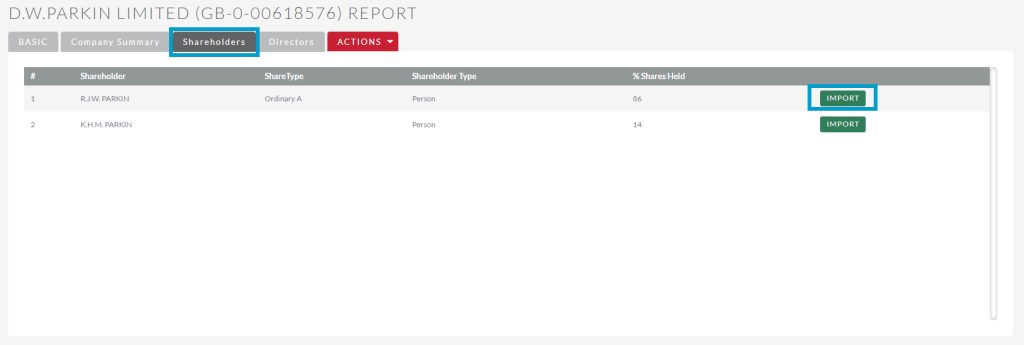
The Shareholders
tab will show all the shareholders from the report and information about them
such as who is a shareholder, the share type and shareholder type and also the
percentage of shares they have of the company.
If the
Shareholder isn’t currently in your CRM as a Person record you can select the Import
button and create a Person record which will also automatically create an Involvement
between the newly created record and the Organisation.
Note: Shareholder information is pulled in from the report and may use initials instead of full name so double check that you wouldn’t be creating a duplicate record of someone that is already in the CRM before you import.
If a Shareholder is already in the CRM and you click import you’ll get a pop up letting you know you already have this person in the CRM.
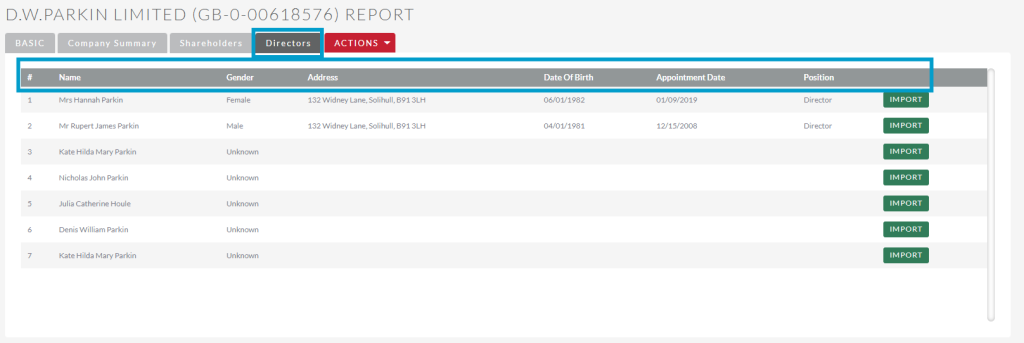
In the Directors
tab you will be able to view a list of Directors that are listed in the Credit
Report. The information in this tab includes; Name, Gender, Address,
DOB, Appointment Date and Position.
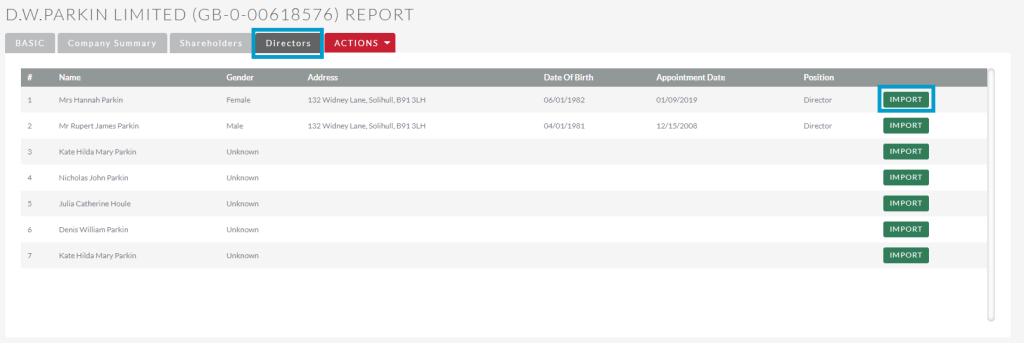
If a Director
isn’t currently in your CRM as a Person record you can select Import and
create a Person record which will also automatically create an Involvement
between the newly created record and the Organisation.
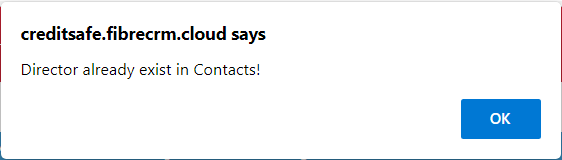
If a Director is already in the CRM and you click import you’ll get a pop up letting you know you already have this person in the CRM.
The results of the Company Search will then be seen in the Onboarding tab in the record in Organisation record. In the panel you can see the AML Completed, Notes and Status.
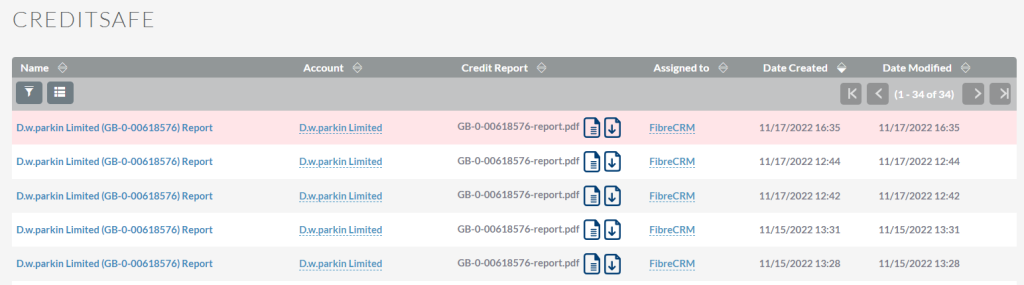
You can
also view any Company Searches that have occurred by scrolling down to the Creditsafe
Subpanel in the relevant
Organisation record. To view click the blue hyperlink on the
result you would like to view this to will take the result page. You can also
quickly view or download the Credit report by selecting the respective icons.
You can
also view AML checks by selecting the All option in the Navigation
Menu and clicking Creditsafe
All Company Searches performed from within FibreCRM will be listed here, you can use the filter system to search for a specific Organsation. Select the hyperlink under the name column to view the details. You can also quickly view or download the Credit report by selecting the respective icons.
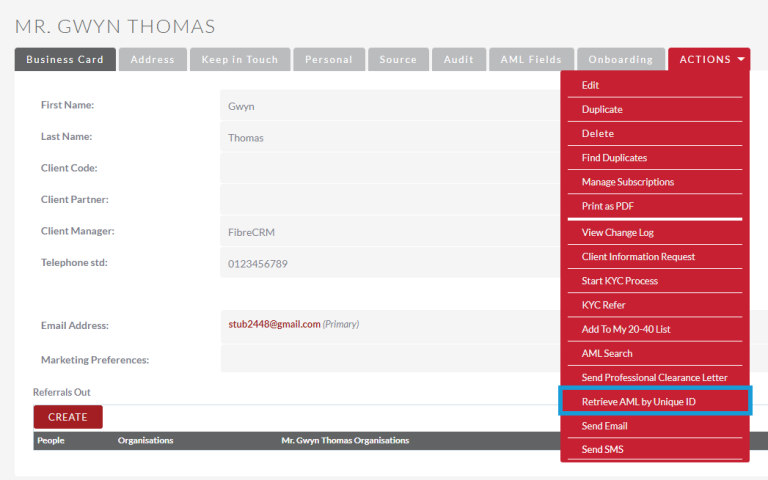
Add Historical Checks to the CRM
You have the ability to add previous/historical AML searches that were conducted in CreditSafe on an individual and add them to their Person record in the CRM.
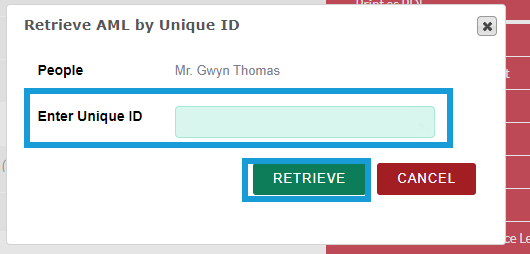
To add a previous AML check to a Person record first navigate to the record and in the Actions Menu select Retrieve AML by Unique ID.
A pop up box will then appear. The first field will show the
name of the Person and below you will have the Enter Unique ID field
where you can enter the Unique ID (which can be found in CreditSafe) of the
search you would like add to the CRM. Then click Retrieve.
This will create an AML record in the CRM which can be viewed in the AML Check History subpanel of the Person record. It will also be able to be viewed in the AML Check History module in the list view.
Table of Contents
We use cookies to assess how people are using our website, only necessary cookies are enabled. Cookie settingsACCEPTREJECT
Cookie Policy
Privacy Overview
This website uses cookies to improve your experience while you navigate through the website. Out of these cookies, the cookies that are categorized as necessary are stored on your browser as they are essential for the working of basic functionalities of the website. We also use third-party cookies that help us analyze and understand how you use this website. These cookies will be stored in your browser only with your consent. You also have the option to opt-out of these cookies. But opting out of some of these cookies may have an effect on your browsing experience.
Necessary cookies are absolutely essential for the website to function properly. This category only includes cookies that ensures basic functionalities and security features of the website. These cookies do not store any personal information.
Any cookies that may not be particularly necessary for the website to function and is used specifically to collect user personal data via analytics, ads, other embedded contents are termed as non-necessary cookies. It is mandatory to procure user consent prior to running these cookies on your website.
Functional cookies help to perform certain functionalities like sharing the content of the website on social media platforms, collect feedbacks, and other third-party features.
Performance cookies are used to understand and analyze the key performance indexes of the website which helps in delivering a better user experience for the visitors.
Analytical cookies are used to understand how visitors interact with the website. These cookies help provide information on metrics the number of visitors, bounce rate, traffic source, etc.
Advertisement cookies are used to provide visitors with relevant ads and marketing campaigns. These cookies track visitors across websites and collect information to provide customized ads.