How Can We Help?
Creating & Amending Client Take On Forms – User Guide


Client Take On forms are used for information requests to a client. Once created you will be able to send a your client a Client Information Request
Note:
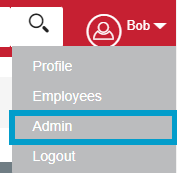
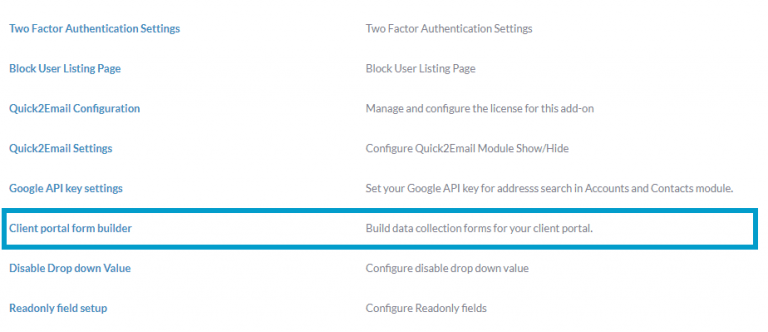
To create a form navigate to your username in the top right hand corner and in the drop down menu select Admin. Then scroll down to the FibreCRM Modules section and there select Client Portal Form Builder.
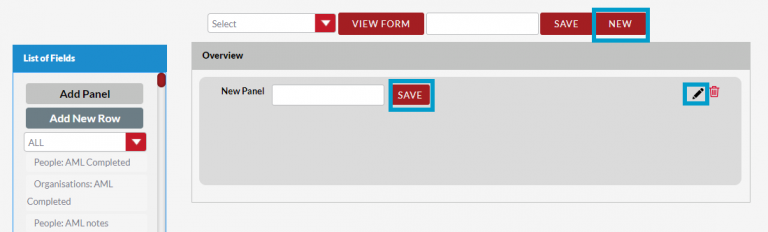
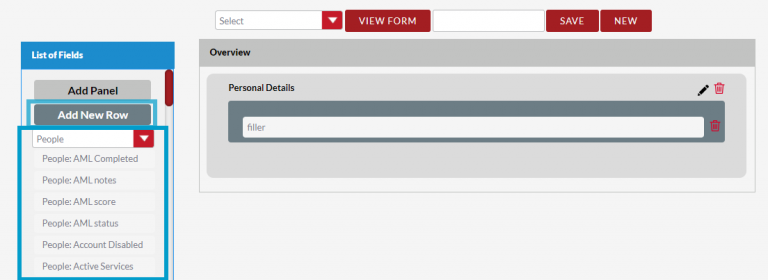
To create a new form press New. A panel will then be created. To build the form, first select the Pen icon to name the panel, each panel will be a section of the form for example; Driving Licence and then select Save. Use the Pen icon at anytime to rename a panel if needed.
In the form you can separate it into different panel
sections where you can request different information; for example the first
panel would contain information about the Business and the second panel across
the top would contain information about the individual. You can create as many
panels as you require for your form by the selecting the Add Panel button.
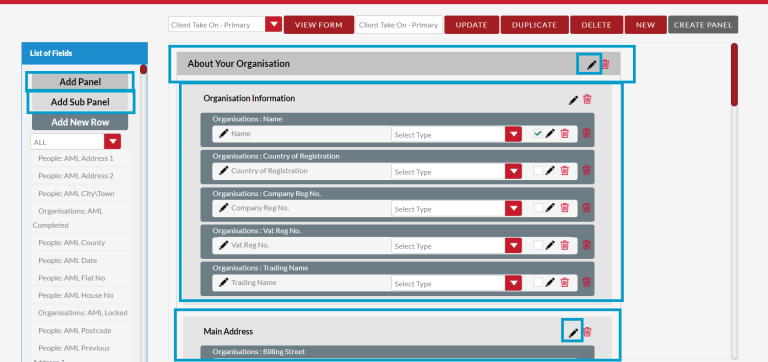
In the form you can separate it into different panel sections where you can request different information; for example the first panel would contain information about the Business and the second panel across the top would contain information about the individual. You can create as many panels as you require for your form by the selecting the Add Panel button. To rename the panel use the Pencil icon. Within the panel you can breakdown the information such as Address and Organisation Information using Subpanels. To add Subpanels within the form use the Add Subpanel button and to rename them again use the pencil icon.
To add fields to the panel you need to add rows. To add rows on a panel select the Add New Row button from the left hand side column. You can then choose your fields from the left hand column and drag them across to sit inside the row. You can add multiple rows to a panel by selecting Add New Row and using drag and drop to add the field from the left hand column.
Note: You can only add fields that already exist in the CRM. If a field doesn’t exist it will need to be created. For information on how to do this please see our cheat sheet: Adding_Fields_Removing_from_screen_CheatSheet.pdf (fibrecrm.com)
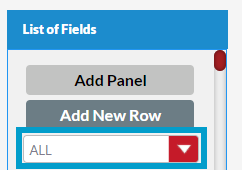
The dropdown below the Add New Row button you can use to filter fields, you can view all or filter by People, Organisations, Panels or Sensitive Data Fields.
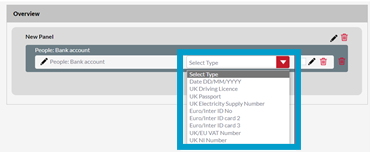
Next to each text field you will be given a dropdown that you could use to format the field, For example; a date field or a passport number. You do not have to select anything, and this list can also be added to if you want a specific format.
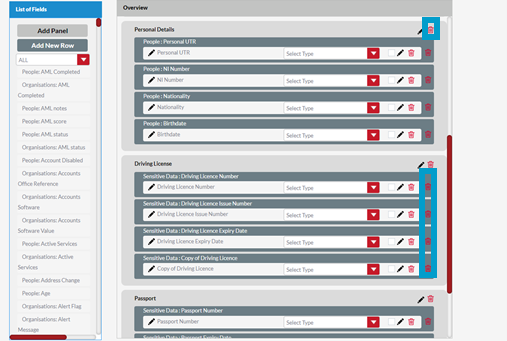
The final results of the form will look better if you keep related fields in their own Panel for example; Address, Personal Details, Driving Licence. Use the Bin icons to delete panels or rows.
To move panels and rows around the screen you can drag and drop the panels and rows by selecting them and holding down the mouse button to move them around.
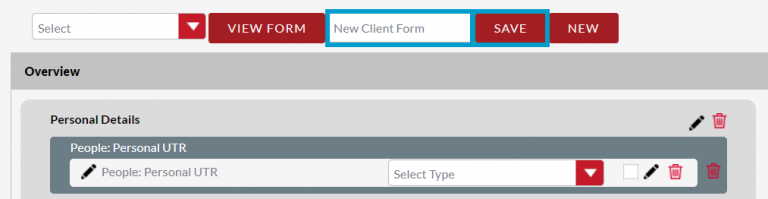
Once you are happy with your form, name the form in the box at the top of page and select Save.
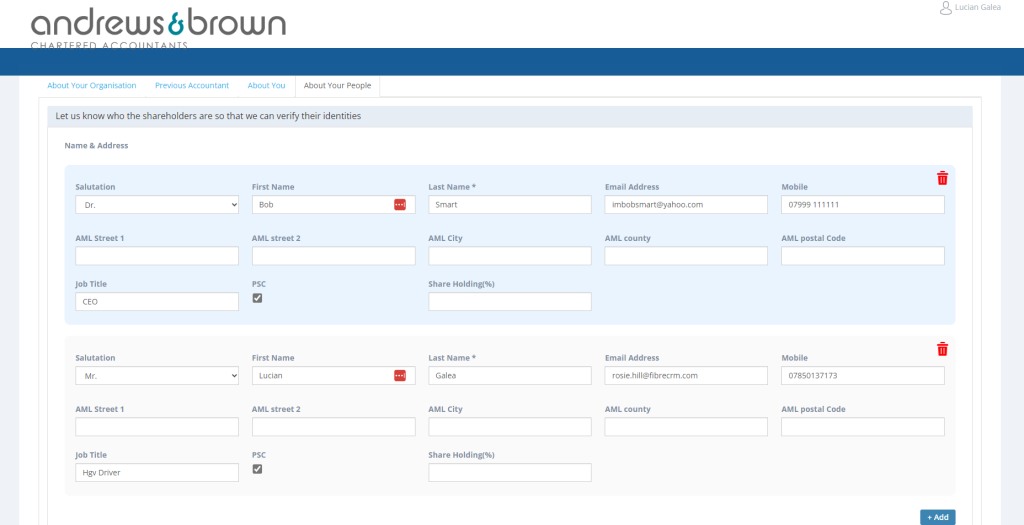
Additionally you can create panels where the client can fill in information about other people in the business such as Shareholders/Directors or other involvements of the business. In these panels filters can be set so involvements that are already listed in the CRM as they’ve been added already or imported from Companies House, can populate in the form and the client can fill in the additional information on each individual. The client also can add people to the list in this panel and once submitted they will be created as people records and an involvement to the business in CRM.
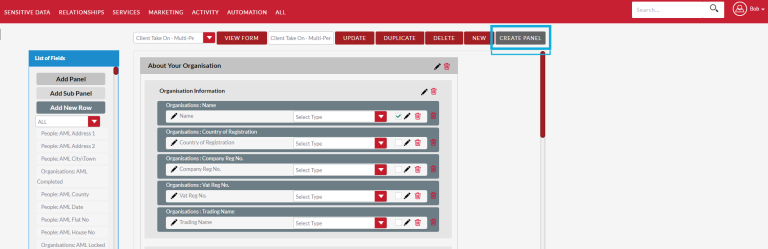
To create one of these panels select the Create Panel option in the client request form builder.
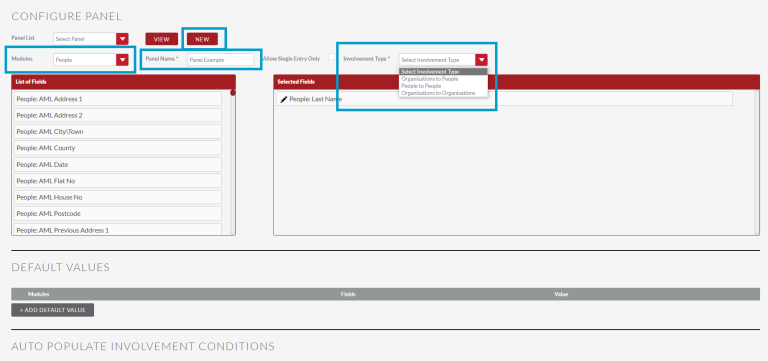
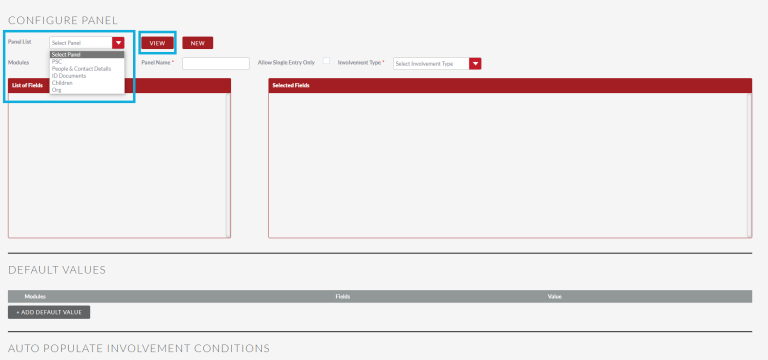
You’ll be then taken to the Configure Panel page to create a new panel select the New button.
In the Modules drop down select whether this panel will be for Organisation or People records.
Enter a name for the Panel in the Panel Name box and in the Involvement Type select how the created Involvement would be related and in which Involvements Subpanel. The options are;
People to Organisations – The involvement would be a created Person record involved with the Organisation record of the client information request or visa versa.
Organisation to Organisation – The involvement would be the created Organisation record be involved with the Organisation record of the client info request.
People to People – The involvement would be the created Person record involved with the Person record of the client information request.
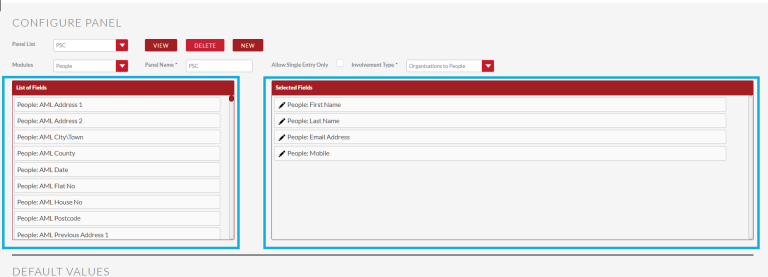
Below you have the List of Fields and Selected Fields, these are the fields you can choose from for information to be filled in. To pick a field find the field you want in the list of fields and then drag and drop it into the Selected fields. In the List of Fields section you can also add Involvement fields so when the involvement is created it will add the entered information into the involvement.
Below the adding fields section you have the Default Values and the Auto Populate Involvement Conditions.
In the Default Values section is where you can set values to the record that is created when the information has been submitted such as; each person created in this panel will be set to have an AML required, the person type on each new record will be Other and in the involvements they will be listed as PSC’s. You can add as many default values as you like.
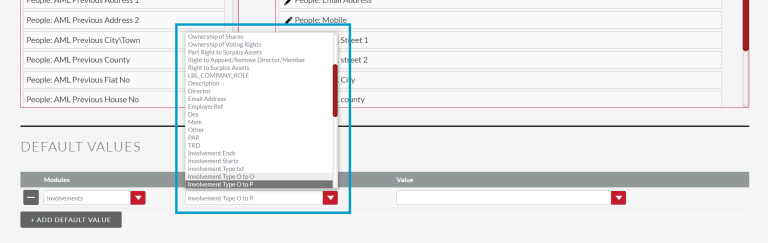
To add a default value select the Add Default Value button. In the Module column drop down you can choose the module, you will the choice between involvements and then Person or Organisation depending on which module you selected for this panel overall.
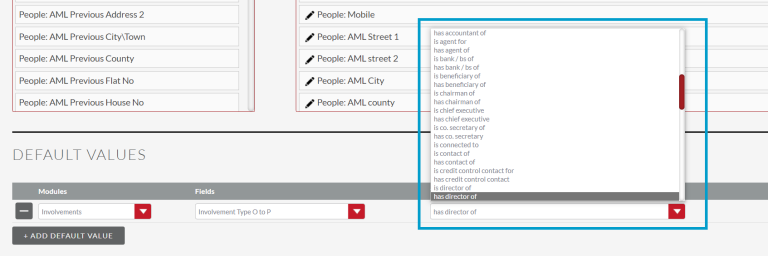
Once selected go over to the fields column and in the drop down selected the Field related to the module that you’d like to make a default value.
When selected scroll over to the Value column and selected the value you’d like the record to default to.
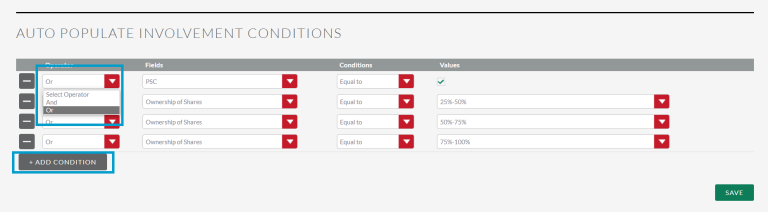
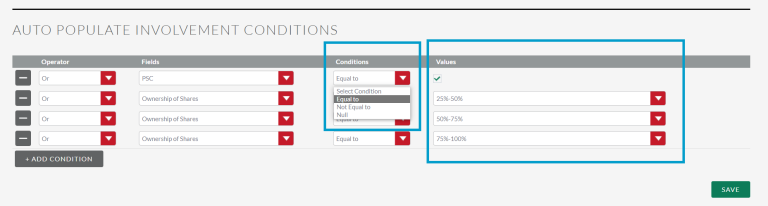
In the Auto Populate Involvement Conditions section you can set conditions so that if a Person/Organisation meets the conditions the record will pull into the client info form automatically for the client to update.
To set Auto Populate Involvement Conditions first select Add Condition. In the Operator column if you select Or any record that fits that lines condition will be pulled in to the form. You can add additional conditions requirements to first line by add more conditions and selecting And from the drop down.
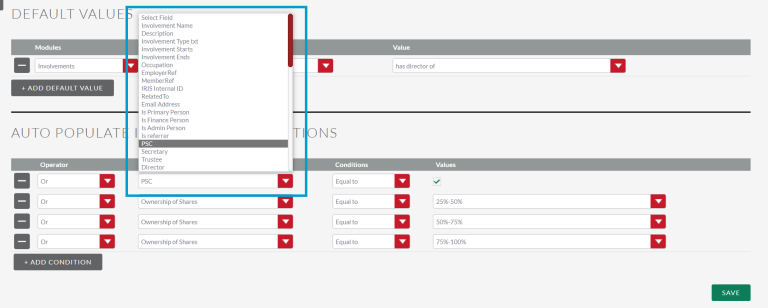
In the Fields column select which field will be used for the condition in the drop down.
In the Conditions column use the drop down to select the condition and then in the Value column choose the value of the condition.
Once you’ve created finished creating your Panel and setting the Default Values and Auto Populate Involvement Conditions click Save.
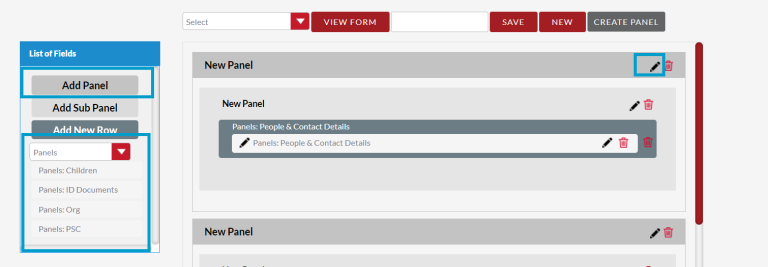
To add the created panel to your client information request form go back to the form builder you’d like to add it to and click New Panel. In the drop down list on the left handside select Panels from the drop down. Choose your newly created Panel and drag it onto the form. You’ll need to rename the panel to something relevant to the created panel.
To amend a client take on from navigate to Admin and then select the Client Take On Form Builder from FibreCRM Modules section.
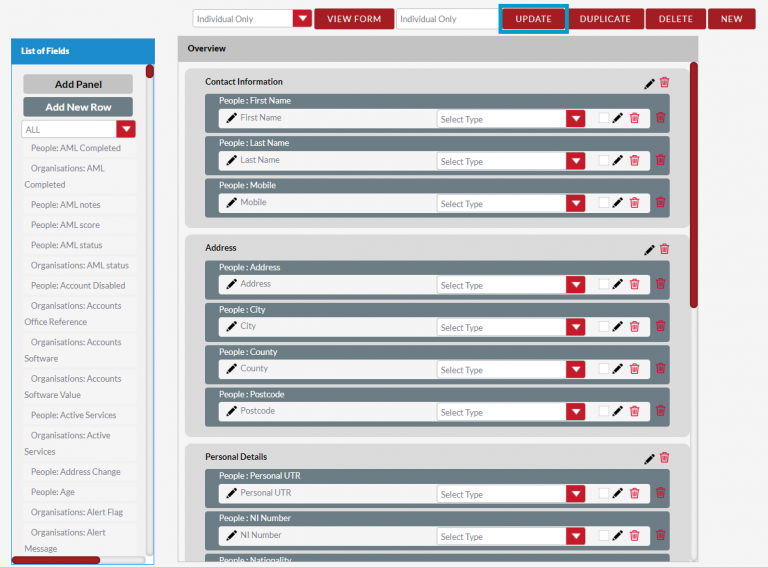
Select the form you’d like to edit from the drop down list and then select View Form.
Make the changes you wish on the form such as adding new panels and rows or changing the fields you’d like on the form. There are options to Duplicate or Delete the form if needed. Once you’ve made the changes click Update.
To amend a panel that requests information on additional People or Organisations select the Create Panel option in the client request form builder.
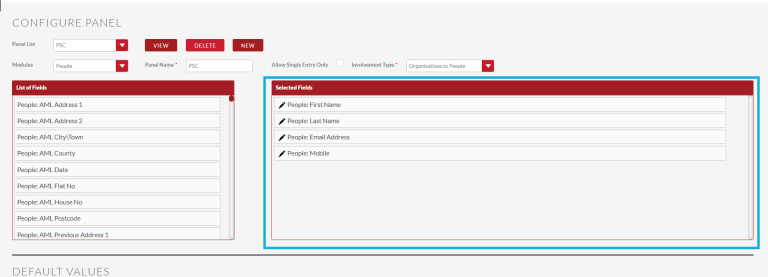
You’ll be then taken to the Configure Panel page to edit a panel select one from the Panel List drop down and then click View. The panel will then load.
To edit for panel drag and drop the fields you’d like to change between the List of Fields and Selected Fields sections.
You can also make amendments to Default Values and Auto Populate Involvement Conditions by using the Drop Downs in the Operator, Modules, Fields and Value columns in their relevant sections.
You can remove any by Default Values or Conditions by clicking the delete button in each line and add any new Default Values or Conditions by clicking the Add Default Value or Add Condition buttons.
Once you’ve made all the amendments you require click Save. The Panel will now be updated on the client information form