Tasks are stored in their own module in CRM for reporting purposes, but can be created and viewed in any Person, Organisation, Job, Lead or Opportunity record that they are associated with.
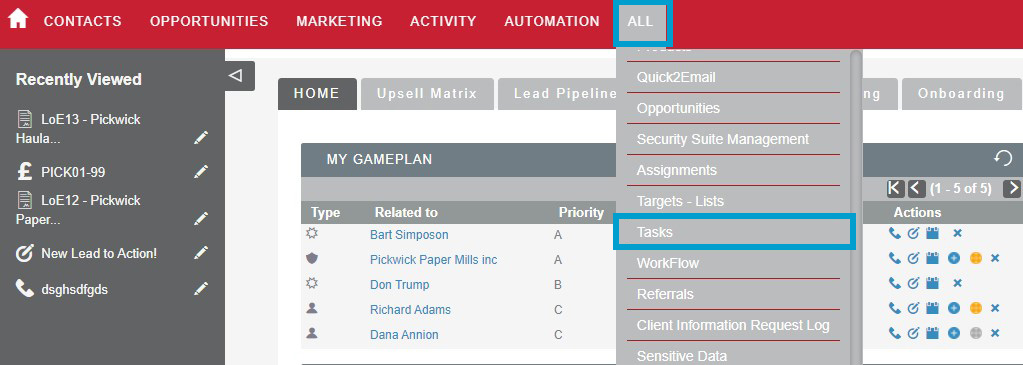
To create a Task you do so by first navigating to the All tab on the Navigation Menu and selecting Tasks.
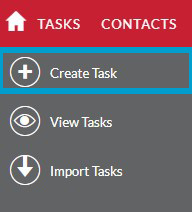
In the Tasks module select the Create Task option to create a new task.
You can also create a task by navigating to either a Lead, Person, Organisation, Job orOpportunity record. Once you have selected the correct record, scroll to the Activities subpanel located below the panel. Using the Actions menu in the Activities subpanel, you can Create Task, Schedule Meeting or Log Call relating to the selected record.
Select the Create Task option. This will prompt the Basic Task record form to become available. If you wish to provide a more thorough record, select Full Form.
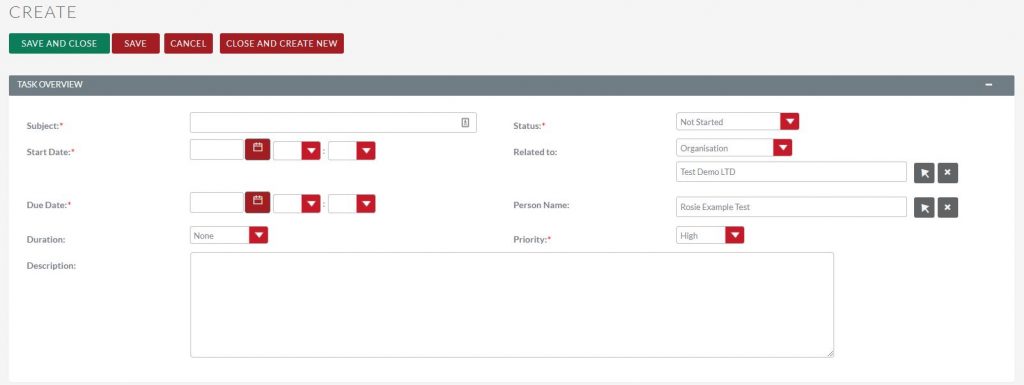
On this form you will be able to:
Set a Subject
Set a Start & End date
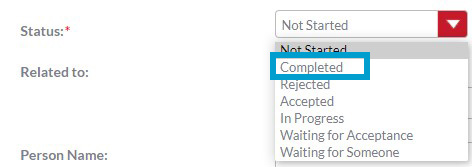
Assign a progress Status to the task
Log time against the task in hours and minutes
Set a Priority for this task
All sections that are required are starred with an asterisk. You’ll need to fill these in before you can Save the task.
At the bottom of the Task Overview Form you can fill in any extra details about the task using the Description box.
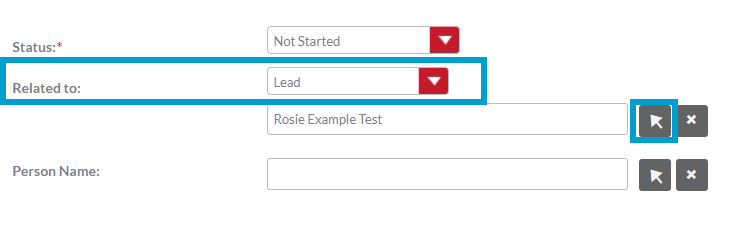
Note: If you create the task via a Person, Organisation, Opportunity or Lead record the Related To field will automatically populate (this can be changed if needs be) with the record name also pulled through. However if you create a Task via the Task Module you will able to select what the Task is related to using the dropdown menu to say what is related to and the Select Arrow to select the actual record.
Assigning a Task to Another CRM User
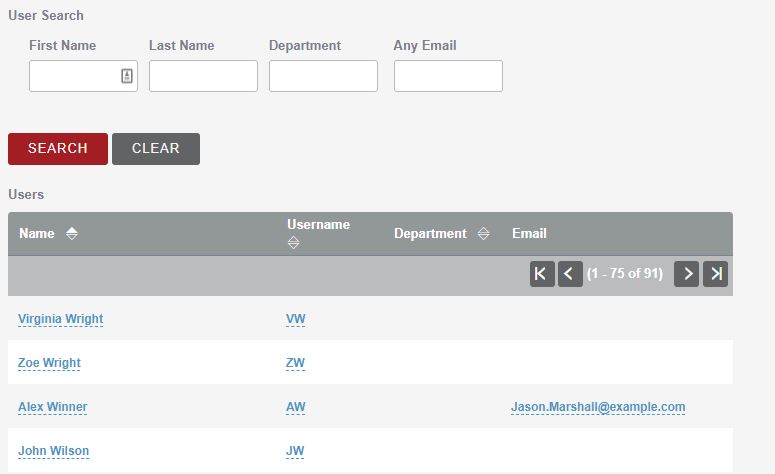
If you’d like assign this task to another CRM user you can do so by click the Select Arrow button in the Assign To section.
The User Search pop box will then appear. Here you search and select the User you’d like to assign the task to.
Once you are happy with the information you’ve added, click Save.
The task will now appear in the Activities subpanel of any record related to it. From there it can be modified, progressed and updated until complete.
Once a Task is Completed
Once a task is completed you can close the task by going into the Task and changing the status to completed and then clicking Save and Close.
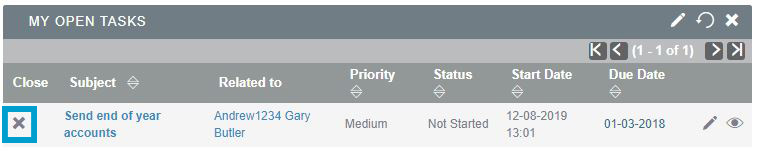
If you have the My Open Tasks Dashlet on your Dashboard you can close the task by select the X button on the Task.
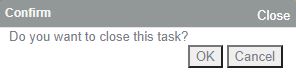
A pop up box will then appear asking if you’d like to close the Task.
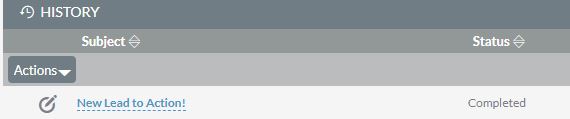
Once completed the task can then be view in the History Subpanel in the related Organisation, Person, Opportunity, Job or Lead record.
Cheat Sheet
To download the Creating and Assigning a TaskCheat Sheetclick here
Table of Contents
We use cookies to assess how people are using our website, only necessary cookies are enabled. Cookie settingsACCEPTREJECT
Cookie Policy
Privacy Overview
This website uses cookies to improve your experience while you navigate through the website. Out of these cookies, the cookies that are categorized as necessary are stored on your browser as they are essential for the working of basic functionalities of the website. We also use third-party cookies that help us analyze and understand how you use this website. These cookies will be stored in your browser only with your consent. You also have the option to opt-out of these cookies. But opting out of some of these cookies may have an effect on your browsing experience.
Necessary cookies are absolutely essential for the website to function properly. This category only includes cookies that ensures basic functionalities and security features of the website. These cookies do not store any personal information.
Any cookies that may not be particularly necessary for the website to function and is used specifically to collect user personal data via analytics, ads, other embedded contents are termed as non-necessary cookies. It is mandatory to procure user consent prior to running these cookies on your website.
Functional cookies help to perform certain functionalities like sharing the content of the website on social media platforms, collect feedbacks, and other third-party features.
Performance cookies are used to understand and analyze the key performance indexes of the website which helps in delivering a better user experience for the visitors.
Analytical cookies are used to understand how visitors interact with the website. These cookies help provide information on metrics the number of visitors, bounce rate, traffic source, etc.
Advertisement cookies are used to provide visitors with relevant ads and marketing campaigns. These cookies track visitors across websites and collect information to provide customized ads.