How Can We Help?
Customising your Dashboard(s) – User Guide


When you first log in to FibreCRM, you will be presented with your home page – this is your dashboard.
Dashboards can be customised to show you information that’s immediately relevant and useful to you upon logging in.
This guide will show you how to put together a personalised dashboard.
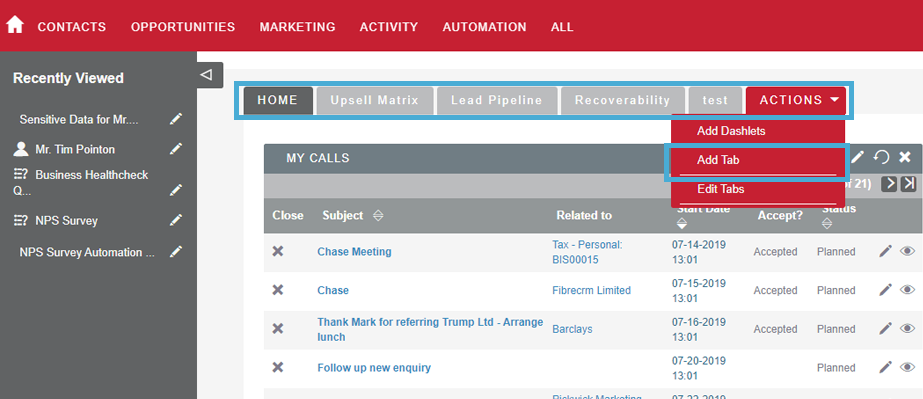
You can have multiple tabs on your dashboard – To add another tab to your dashboard, click Actions → Add Tab:
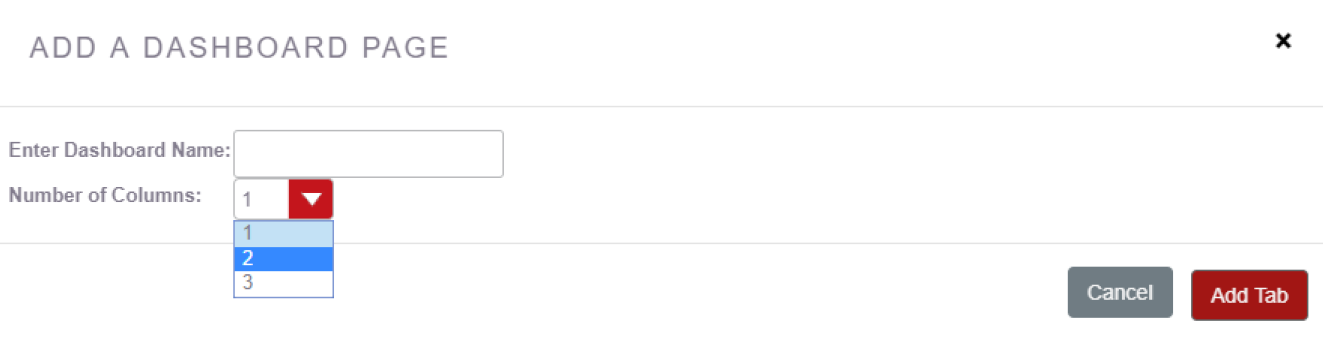
Give your tab a name and chose how many columns you’d like the dashboard to have from the drop-down:
Columns are how many dashlets you can have next to each other on each tab. 1 column would be a dashboard with no dashlets side-by-side. If you wanted to have 2 dashlets side-by-side, then you would choose 2 columns.
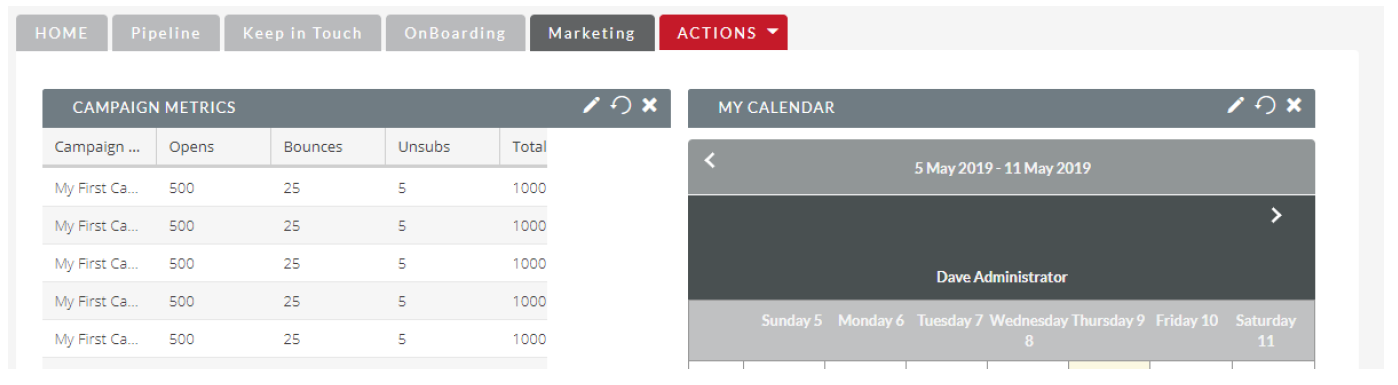
This is a 2-columned tab:
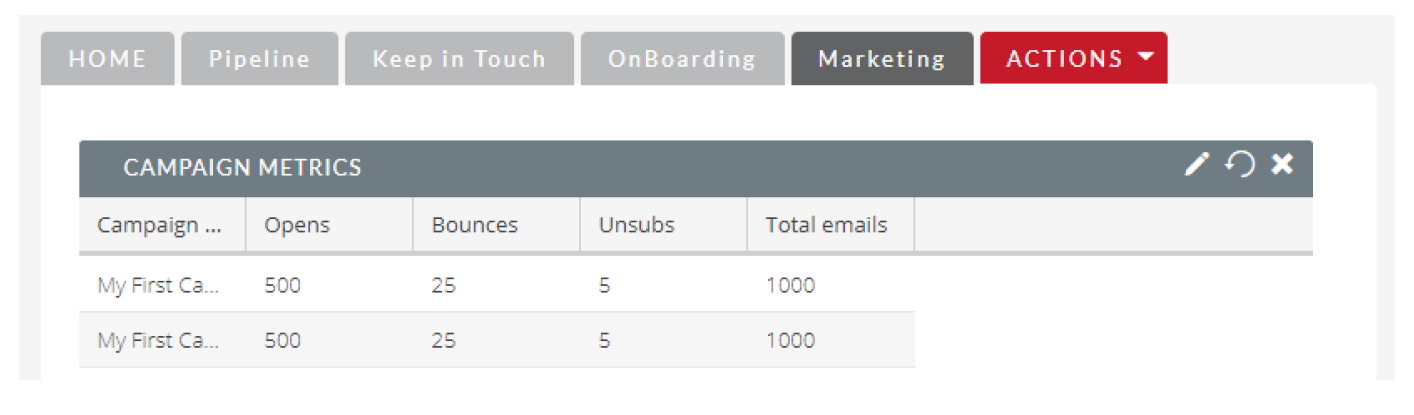
This is a 1-columned tab:
You will always have one tab by default – the Home tab. It’s important to note that this tab is the only one you can have reports displayed on.
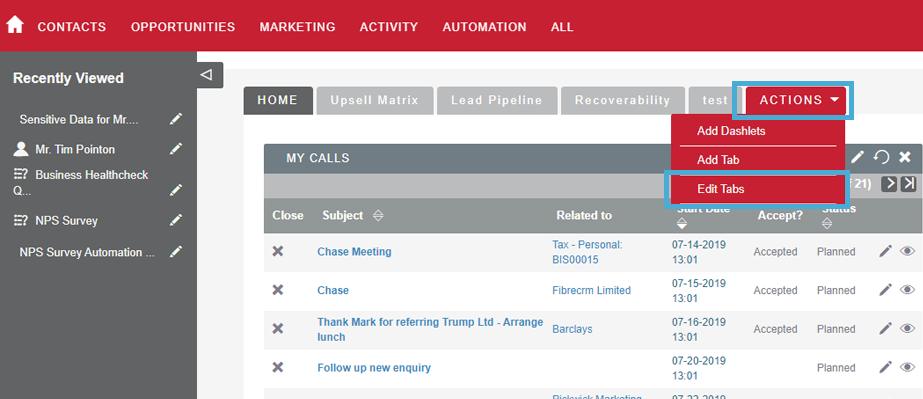
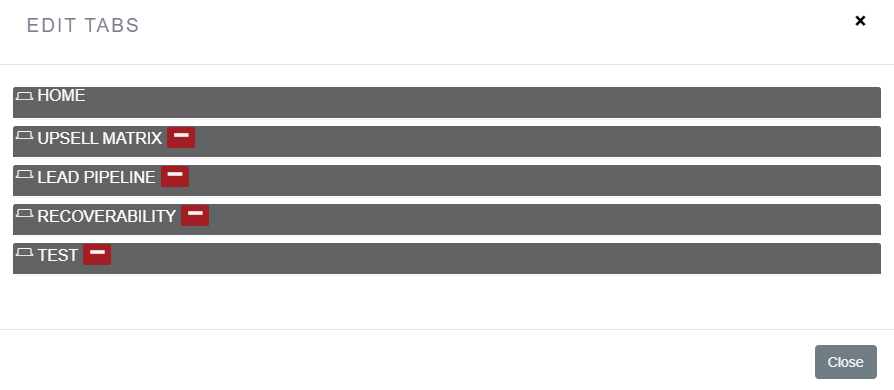
If you decide you want to remove a tab you’ve added, then click on Actions → Edit Tabs:
Then click the minus symbol to remove the tab.
N.B. There is no confirmation message that the dashboard will be removed. So ensure to click the right one!
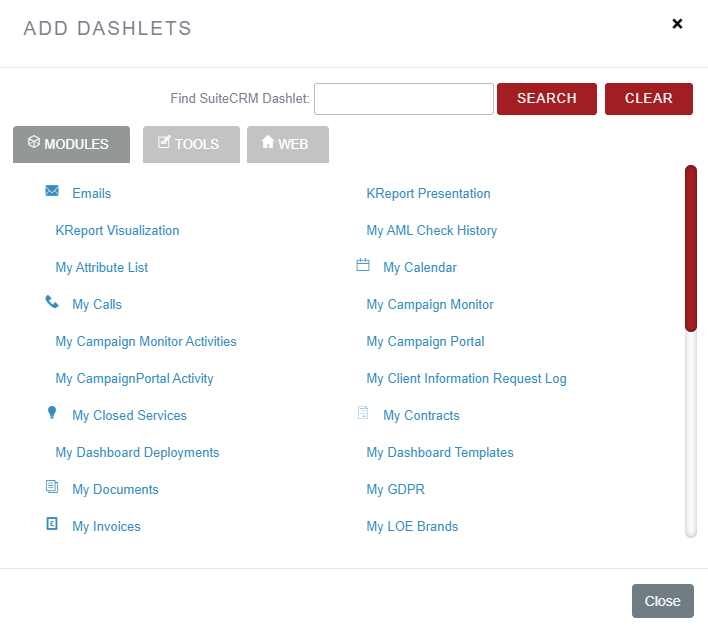
There are a number of default Dashlets you can have, based on modules within the CRM. To add a Dashlet, navigate to the tab you want the Dashlet on and click Actions → Add Dashlet:
You can then choose your Dashlet from the pop-up:
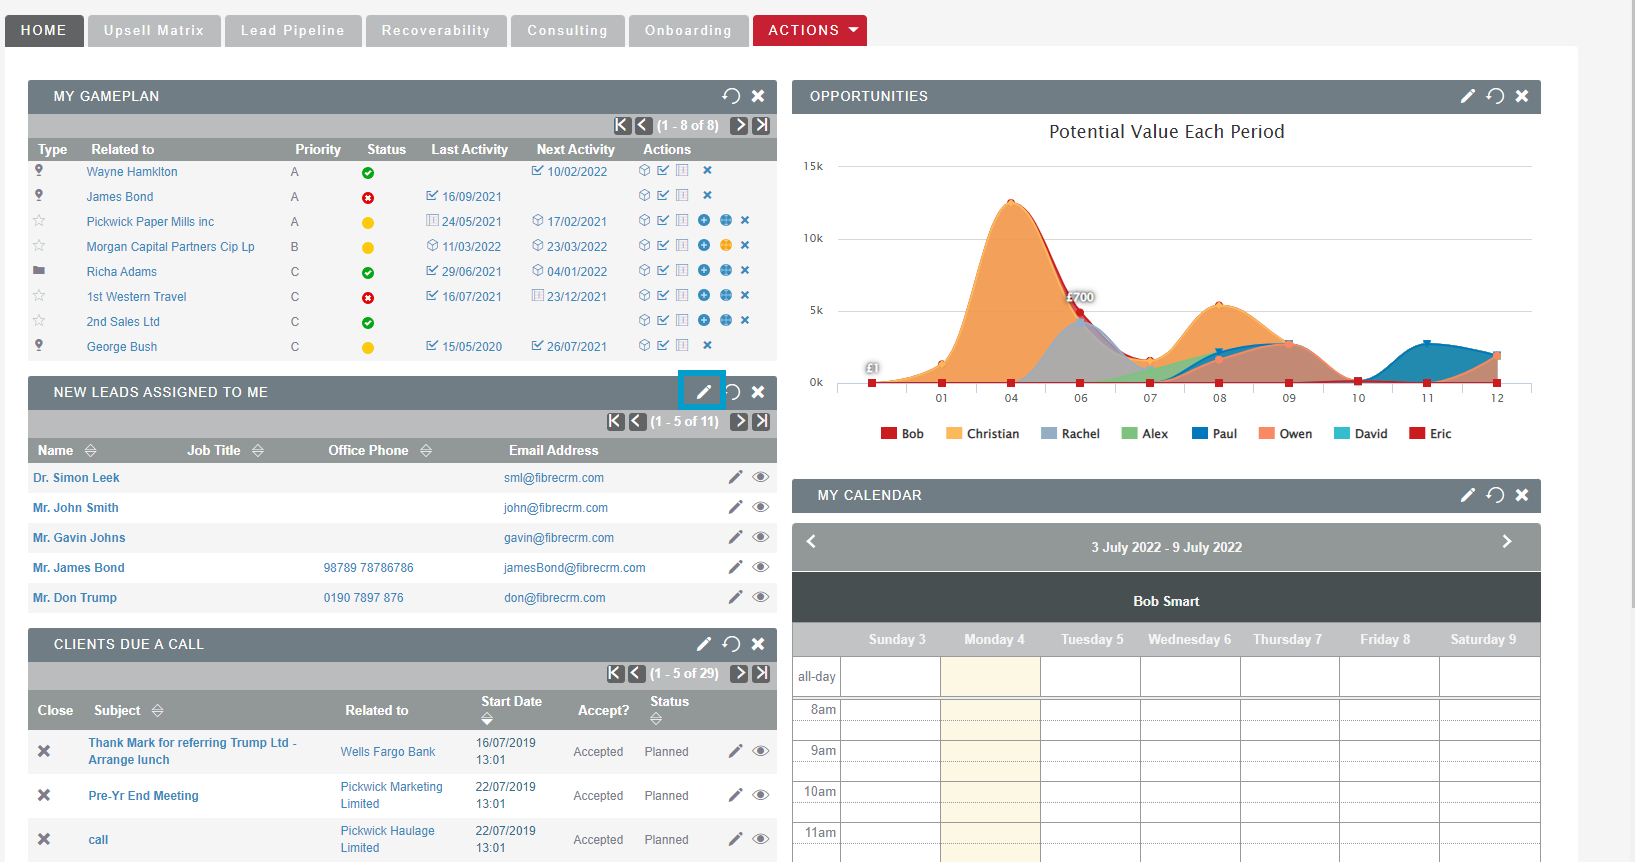
Particularly helpful dashlets that other clients have used are:
• My Contacts
• My Leads
• My Opportunties
• My Meetings
• My Calls
• My Tasks
Click on the name of the Dashlet you’d like to add, it will then appear on your dashboard tab behind the pop-up box. Hit Close when you’ve finished adding Dashlets.
If you’d like to rearrange the Dashlets on your dashboard, hover over the banner at the top of the Dashlet (where the arrows indicates in the screenshot below) until the arrows appears – then simply click and drag:
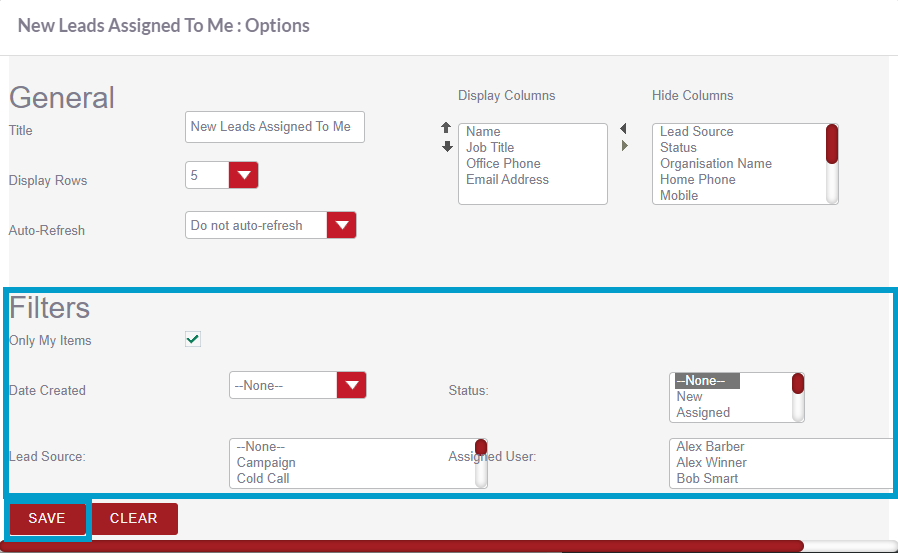
You can edit what you see in the dashlet by clicking on the pen icon:
A
pop up will then appear with two sections:
General which includles:
Title: what the dashlet is called
Display Rows: how many rows of data would you like to see in the dashlet (this will effect how large the dashlet is)
Auto-Refresh: How often you would like the dashlet to automatically refresh/update the data it’s displaying
Display Columns: these are the columns of information that you will see in the dashlets. Click on the item and then the arrows to add/remove
Hide columns: These are columns of data that are available to be added to the dashlet but won’t show at the moment. Click on items you want and then use the arrows to add or remove them.
Filters: Here you can use the search filters to narrow down results of fields you’d like to see on your Dashlet including:
Only My Items: tick this if you only want to see records assigned to yourself. If you want to see items assigned to a colleague, then you could use the “Assigned To” filter in the bottom right
Date created: do you want to filter records by the date they were created? I.e. maybe you only want to see your new accounts – so then you could tick the “only my items” box, and set this drop-down to “last 7 days”. Then the dashlet would only show you records assigned to you and created in the last 7 days
What you can search by will have been set by an Admin CRM user. If you’d like to filter by something that is not displayed contact your Admin for them to make the changes.
Once you’ve made all of your changes, click Save. The process is very similar for each of the Dashlets you want to add.
Add your Dashlet → close the pop-up box → click on the pen icon to edit what data your Dashlet displays → make your changes → hit save.
To download the Editing a Dashlet cheat sheet click here