The Survey module allows a web-based survey with a variety of question-type options to be created. This can be sent as part of a Campaign.
The responses received are stored in FibreCRM and can be viewed on a per-respondent basis or as a detailed summary report using charts where appropriate.
How to Create a Survey
To create a Survey, navigate to the All option on the Navigation Menu
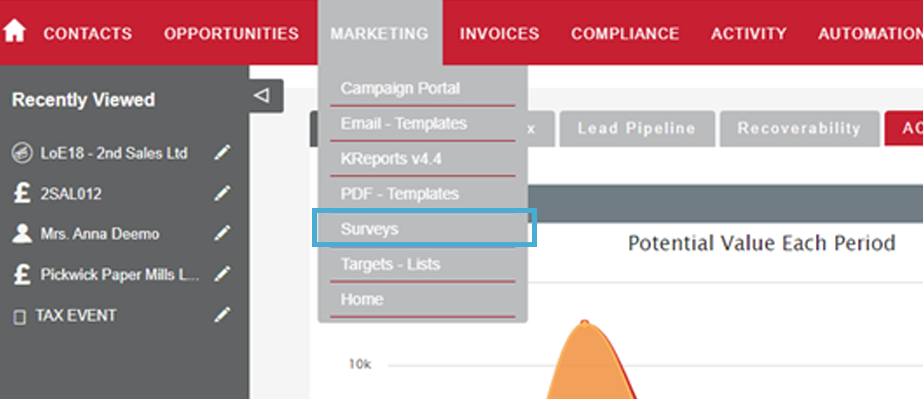
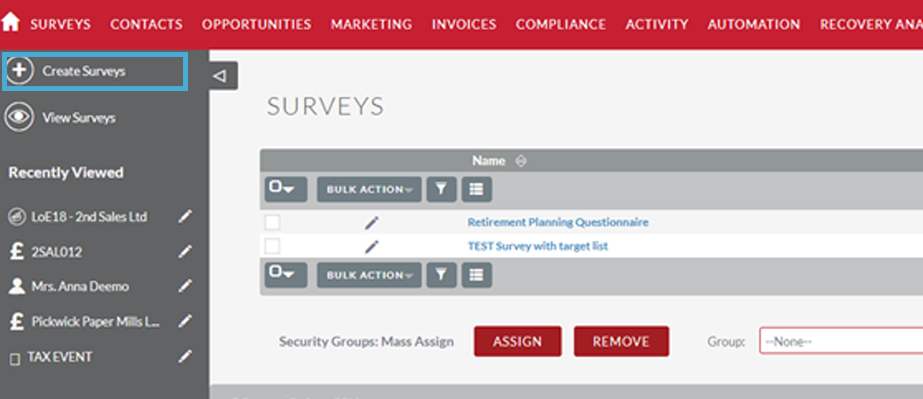
Alternatively, navigate to the Marketing option on the Navigation menu and click on the Surveys option to open the module. In Surveys you will see a list of Surveys that have already been created in the CRM.
To create a Survey, select the Create Survey option on the sidebar menu
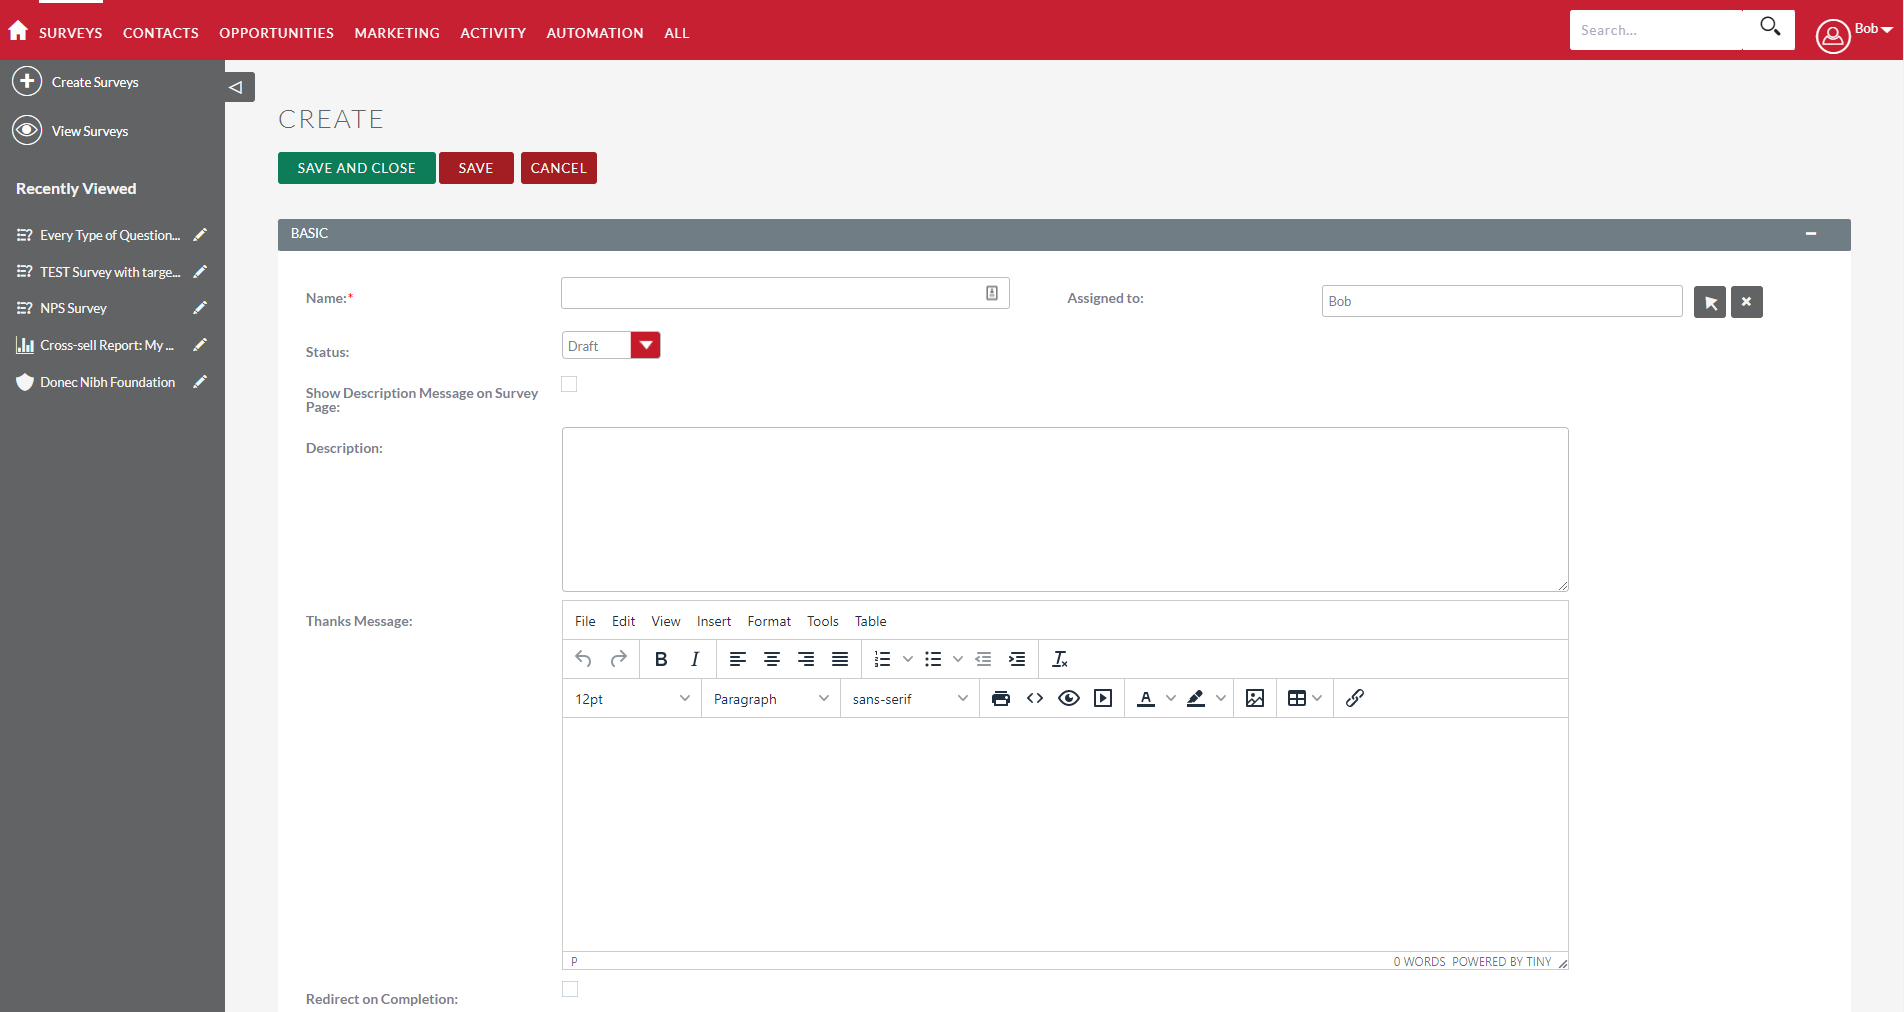
The create new survey screen will then appear:
Name: Enter the title of the survey to be displayed to users. This is a required field.
Note: This is visible to everyone, including recipients
Status:
Draft: Survey in preparation, not yet ready to publish and seek responses. Note: This means the survey is editable, but it cannot be sent out to recipients.
Public: When the survey is ready setting the status to Public will generate a URL link for the survey. This will allow the Survey to be sent out and to gather responses. The survey can be viewed and completed, and any responses submitted will be recorded. Note: that once responses have been received, the survey questions cannot be edited.
Closed: A Closed survey will not accept any further responses. Users navigating to the survey link will see a message informing them that the survey is now closed.
Description: Explains the reason for the survey.
Note: By default, this is only visible internally and it will not be displayed to users as part of the survey.
Tick the check box for Show Description Message on Survey Page if you want the description to be displayed.
By default, when a survey is completed the recipient will be shown the Survey title along with any text in the Thanks Message text area.
To redirect the recipient to another page such as a website then: Tick the Redirect on Completion checkbox and enter the URL to the website page you want to redirect them to.
Once done click the Save button. Now that the Survey is created the next step is to add the survey questions and sections.
How to Add Questions
Click the New Question button to add a question to the survey
In Text enter the question you’ll be asking in the survey
Select the Question Type from the dropdown list
The available question types are as follows:
Text
A standard text input
Textbox
A larger text input area
Checkbox
Displays a single checkbox alongside the question.
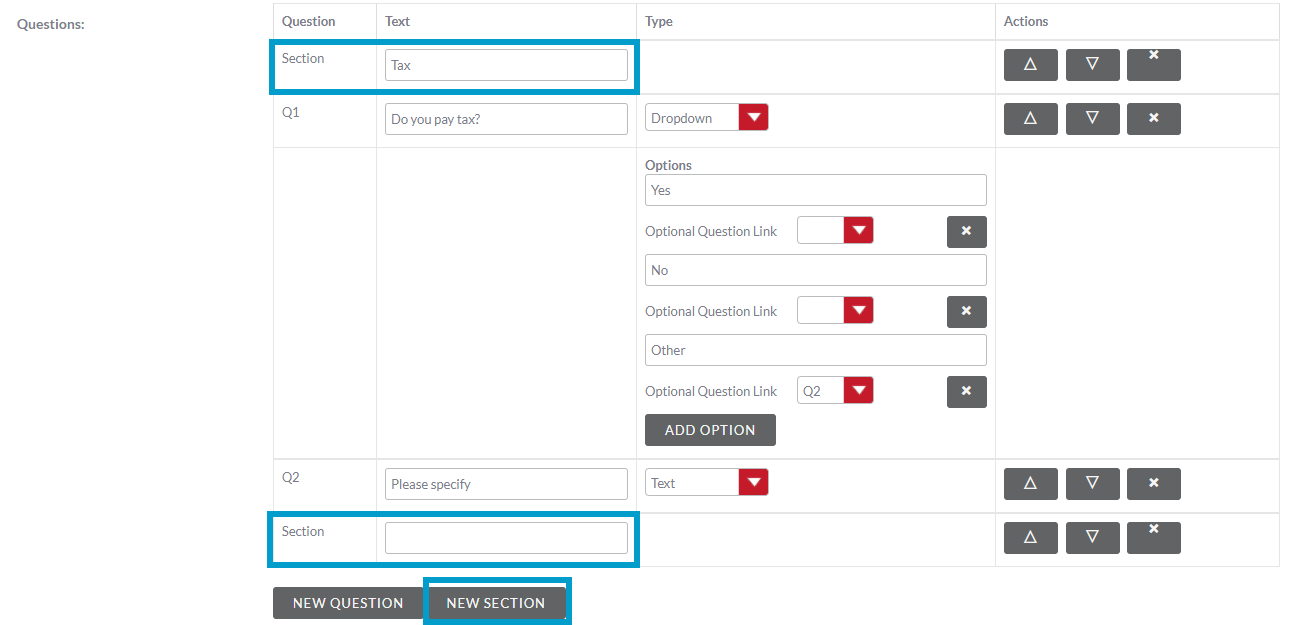
Radio
Specify several answer options to choose from, with radio buttons. Only one answer can be selected. To add answer options select the Add Option button and type in the answer option in the field.
Dropdown
Specify several answer options to choose from, in a dropdown list. Only one answer can be selected. To add answer options select the Add Option button and type in the answer option in the field.
Multiselect
Like a dropdown list, but one or more answers can be selected. To add answer options select the Add Option button and type in the answer option in the field.
Matrix
For each option specified, the user will be able to answer “Satisfied”, “Neither Satisfied nor Dissatisfied” or “Dissatisfied”. These responses can be also be customised -see below.
DateTime
A Date/Time picker will be displayed for the user to select a date.
Date
A Date/Time picker will be displayed for the user to select a date and time.
Scale
A 1-10 scale will be displayed. Users can select one number on the scale in response to the question.
Rating
A five-star rating widget will be displayed. Users can select 0 to 5 stars in response to the question.
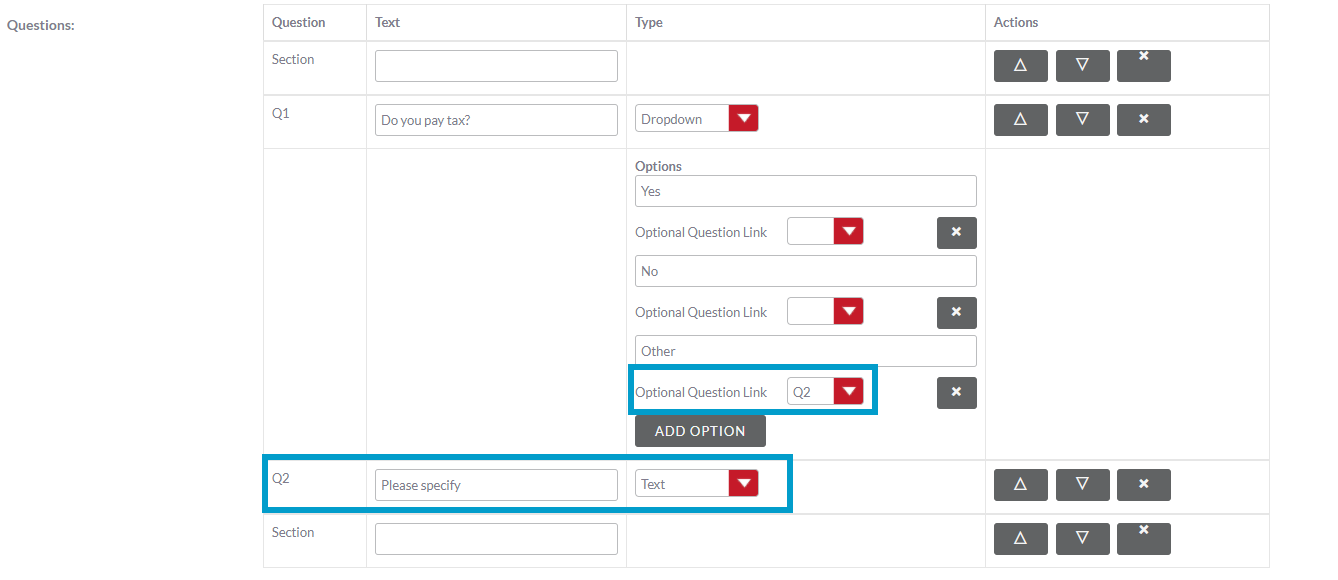
Optional Questions
If you select a Dropdown, Multiselect or Radio question you can add Optional Question Links which means when a person selects an answer with an optional question link enabled it directs them to answer more optional questions. For example if a person selects ‘Other’ as an answer to a question you can then redirect them to another question in the list to ask them to go into more detail. The Optional Question it is linked to will only appear if they have selected the answer that has the question link enabled.
To enable the Optional Question Link use the drop down menu to select the question it will go to if the answer is selected. Set up the optional question just like you would any other question.
Sections
You can group questions into sections in the survey. To add a section select the New Section button. Once selected you can add a name/heading for the section in the text field.
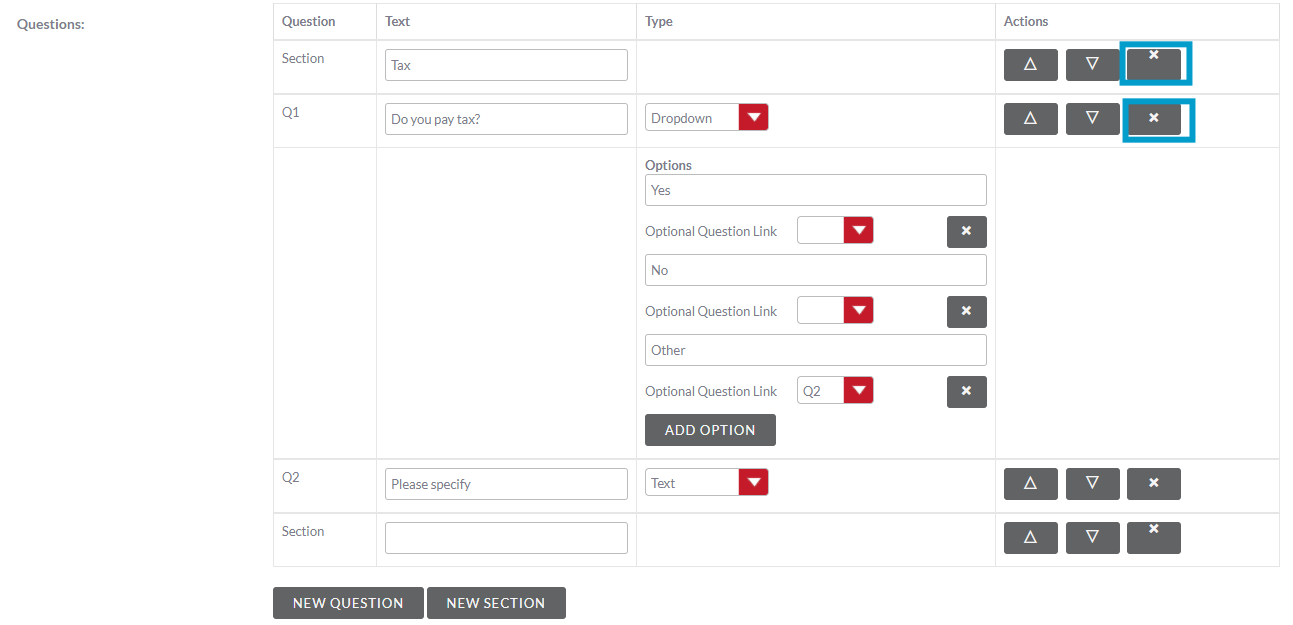
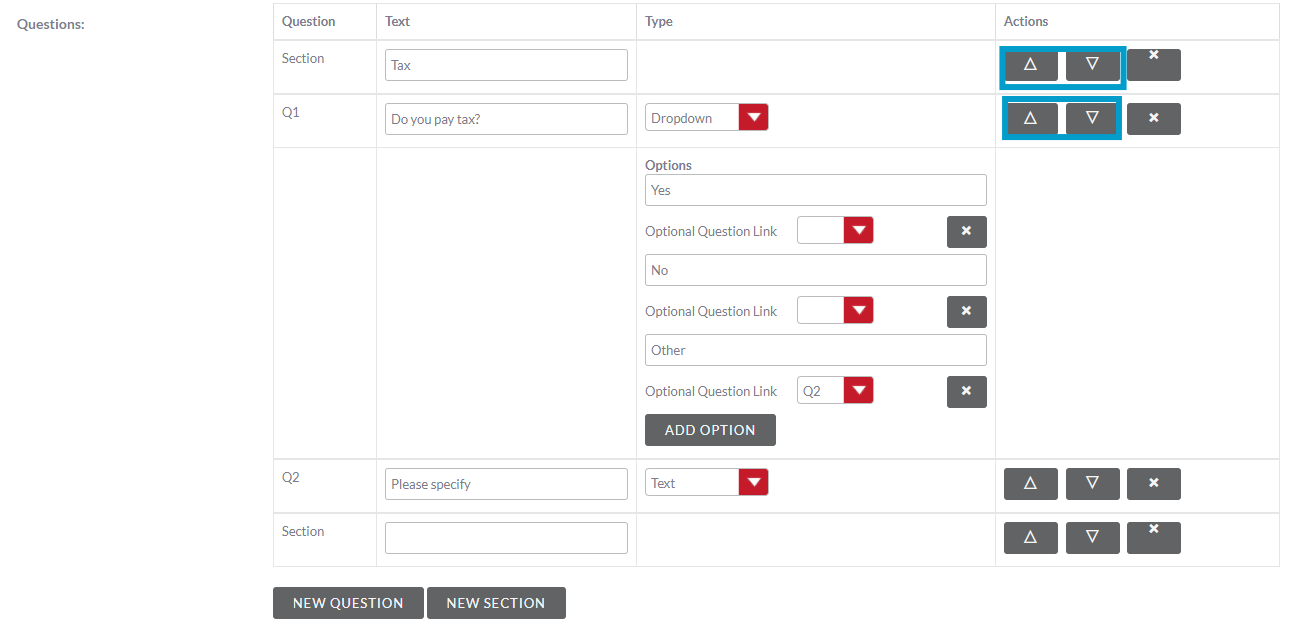
How to Delete and Reorder
To delete a question or section from the survey: Click the X button
To change the order of the questions or section: Click on the Up and Down arrows
Further Options
Submit Text: Edit the text for the survey’s Submit button here, if desired.
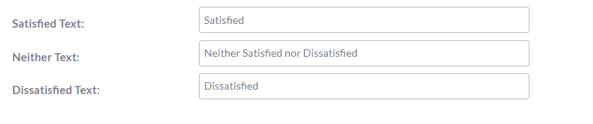
Customise the responses for Matrix type questions by editing the default matrix response text here
Click the Save & Close button to save the survey
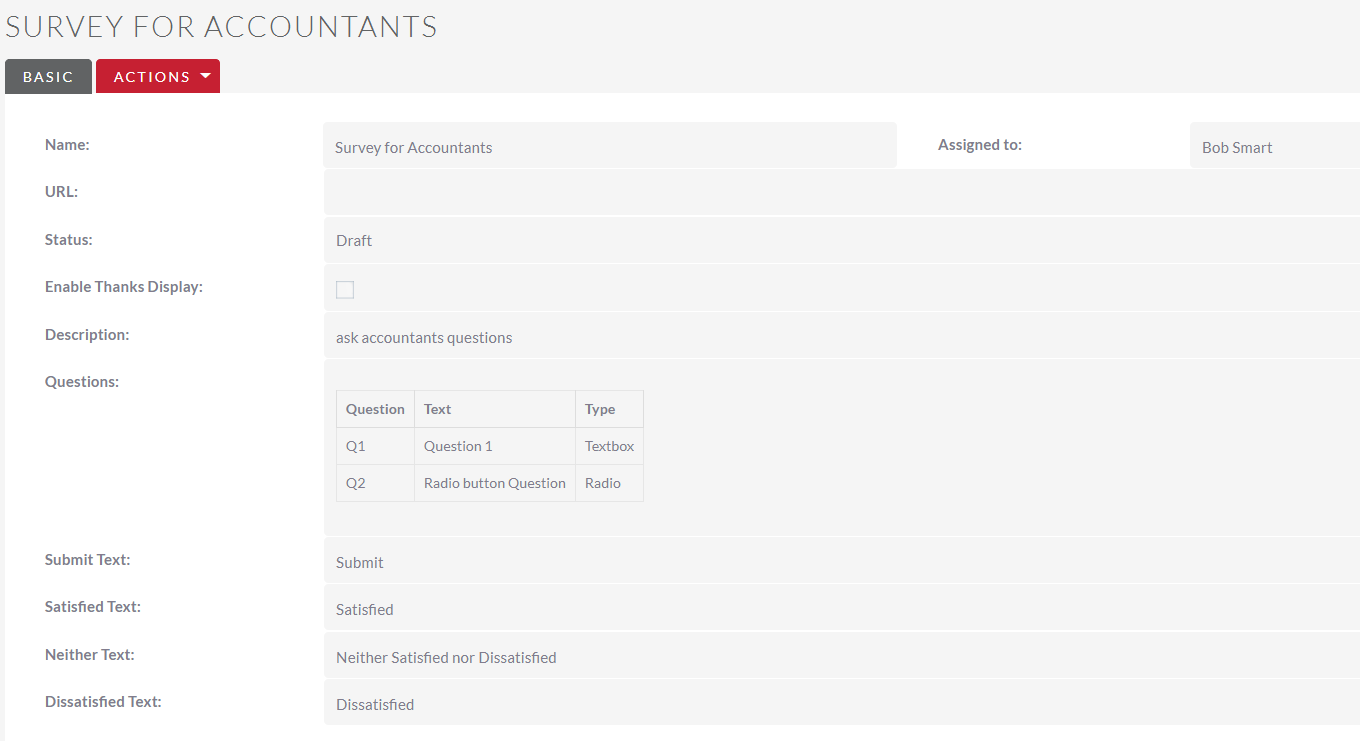
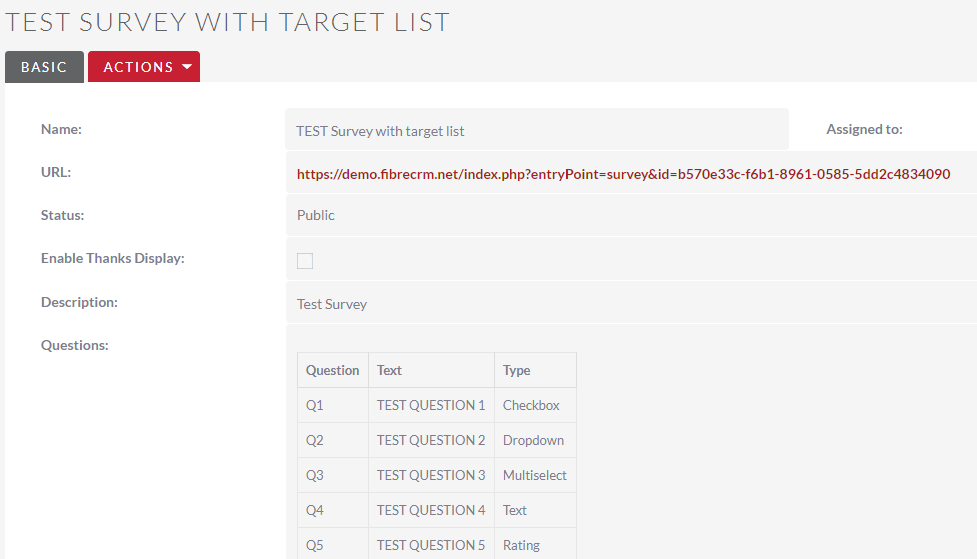
The Detail View for the draft survey will be displayed. This overview shows all the survey questions and question types included in the survey.
Note: that the URL field is blank – this field will display the CRM-generated URL link for the survey once the survey status has been set to Public.
How to View an Existing Survey
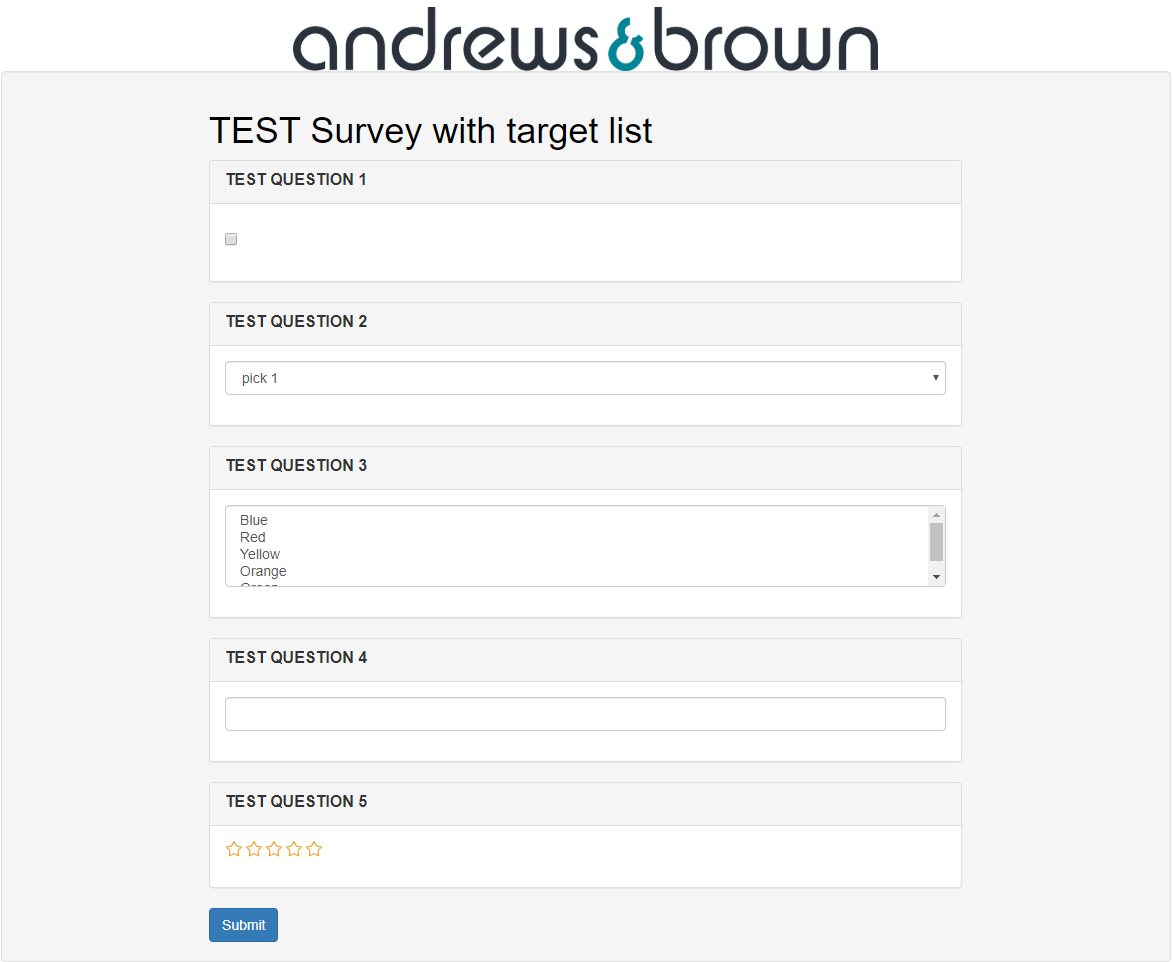
Once the Survey has been created, it can be viewed as it will be shown to participants.
In the Survey click on the Actions Menu select the Edit option on the dropdown list. The set the status of the survey to Public from the option on the Status dropdown list
Click the Save & Close button to save the survey.
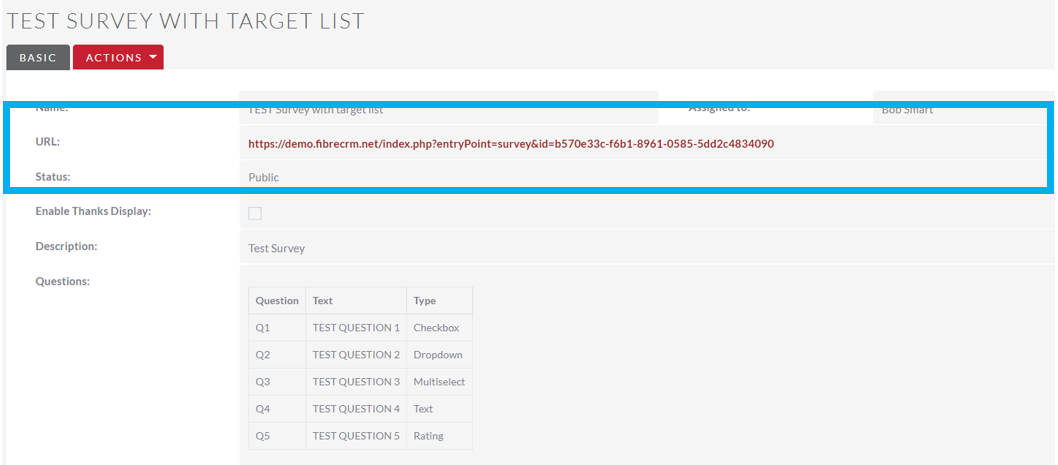
The Detail View for the survey will be displayed, now showing the URL for the survey.
Click on the URL to view the survey in your browser.
Click the Submit button to respond to the survey. Users will be redirected to a thank you page and the responses will be recorded.
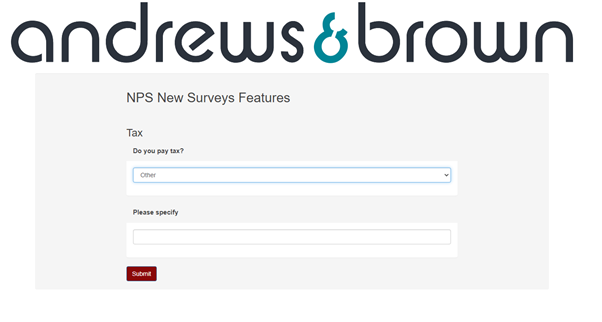
Note: The logo displayed above the survey is the current logo set for your FibreCRM, which can be set in System Settings on the Admin panel.
Once responses have been received, survey questions cannot be edited.
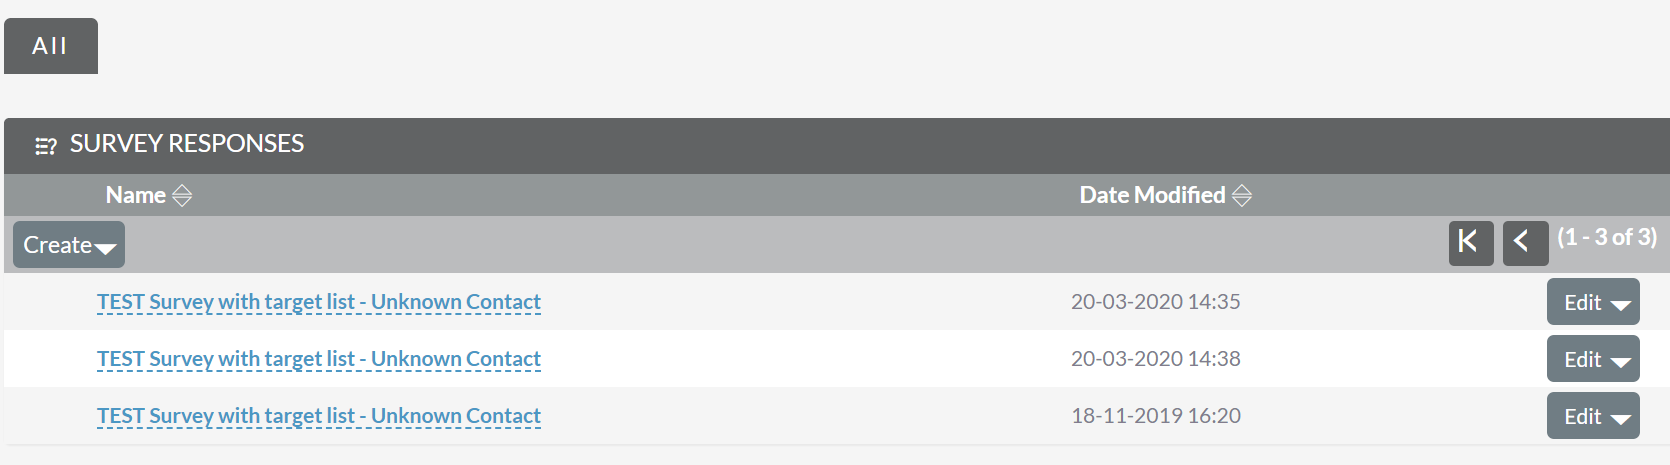
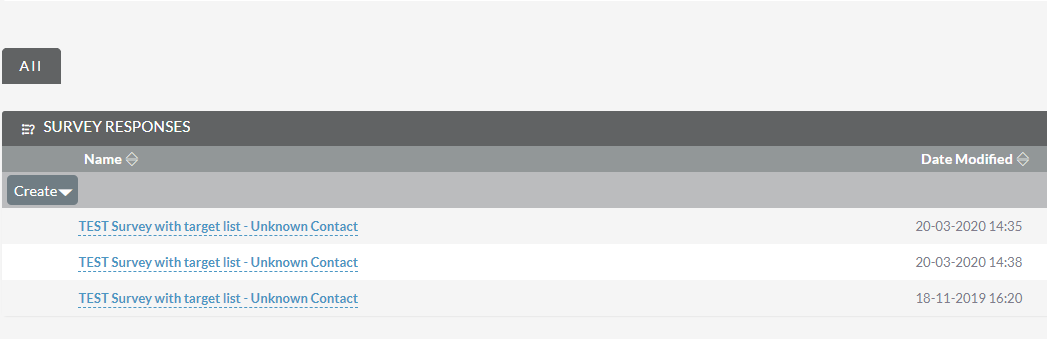
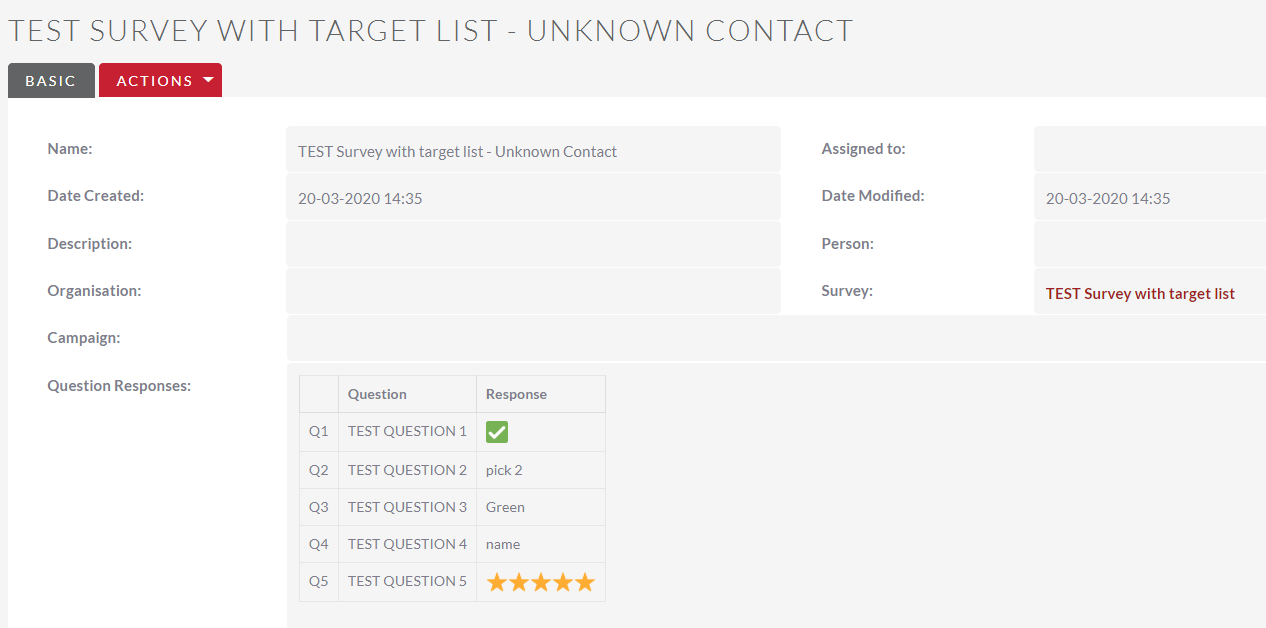
Responses can be viewed in the Survey Responses subpanel
And on the Survey View Screen:
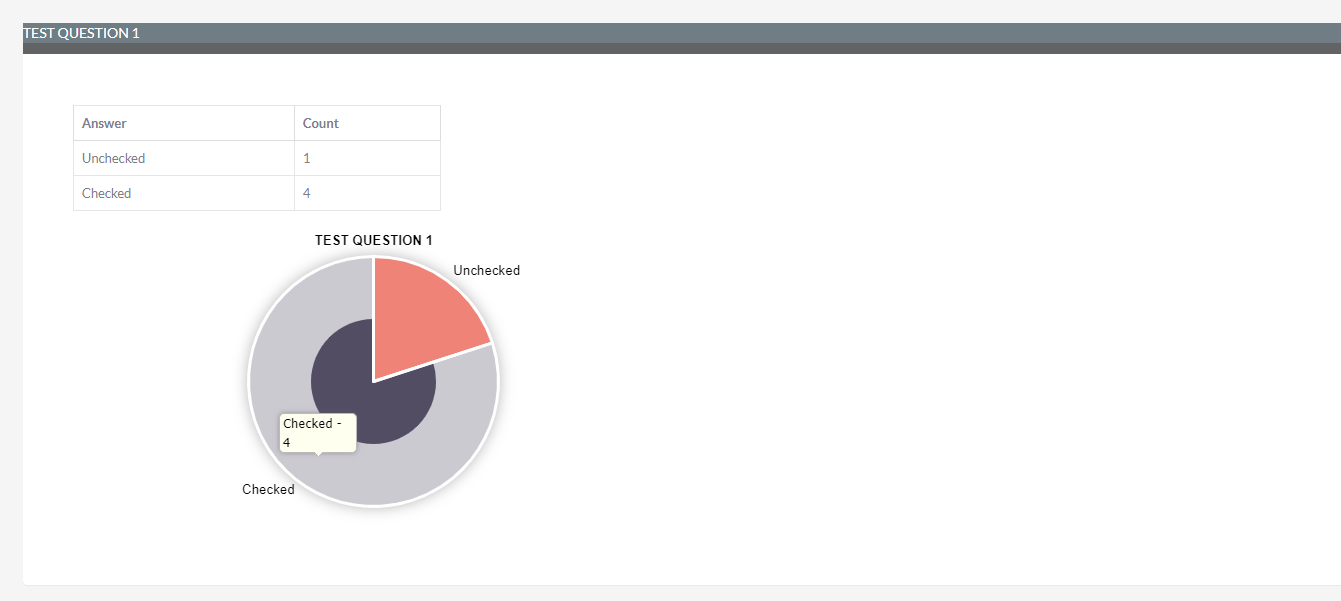
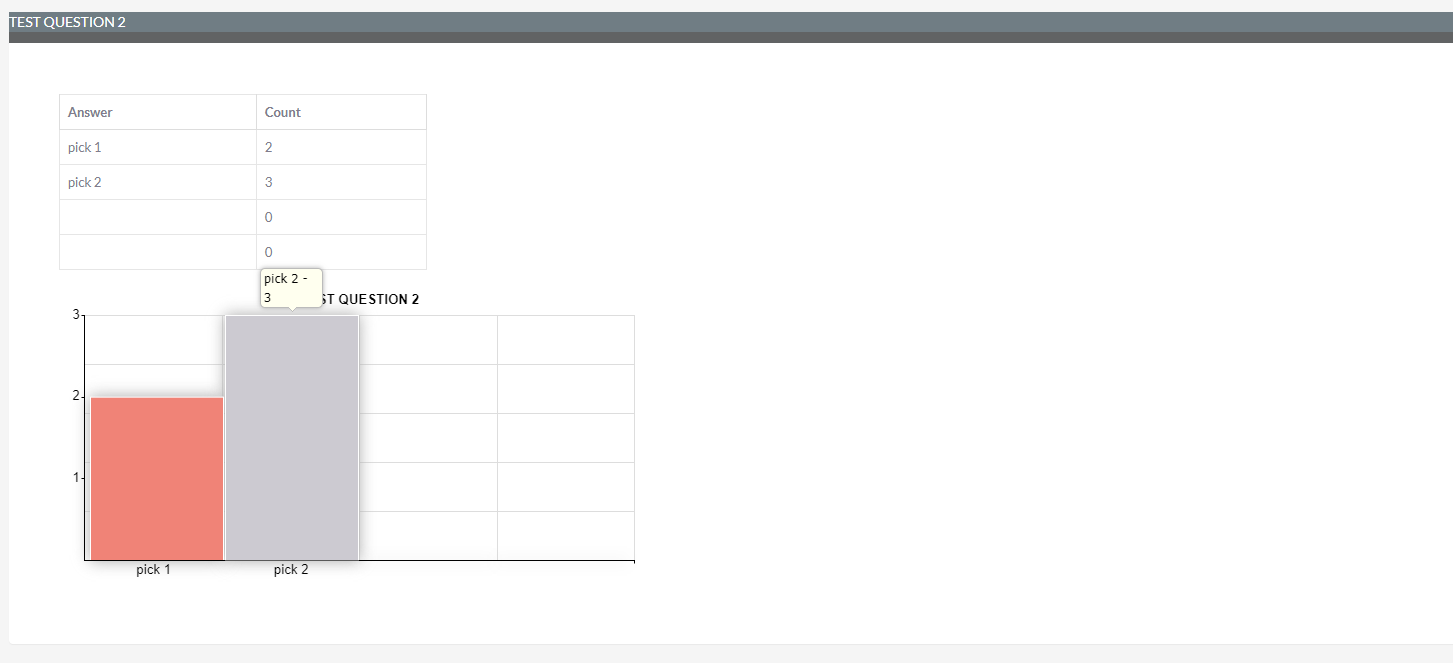
The result from each question can be viewed and are provided in a table and a chart.
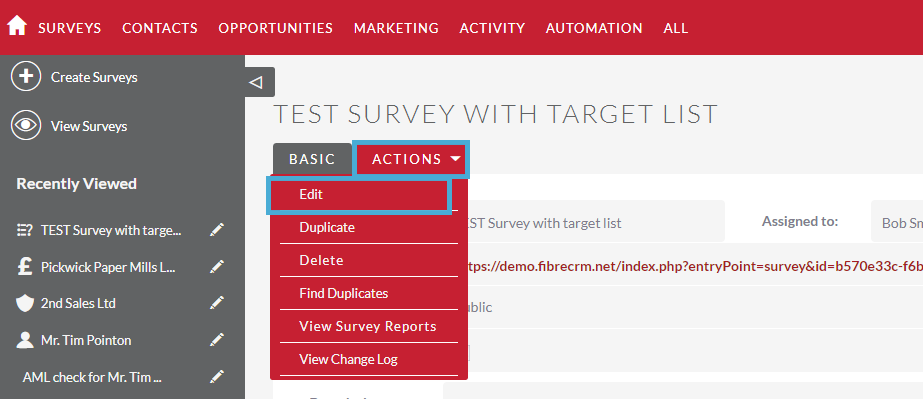
How to Edit an Existing Survey
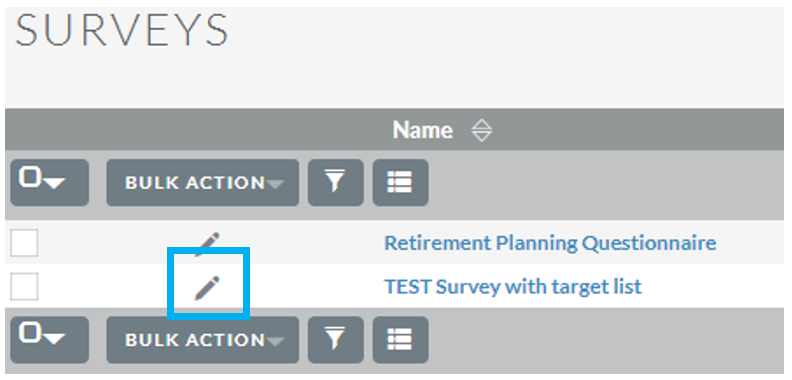
Navigate to the List View Screen
Click the Pencil Edit icon beside the survey name to open the survey in Edit mode
Alternatively, navigate to the Survey in Detail View and click on the Actions Menu then select Edit from the drop down menu.
Questions can only be edited in Draft surveys or in Public surveys which have not yet received responses.
Note: Once the survey has received responses the questions cannot be edited
Survey Sending Process
To send the Survey first create the Survey to be distributed. Once done build a report and create a Target List of people you will be sending the list to for more information on target lists please see Target Lists (Static & Dynamic) – FibreCRM Support Portal.
Once you’ve created the target list sync the list of to Campaign Monitor. Add any custom fields to Campaign Monitor and then copy the Survey link from the Survey record. In the Campaign Monitor email template add the Survey Link to the Campaign Monitor template. In the link add &[cm_type]=[crm_id] at the end (these are merge field for the record type either lead or person and their unique, this links the survey data back to the person).
Once done send the Campaign with the Survey Link.
Viewing Survey Responses
The Survey Responses can be viewed by several methods:
Survey Response Subpanel
Navigate to the Survey Responses subpanel on the Detail View.
The subpanel shows the individual responses received from each respondent. The subpanel can be found in Detail View for the survey.
The Survey Responses subpanel can also be accessed from the Campaign Status page for a campaign.
Click on a Respondent’s name to view their responses
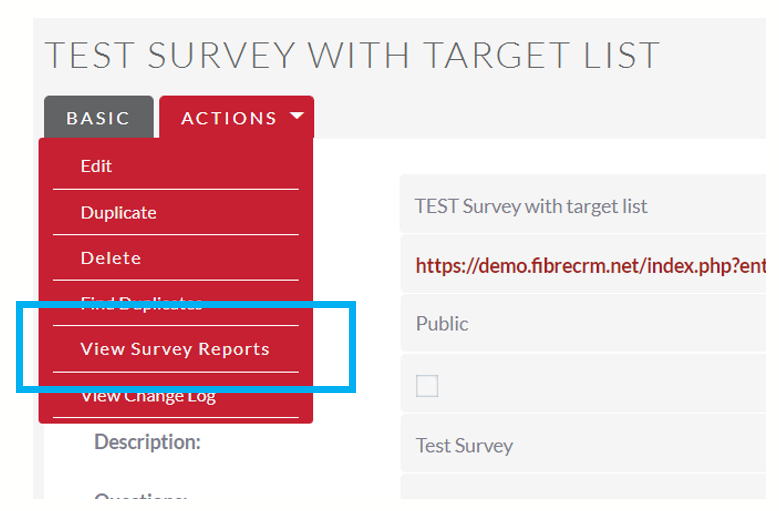
Survey Reports
Alternatively, the survey responses can also be viewed as a Survey Report, showing a summary of all the responses by question. Charts are used where appropriate to display the data.
Note: Individual responses cannot be viewed from the Survey Report. If you wish to view a respondent’s answers, these can be viewed from the survey’s Survey Responses subpanel, as shown above.
Click the Actions Menu and select the View Survey Report option for a collated report of all responses
The Survey Report will open showing a summary of all the responses for each question.
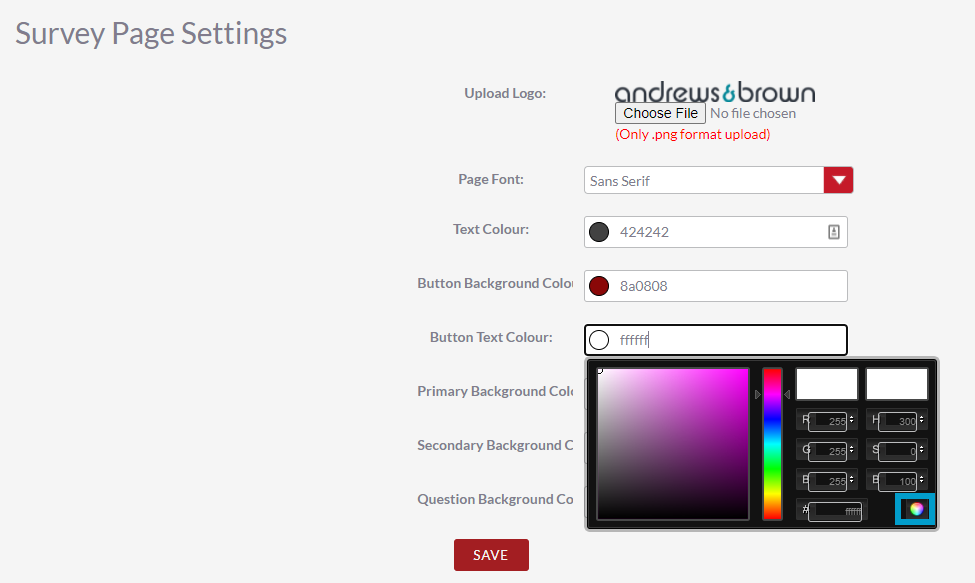
How to Upload Logo for the Survey Module
To upload a logo for the survey module navigate to your username in the top right hand corner and select Admin from the drop down menu.
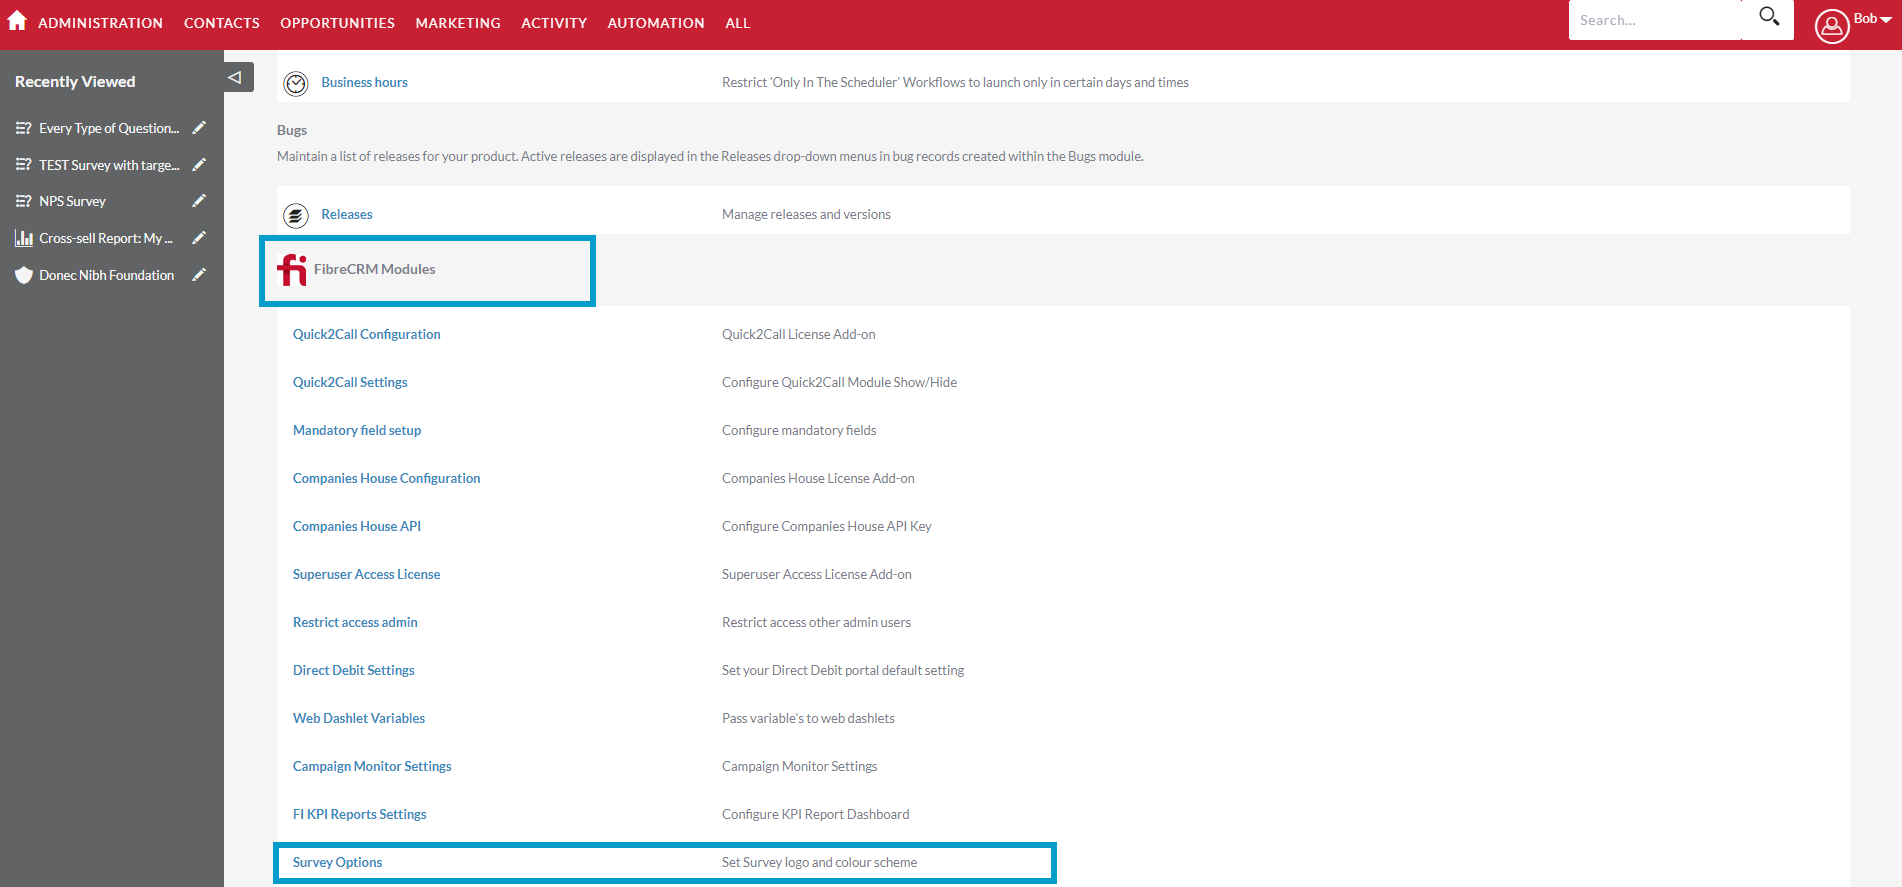
Scroll down the FibreCRM modules section and click on the Survey Options.
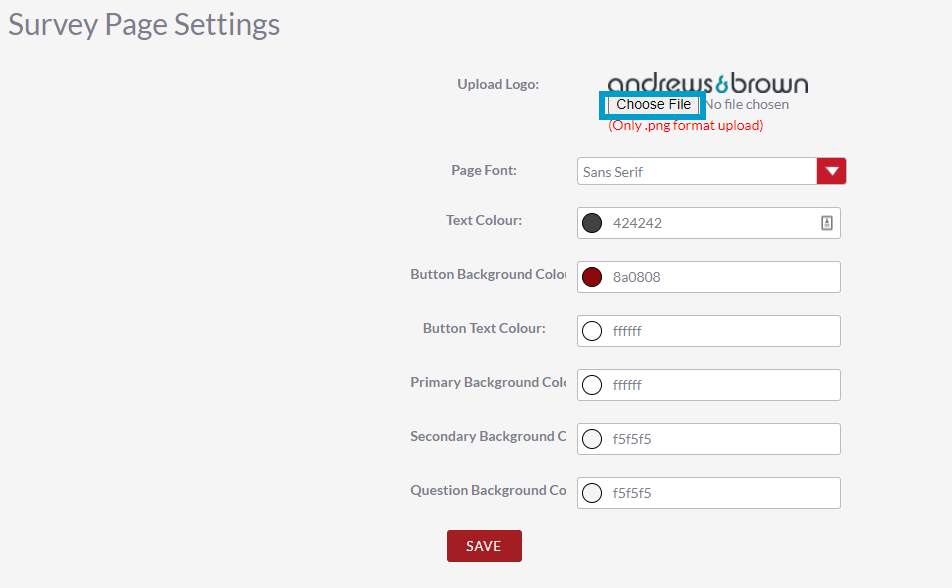
On the Survey Page Settings Page page click on the Choose File button to upload an logo image. Note: logos need to be in the format of a .png file
You can choose the surveys page font by selecting a font from the drop down menu. Below you can then select colours for bits of your survey such as; Text Colour, Button Background, Button Text, Primary Background, Secondary Background and Question Background.
To change any colour click in the box of the bit of the survey you’d like to change and colour picker box will appear. Choose the colours you’d like to change it to using the drag and drop picker over the colours or typing in the colour hex code if you know it. Once done select the little colour palette in the colour picker to set the colour.
When you’ve uploaded your logo and picked your colours click Save.
Note: The branding you’ve uploaded will be applied to all surveys.
We use cookies to assess how people are using our website, only necessary cookies are enabled. Cookie settingsACCEPTREJECT
Cookie Policy
Privacy Overview
This website uses cookies to improve your experience while you navigate through the website. Out of these cookies, the cookies that are categorized as necessary are stored on your browser as they are essential for the working of basic functionalities of the website. We also use third-party cookies that help us analyze and understand how you use this website. These cookies will be stored in your browser only with your consent. You also have the option to opt-out of these cookies. But opting out of some of these cookies may have an effect on your browsing experience.
Necessary cookies are absolutely essential for the website to function properly. This category only includes cookies that ensures basic functionalities and security features of the website. These cookies do not store any personal information.
Any cookies that may not be particularly necessary for the website to function and is used specifically to collect user personal data via analytics, ads, other embedded contents are termed as non-necessary cookies. It is mandatory to procure user consent prior to running these cookies on your website.
Functional cookies help to perform certain functionalities like sharing the content of the website on social media platforms, collect feedbacks, and other third-party features.
Performance cookies are used to understand and analyze the key performance indexes of the website which helps in delivering a better user experience for the visitors.
Analytical cookies are used to understand how visitors interact with the website. These cookies help provide information on metrics the number of visitors, bounce rate, traffic source, etc.
Advertisement cookies are used to provide visitors with relevant ads and marketing campaigns. These cookies track visitors across websites and collect information to provide customized ads.