How Can We Help?
Security Groups & Roles – User Guide
Roles and Security Group settings are managed from the Users section of the Administration Panel.
Administrators will need to set these up, if FibreCRM are your only system administrator and you would like to become an admin of your system then please contact us so we can set up administrator rights.
The settings allow you to restrict access to sensitive data in FibreCRM to specific teams (groups). There are many options to allow you to configure it to your exact needs and several automatic assignment options to ensure that your users can always access the data that they need.
Security Groups allow you to define groups of users with particular access rights, defined by the roles attached to the group. Groups can also be used to assign records to teams of users.
Roles are used to define access rights to modules and determine what a user can do with a record once they have access to it.
There are 3 key steps to setting up Groups so that you work correctly:
1. Create a group for each team of users and add the appropriate users to the group.
2. Create a role and select the appropriate access levels. Assign that role to each group.
3. Add the groups to records in FibreCRM. You can use the Mass Update/Bulk Action tool on the List View to do this if you’d rather. Going forward the groups will automatically inherit based on your SecuritySuite Settings. You can also use logic hooks, workflow, or do a direct database insert into the securitygroups_records table if doing a one-time initial setup.
Create a role to define access to modules and the functions users will be able to perform on records within these modules. The role can then be assigned to security groups or to individual users where appropriate.
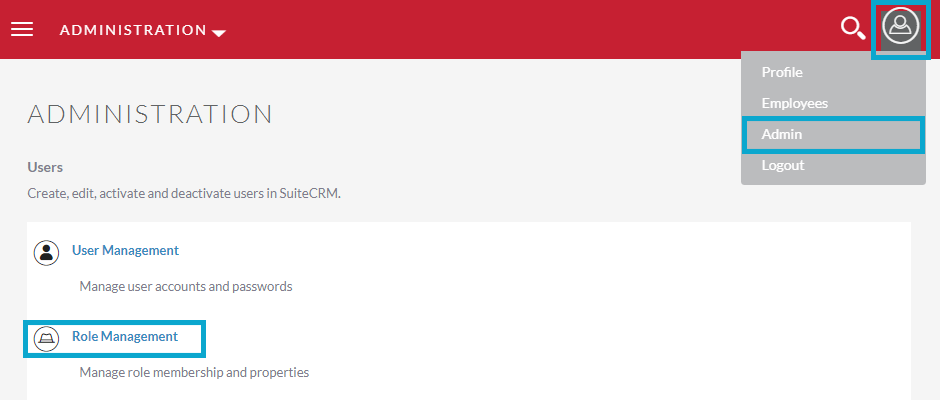
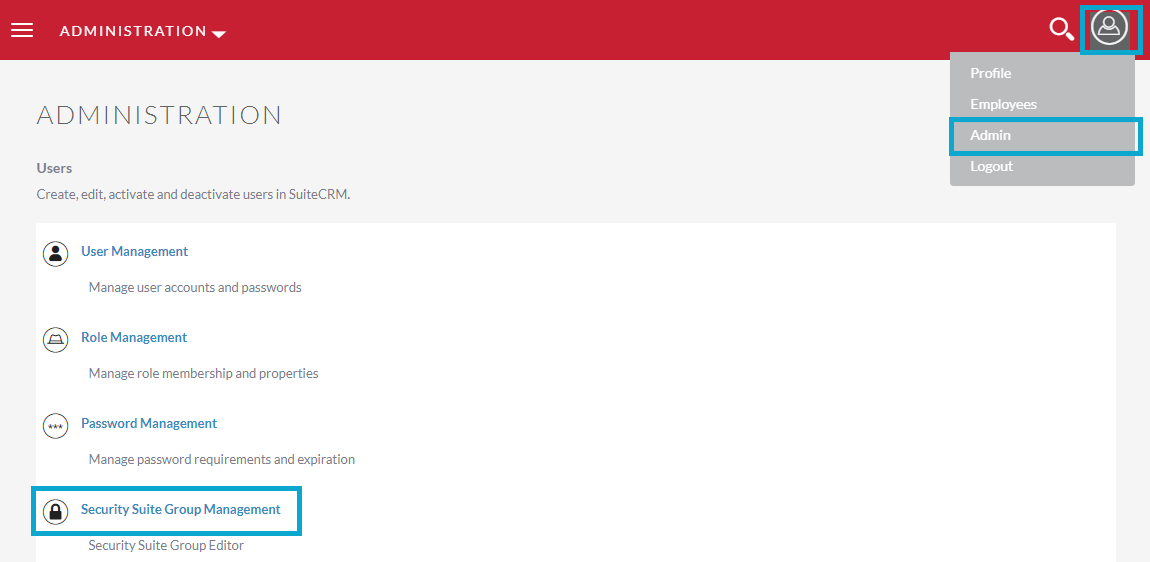
1) Go to Admin (hover over your name and click Admin) and select Role Management:
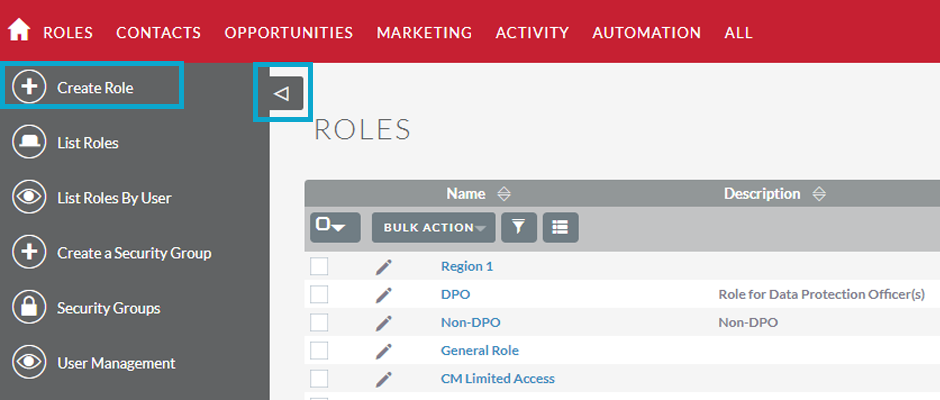
2) Then Create Role from the Role Management sidebar (if your sidebar is hidden, then click the arrow on the right to unhide)
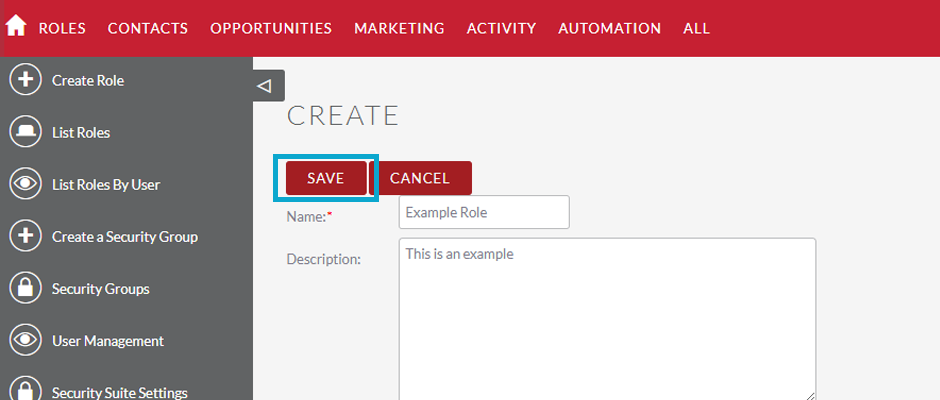
3) Enter a name and a description for the role you are creating and click SAVE:
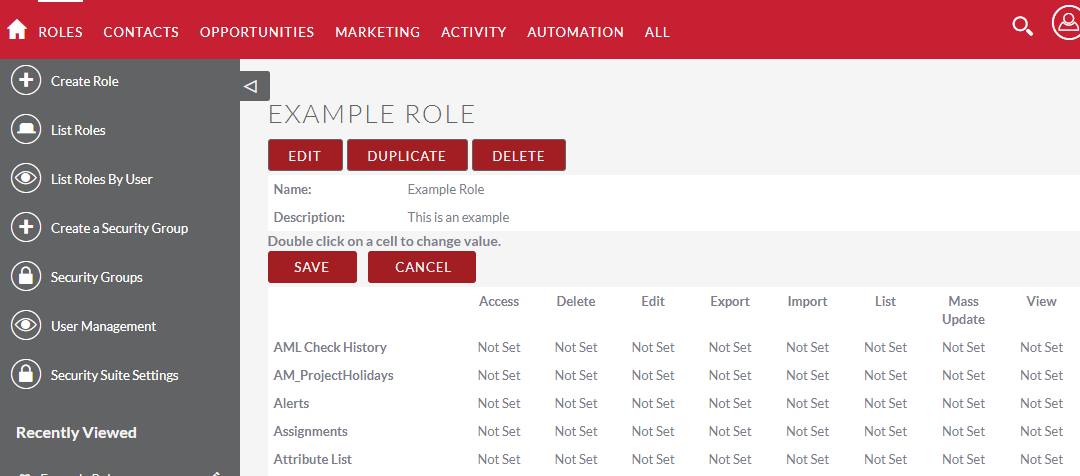
Once the role has been created, the role matrix will be displayed, showing all the configurable access options for each module
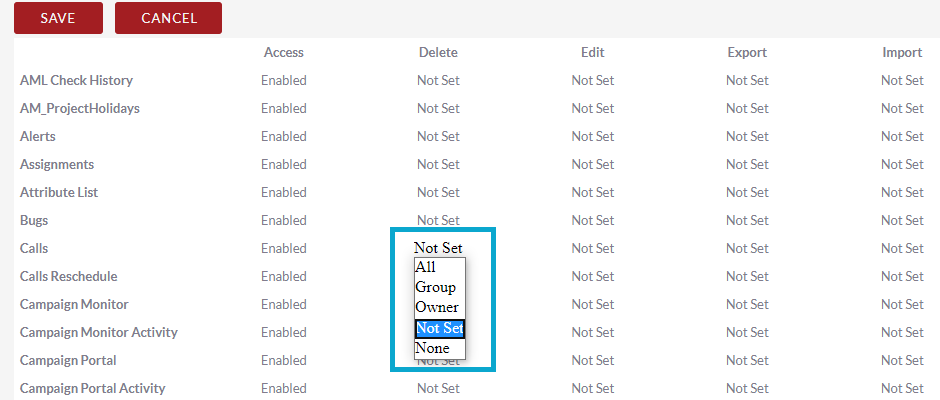
Click on a cell to change the access setting. Note that you can change the setting for an entire column by clicking on the column heading, or change individual cells by clicking in them:
Use the Access column to determine whether users can access each module:
• Enabled: Users have access to this module
• Disabled: Users will not be able to view records for this module.
Use the Delete, Edit, Export, Import, List, Mass Update and View columns to determine available record functions for users:
• Group: Gives users access to all records assigned to members of the same group
• Owner: Gives users access only to their own records
• None: Users will not have access to this function for this module
Not Set will mean that it reverts to default i.e. user will have access to this function/module.
Click SAVE.
Once saved, access rights are colour coded for ease of reading. If your users should only typically see their own records then the role you would assign to their group would be configured to have Owner rights.
A manager who is a part of the same group, but who should be able to see all records in the group, should have a role directly assigned to their user record that gives Group access.
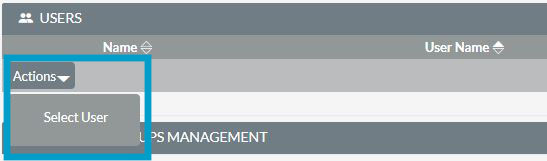
Add User or Group – Assign the role to a group or an individual user as appropriate, using the subpanels below the matrix (at the bottom of the page):
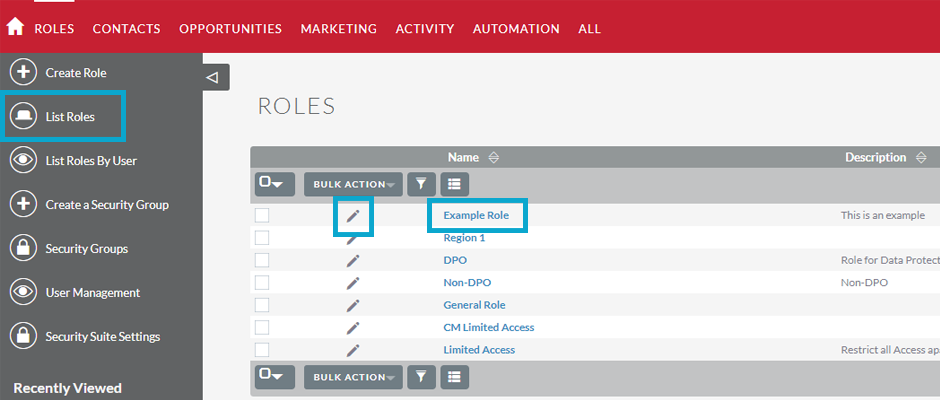
Select List Roles from the sidebar to view all roles and their descriptions.
Click on the role name to view and edit the access settings. Click on the pencil icon to edit the role name and/or description.
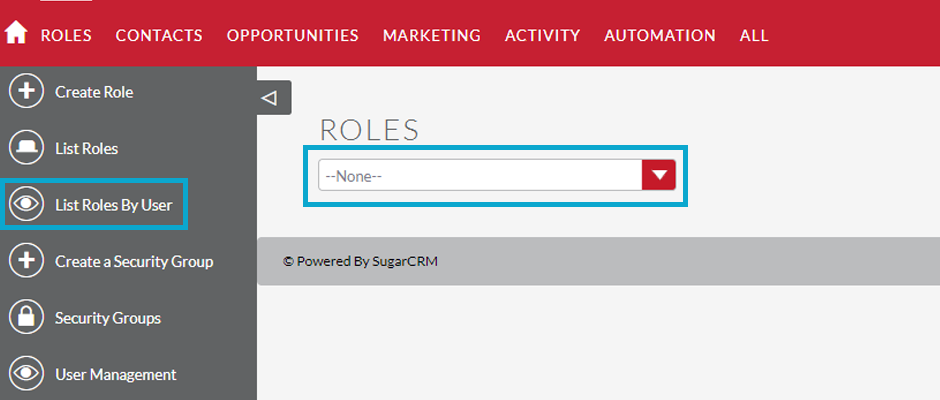
Click List Roles By User in the sidebar.
Select a username from the list to display the access matrix (the big table with cells determining what users have access to) for the user as defined by all roles applied to the user.
Select Security Suite Group Management from the Admin panel to view any existing groups or create a new group.
Create a group to define groups of users with particular access rights, which are defined by the roles attached to the group. Groups can also be used to assign records in the CRM.
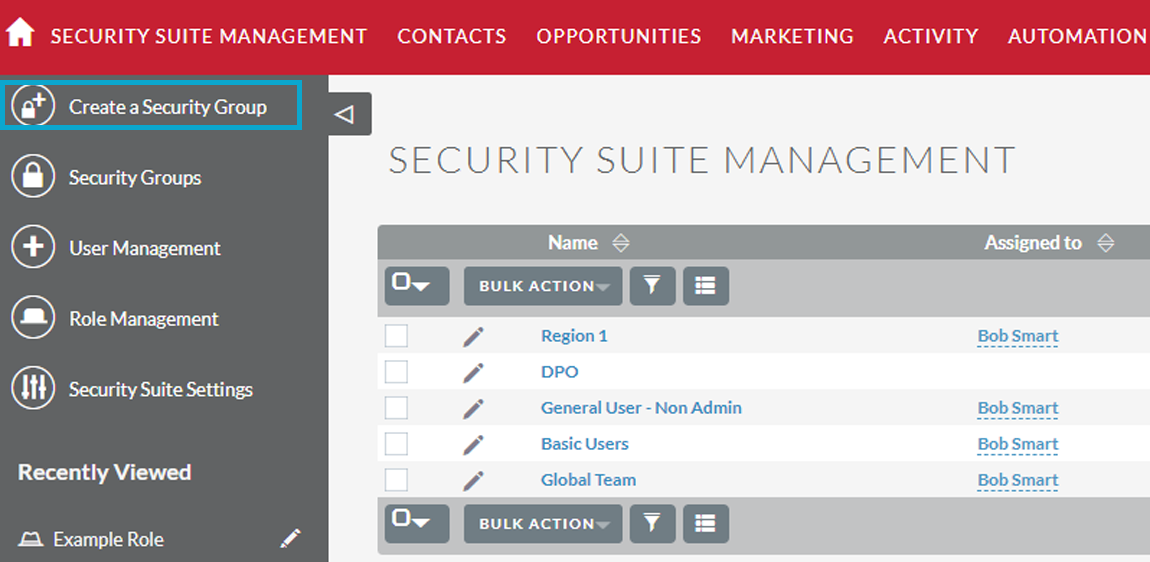
Select Security Suite Group Management, and then Create a Security Group from the sidebar.
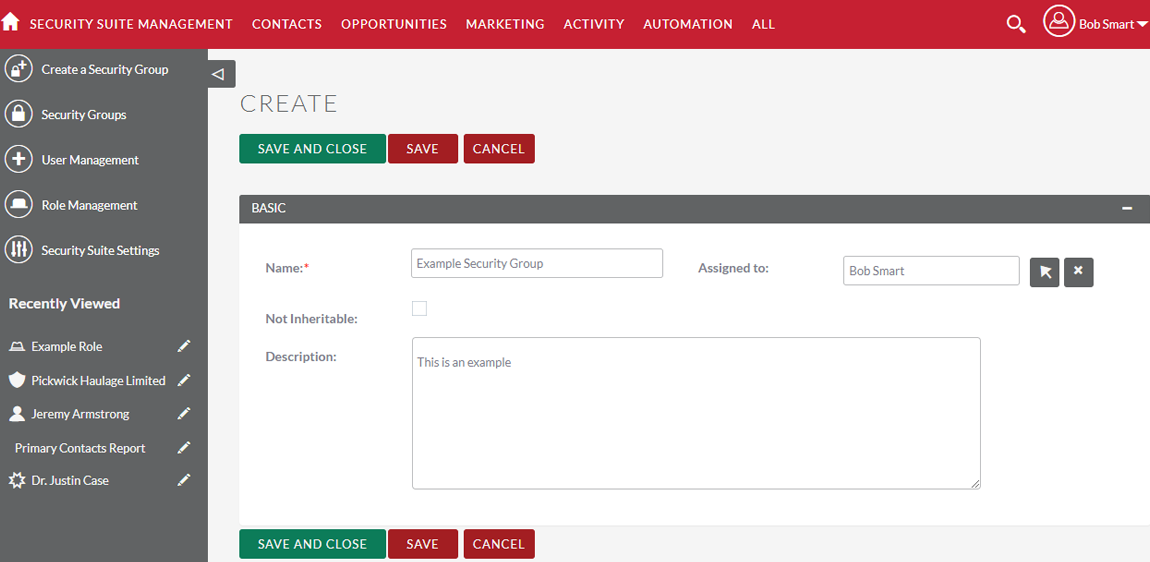
Enter a name and an optional description for the group.
Not Inheritable If this field is checked then the group will not automatically be attached to any record. This can be useful for cases such as creating groups to assign roles to.
Click SAVE AND CLOSE.
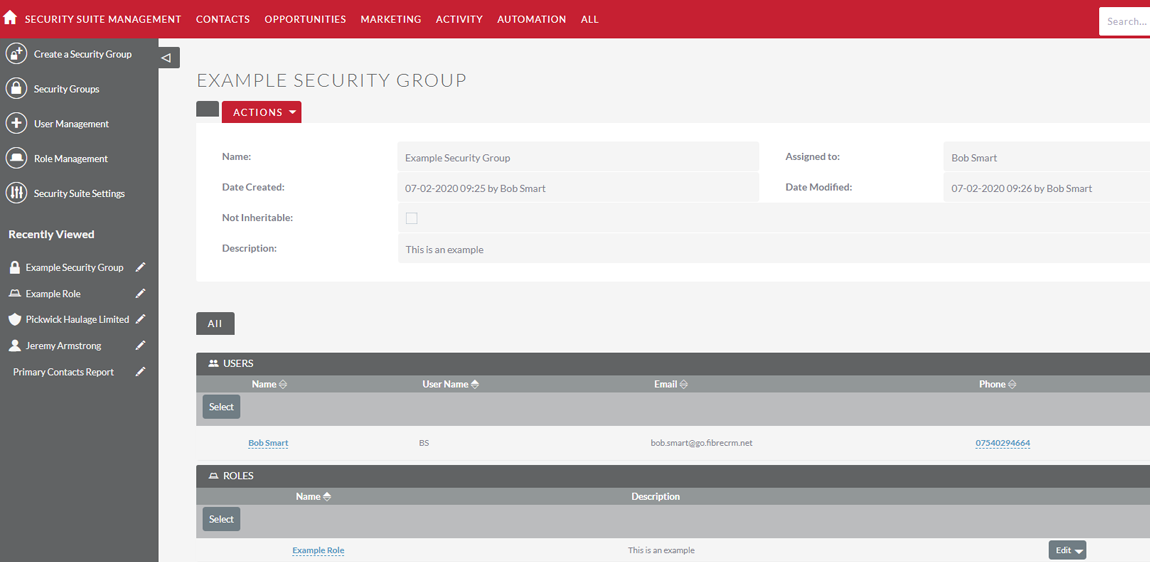
The Detail view for the newly created group will appear.
Add users and roles to the group as required, using the subpanels.
Here, Bob Smart is a member of the group and the Example Role role has been applied, so the Example Role settings will apply to Heather Test (and any other users added to the user’s subpanel).
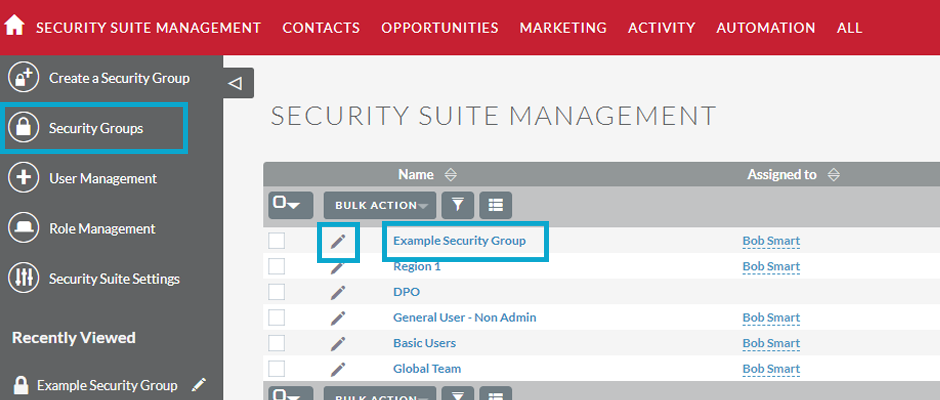
Select Security Groups from the sidebar to view all security groups.
Click the group name to edit the users and roles attached to the group, and the pencil icon to edit the group name and/or description.
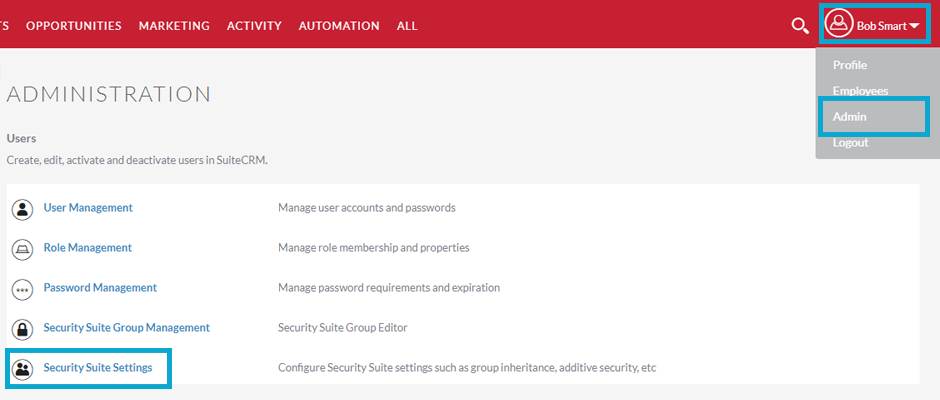
FibreCRM System Administrators can configure many advanced options for Security Suite. This allows you tocontrol various access rights, inheriting of records, filters and more.
To access these settings go to Admin → Security Suite Settings:
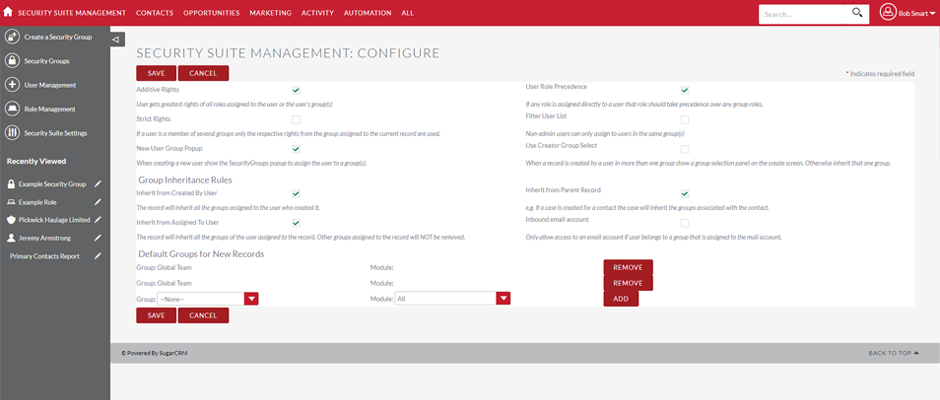
You will then see this screen, an explanation of these options is below:
Additive Rights
User gets greatest rights of all roles assigned to the user or the user’s group(s).
Strict Rights
If a user is a member of several groups only the respective rights from the group assigned to the current record are used.
New User Group Popup
If this is checked, a Security Groups popup will open when a new user is created, allowing you to add the user to a security group(s) upon creation of a new user.
User Role Precedence
If any role is assigned directly to a user that role should take precedence over any group roles.
Filter User List
With this selected, non-admin users can only assign records to users who are in the same group(s).
Use Creator Group Select
Adds a panel to a record creation screen if a user is a member of more than one inheritable group that allows a user to select one or more groups (that the user belongs to) that should be associated with the newly created record. If a user is in just one group, the normal inheritance rules will instead be applied. The new record will still inherit from the Assigned To user or Parent record if these options are set. This setting only overrides the Created By setting.
Inherit from Created by User
The record will inherit all the groups assigned to the user who created it.
Inherit from Assigned to User
The record will inherit all the groups of the user assigned to the record. Other groups assigned to the record will NOT be removed.
Inherit from Parent Record
E.g. If a case is created for a contact the case will inherit the groups associated with the contact.
Inbound email account
Locks down inbound email accounts in the email client to only list those that belong to the same group as the current user.
Default Groups for New Records
Set groups that should always be attached when a specific module record is created, e.g. you can set a group to be assigned to all newly created Account records.