How Can We Help?
Setting up Outgoing Mail – User Guide

The CRM system has the ability to send email communications in two different ways, either via a global system email configuration or via an API to a 3rd party such as Campaign Monitor or Mailchimp.
The system email configuration is used to send transactional emails such as reminders to customers or staff, or small batches of emails to groups of customers that wouldn’t necessitate creating an email campaign.
Outside of this all-email campaign messages should be sent via the approved chosen campaign tool which integrates via API, so no campaign emails are actually sent from the CRM to the customer, these will come from the provider.
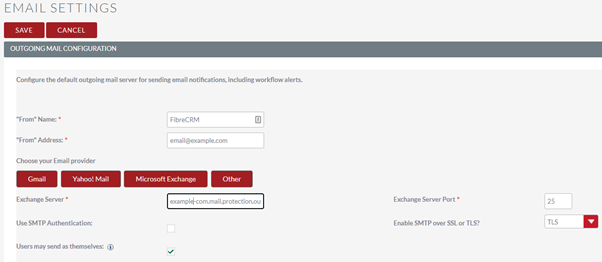
The CRM is configured to connect to your Exchange Server in the same way Outlook would by connecting to O365 Exchange using a From Address, an Exchange Server Address and Port Number.
Emails aren’t sent directly to the customer from the CRM, they will be routed via your Exchange server.
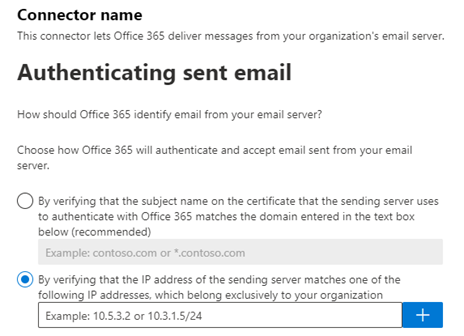
To facilitate this a mail flow connector or relay will need to be created on the Exchange server to allow emails to be sent from the CRM web server IP address routed via Exchange. The purpose of this is to allow all users to send emails from the CRM without authentication, if this is not enforced then any change in email credentials specified in the CRM could cause deliverability problems.
The Example below is of a O365 configuration:
2. Create a connector from Your organisation to O365
3. Enter the CRM web server IP into the connector.
Once the connector is established the CRM can then be configured to connect to your Exchange using a URL similar to [example-com].mail.protection.outlook.com
It is also recommended adding the web server IP to the SPF record for your domain in your DNS records.