How Can We Help?
Target Lists (Static & Dynamic) – User Guide


Most Target Lists will be looking at Contacts, as the list will have been put together for marketing – thus needs to go to a Person record. Therefore, this guide will focus on searching by Target List in the People Module, but the process is the same elsewhere.
A Static Target List is a list of Organisations, People and or Leads that is put together manually and doesn’t change or update itself. If you want a list which updates itself, then you will want a Dynamic Target list.
Static Target Lists are great if you’ve got a group of recipients who have nothing in common, so you couldn’t use a report to automatically group/pull them together.
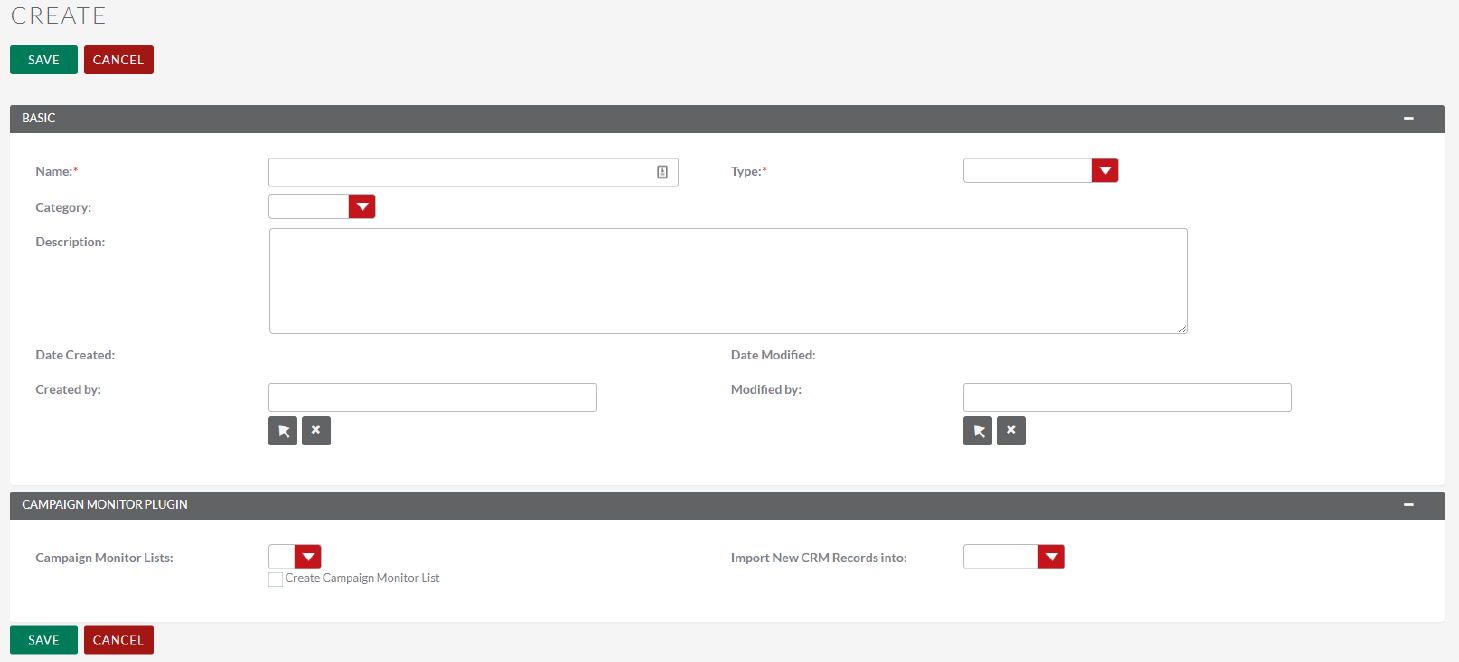
First, we head over to Target Lists and click Create Target List.
Give the Target List a name that relates to the list.
We can also add more details in the description to better understand what this list is for.
We also have options here to create or link to a Campaign Monitor list (or MailChimp, if you use that instead) ready for marketing.
There is more on this in the Campaign Monitor manual. Set the type drop-down to Static Target List.
Once the details are filled out click Save.
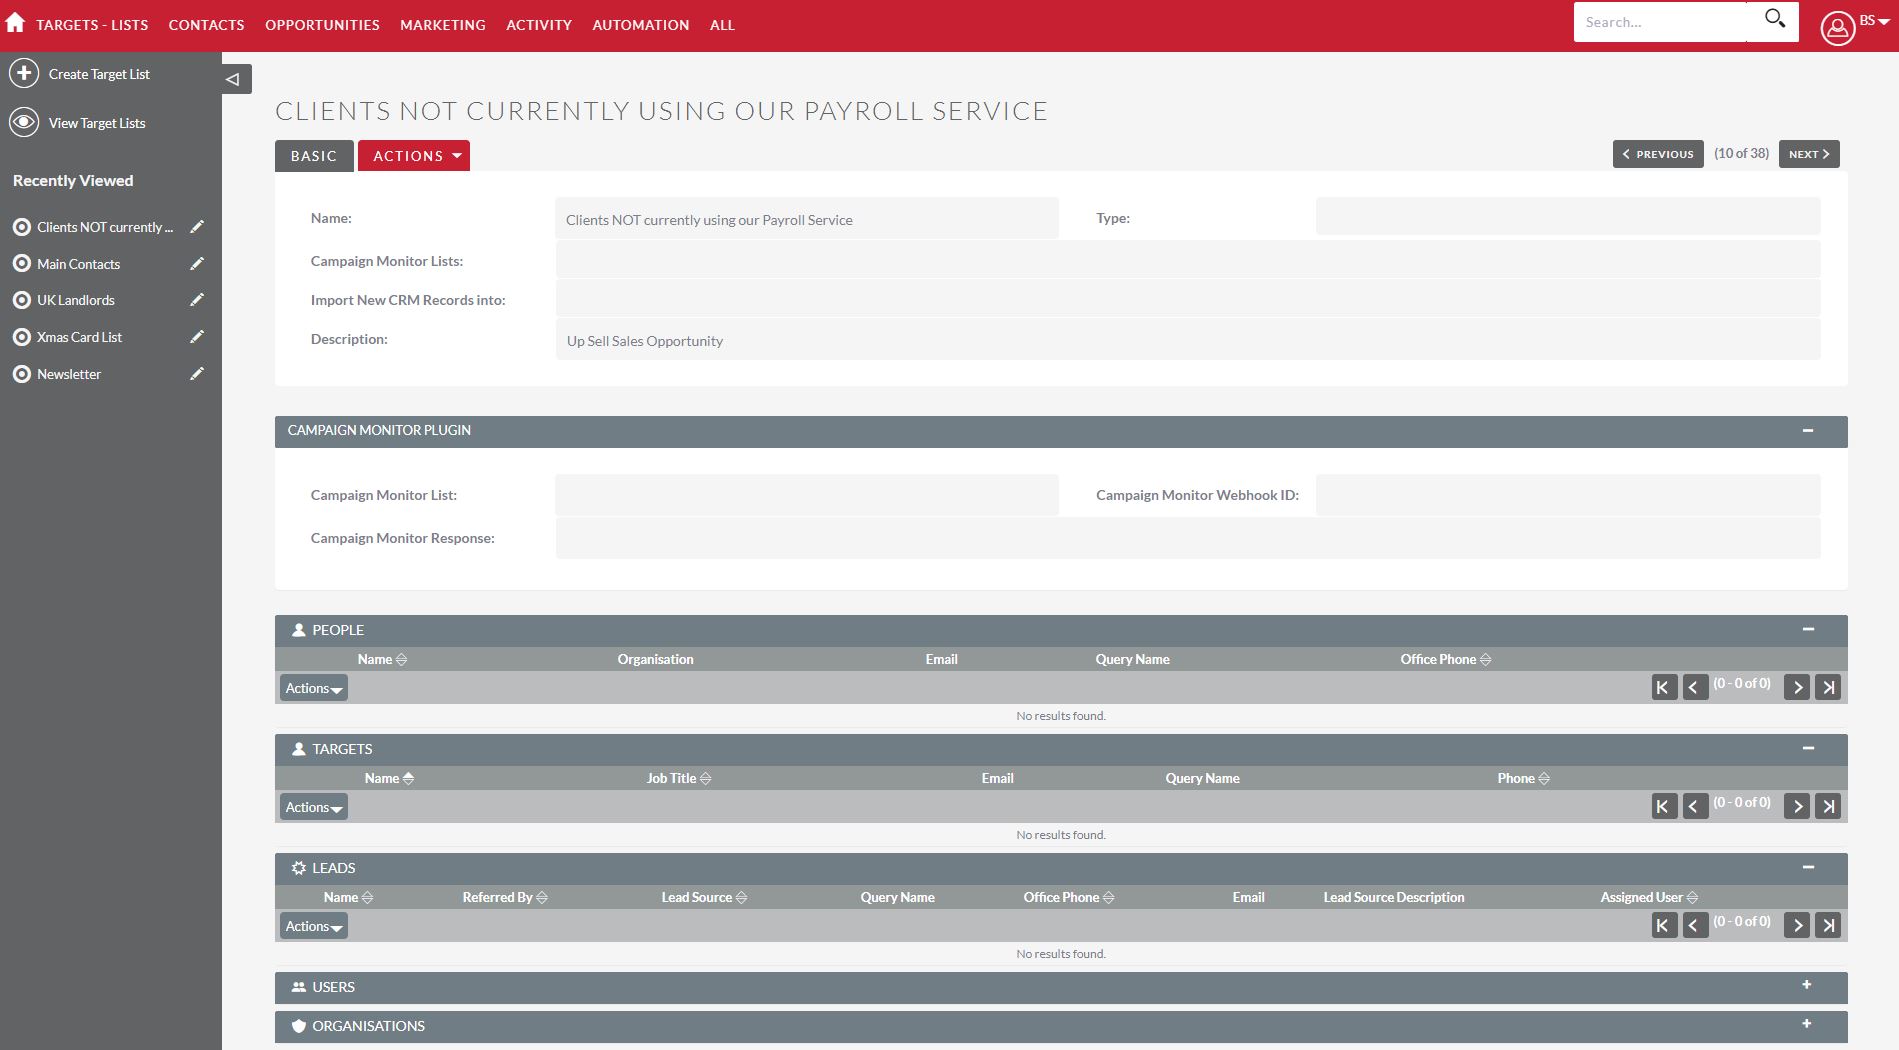
You will now have an empty target list. There are 3 different ways to add recipients to a static target list.
Once you’ve created your list, your screen will look like this:
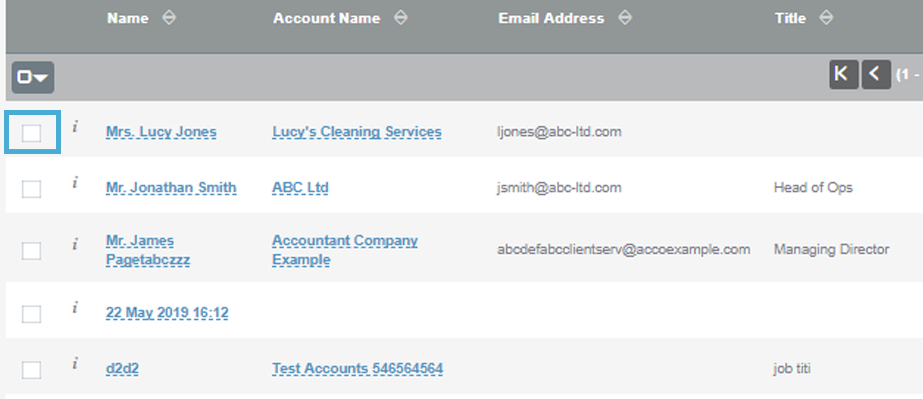
You can use the People/Leads/Organisations subpanels to add recipients to your target list. Simply click on the arrow on the right and click Select:
You can then use the pop-up box to search for whoever you want to add to the list. You can multi-select using the checkboxes on the left (checkboxes do not remain selected if you change the page in the search box, so please select one page at a time).
Alternatively click on the name to select just the one record:
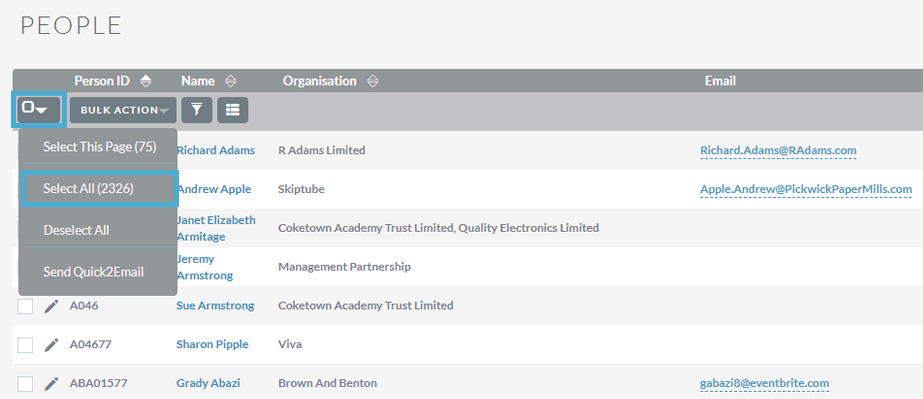
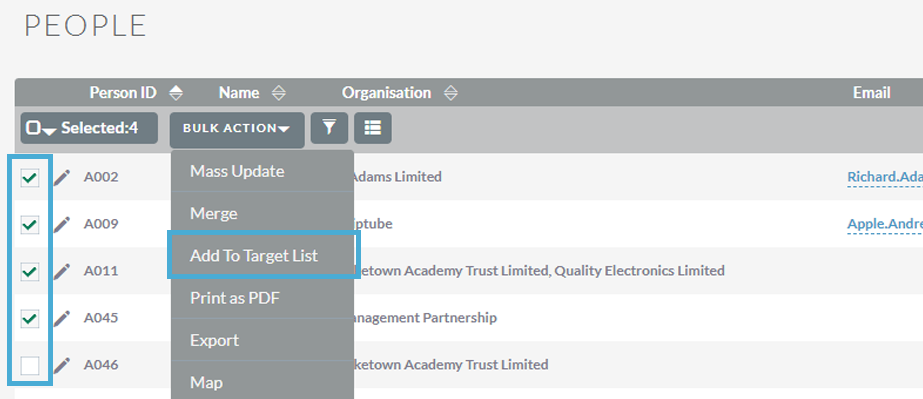
You can also add Records to your Target List from the list view in a module. E.g. Organisations.
Simply navigate to the module, multi-select who you want to add and then go to the Bulk Actions Menu.
Either pick and chose who you want to add:
Or select all, by clicking on the arrow on the left and then either Select All (multiple pages) or Select This Page (just the page on your screen).
Then click on the Bulk Actions menu and Add to Target List:
Then chose your list from the pop-up box:
Your selected records will then be added to the target list.
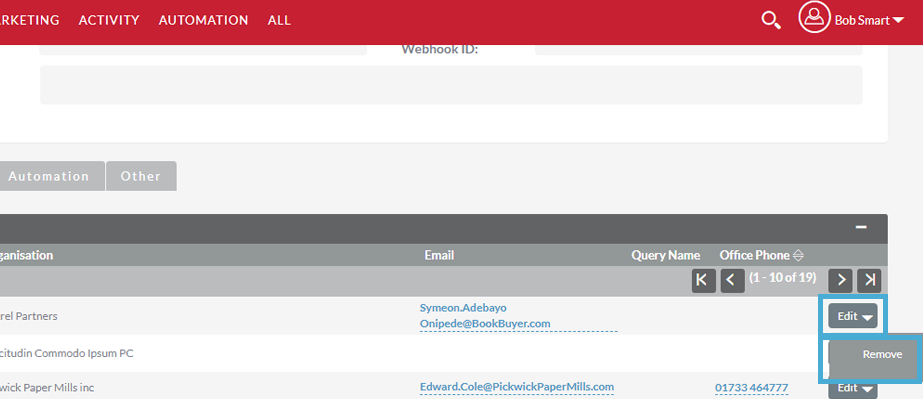
If you have an Organisation/Person/Lead record that you want to remove from a Static Target List, then navigate to the Target List, find the record you want to remove and click on the arrow on the right:
The record will then be removed from the list.
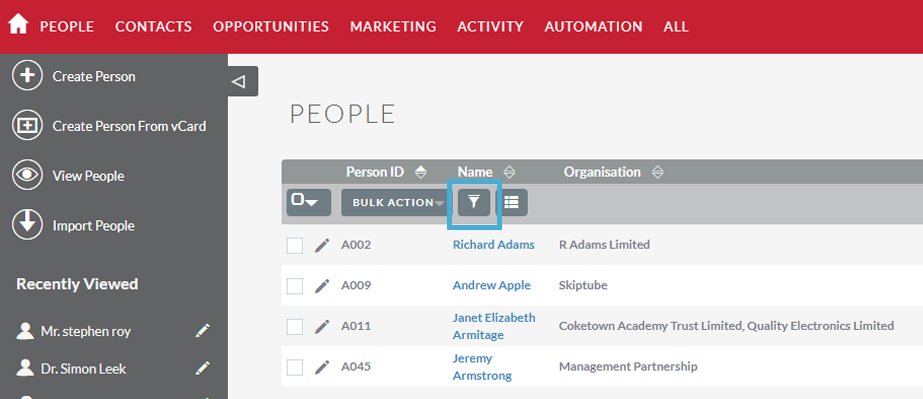
Log into FibreCRM and navigate to the People module. On the list view, click the funnel icon:
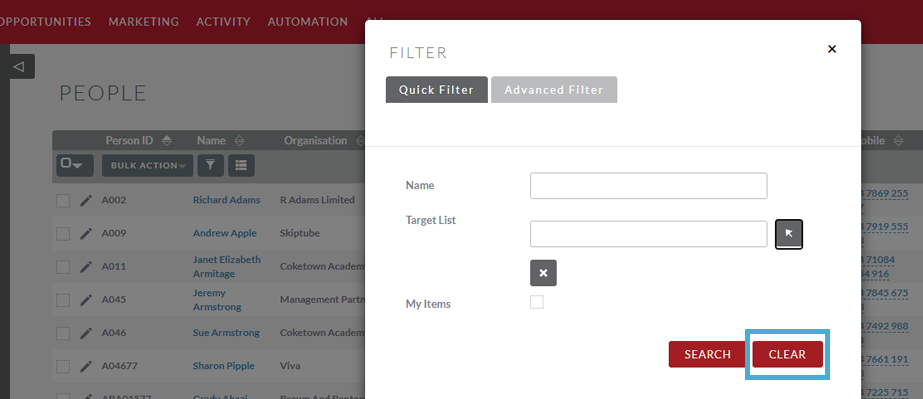
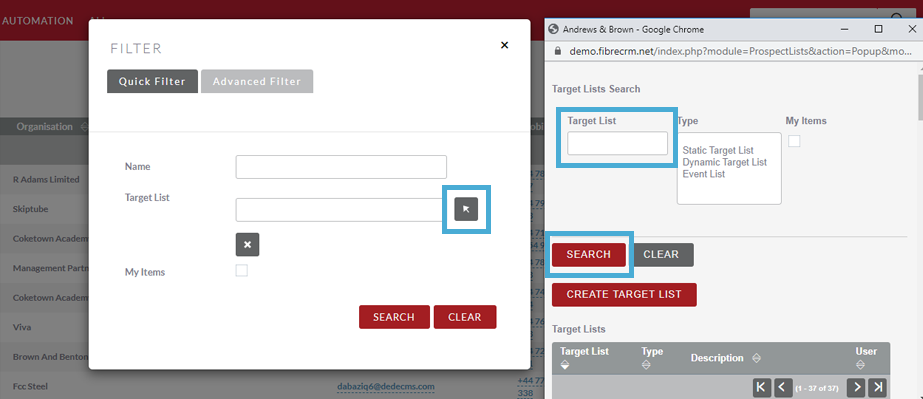
You’ll get a pop-up window, go to the Quick Filter tab and then scroll to the bottom and hit Clear. This will remove any previous search parameters you had applied before we create our new search:
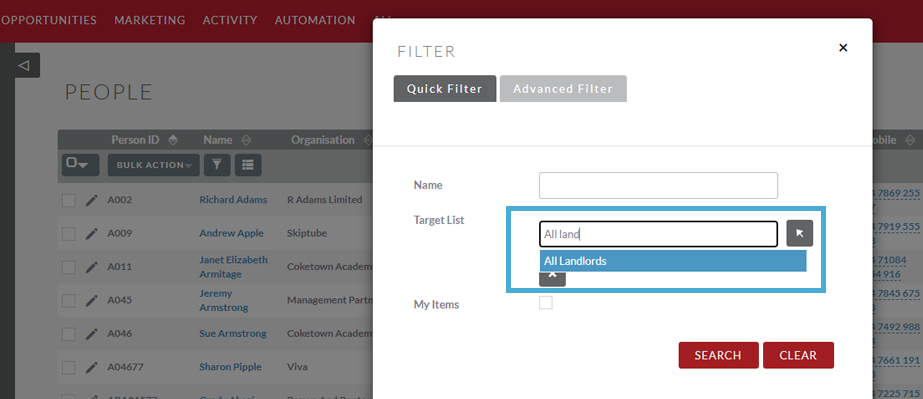
Then simply begin typing the name of the target list into the Target List box above and select it.
Alternatively, click on the arrow to get a pop-up box and be able to view all your target lists built across the module you are currently in.
You can then either search for the list by name, at the top of the pop-up window, or you can simply click on the name of the Target List in the results.
Then you can hit Search and the results will be filtered by records on that Target List.
A Dynamic Target List is a list of Organisation/People and or Leads that is automatically updated at scheduled intervals to keep the list current.
A great example of a Target List would be a list of all your contacts who are landlords.
To do this in a non-dynamic way you would have to have a list of all contacts who are landlords and select these in the target list. As soon as you had done this the list could instantly be out of date. Any changes to the list would need to be done manually.
To create this Dynamic Target List, the list is first created in KReports which contains the conditions required to create the list.
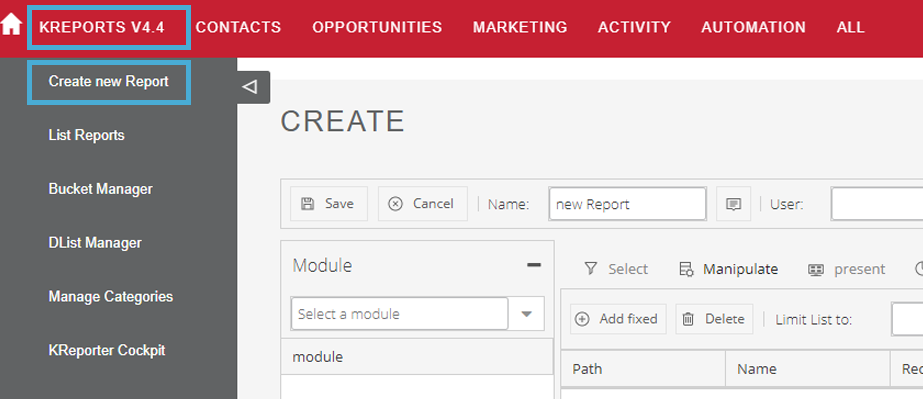
To create a report first head over to the KReports tab and select Create New Report.
You will be met with the page above, first we need to give our report a distinct and clear name.
In this example, we will be creating the contacts who are landlords report, so we will give it that name.
Next, we can assign the report to a user from the drop-down list. If this is not filled out it will default to the current user logged in.
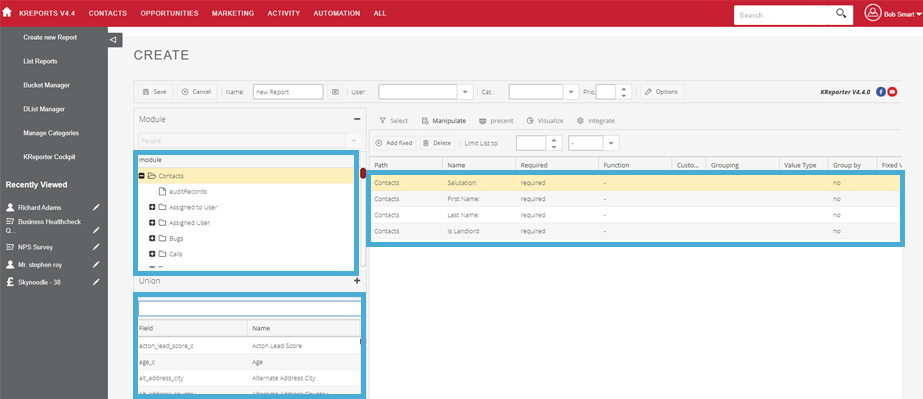
Now we need to select the module or section of data you wish to report on. The module we will select here is contacts.
NOTE: Once a module is selected it cannot be changed.
Now that the contacts module is selected we can expand the contacts module to see any related modules to select fields from.
Below this is a list of all the fields available in the selected module (Highlighted in yellow.)
To select a field, we simply drag and drop the field that we wish to see into the manipulate area.
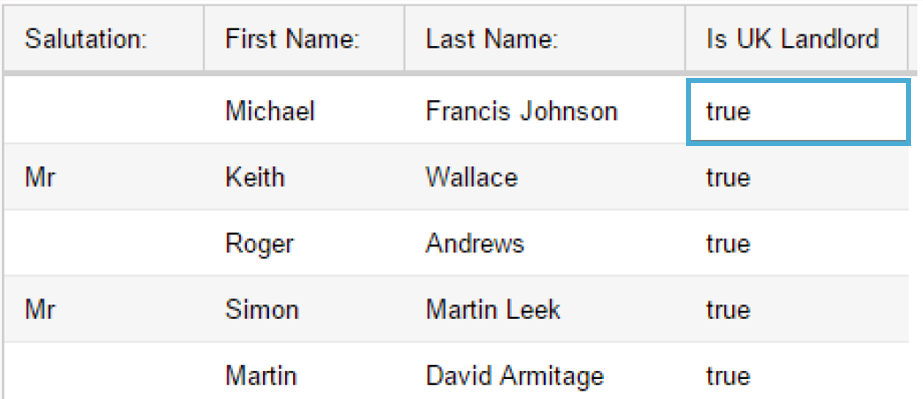
Below is selected salutation, first name, last name and “is UK landlord” fields.
If you saved the report at this stage you would have every contact in the CRM and a true or false under the “is UK landlord” column.
We only want the trues.
To achieve this, we can go to the select tab, just to the left of manipulate.
Here we will drag in the is UK landlord field just as before, but we will be adding an operator, these are restrictions on the data such as equals, is one of, is not one of, between or after, plus many more.
We will be using the equals = operator.
We can then set the equals/from column to True, when the report is saved and run now we will only see those contacts who are UK landlords.
Our report is now created.
Now we have our report we can use this to populate our Target List.
First, we head over to Target Lists and click create Target List.
Give the Target List a name that relates to the list.
We can also add more details in the description to better understand what this report is for.
We also have options here to create or link to a campaign monitor list ready for marketing.
There is more on this in the Campaign Monitor manual. Set the type drop-down to Dynamic Target List.
Once the details are filled out click Save.
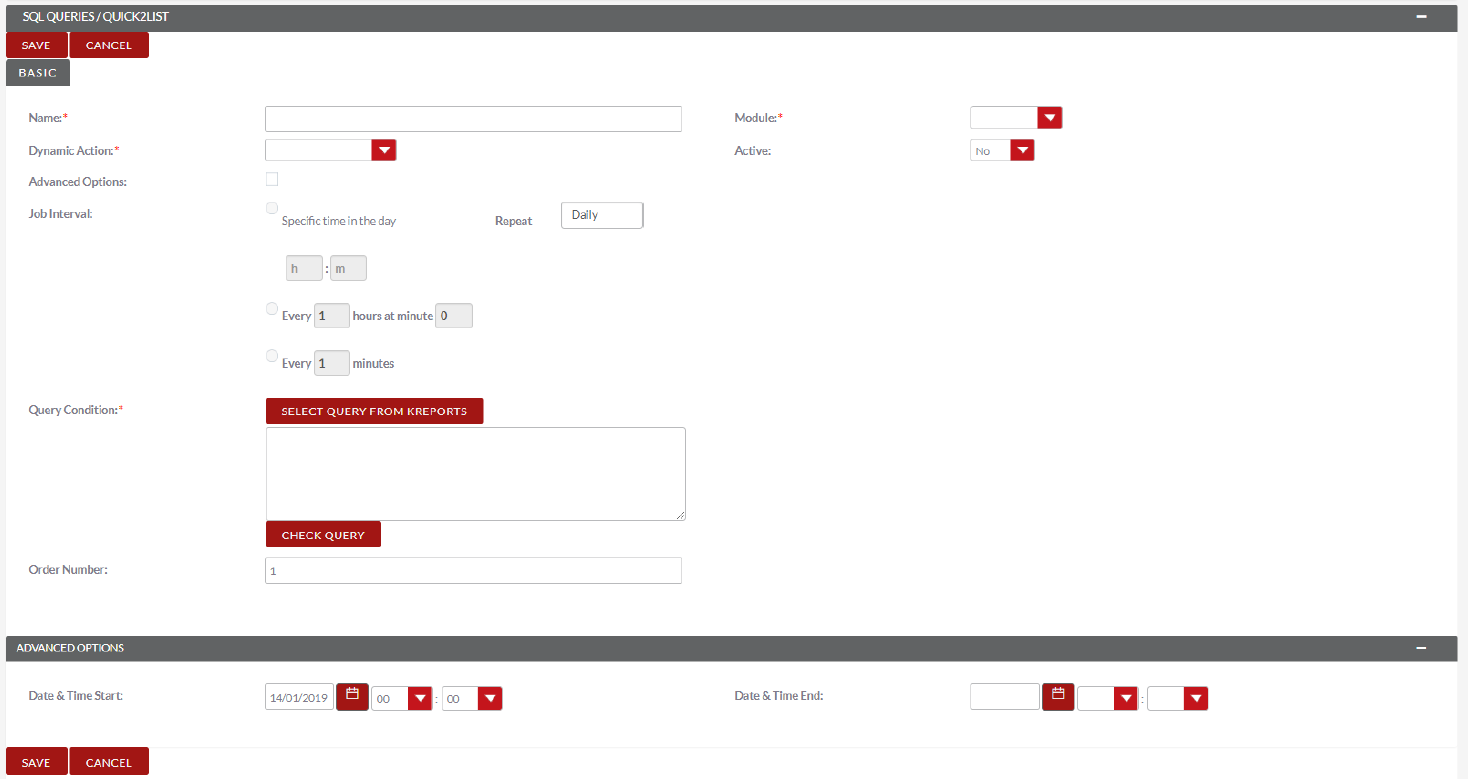
You will now have an empty target list, scroll down to SQL Queries / Quick2List and click the create button to get the form below.
Give this Query a name, ideally something that relates it to what the report does such as UK Landlord Contacts.
Next choose the module that this report is for, such as contacts.
The dynamic action is how the records are handled with in the list the options are:
For lists with a large amount records it would be best to schedule the action with at least an hour between it.
Now we can select which report we want to use for this target list.
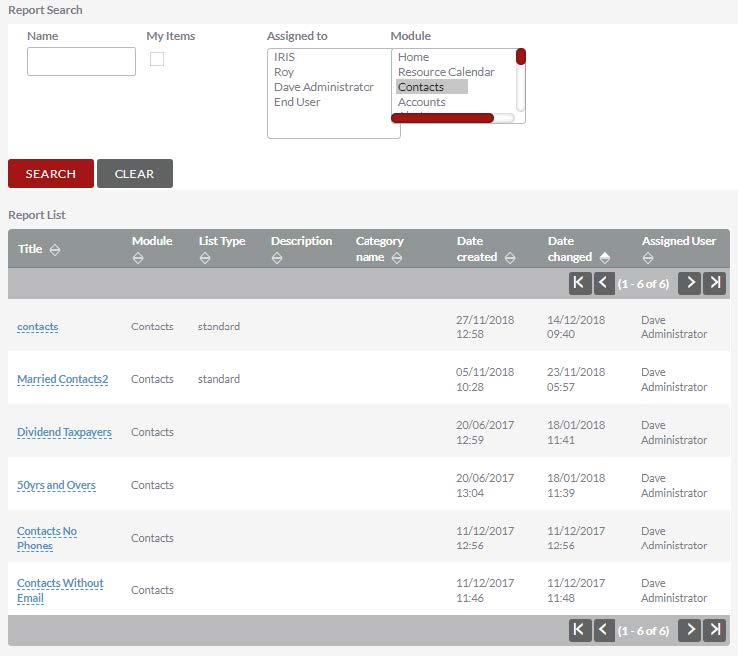
Click select query from Kreports, a popup will appear to select the report from, as below:
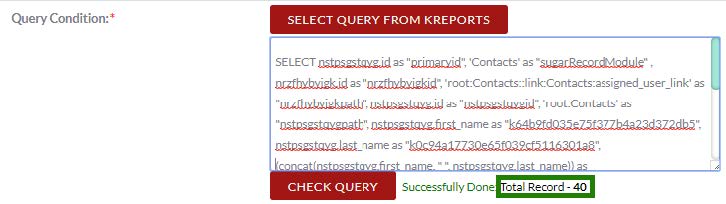
Click the report you want to use, the popup will close and the Query condition box on the target list will be populated.
Below it will display how may records will be imported.
Click Save and the Target List will start to populate.
On its schedule the target list will update and always be up to date.
Once you’re happy with the data in populated in the target list, you can push the list to your email marketing platform (e.g Campaign Monitor).
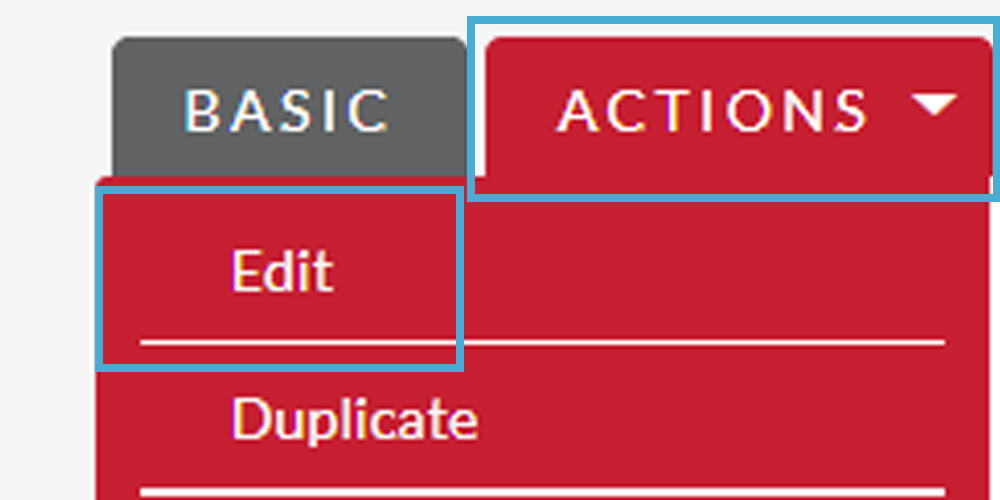
Start by navigating to the correct Target List. In the Actions menu, select Edit.
Then scroll to the Campaign Monitor lists options. You can either use the list to populate an existing CM list using the drop down menu, or create a whole new list by ticking the Create Campaign Monitor List option and hitting Save.
To download the Target List Part 1 Cheat Sheet click here
To download the Target List Part 2 Cheat Sheet click here