How Can We Help?
Understanding Workflows – User Guide


A Workflow is an automated process that triggers an event when some criteria is met.
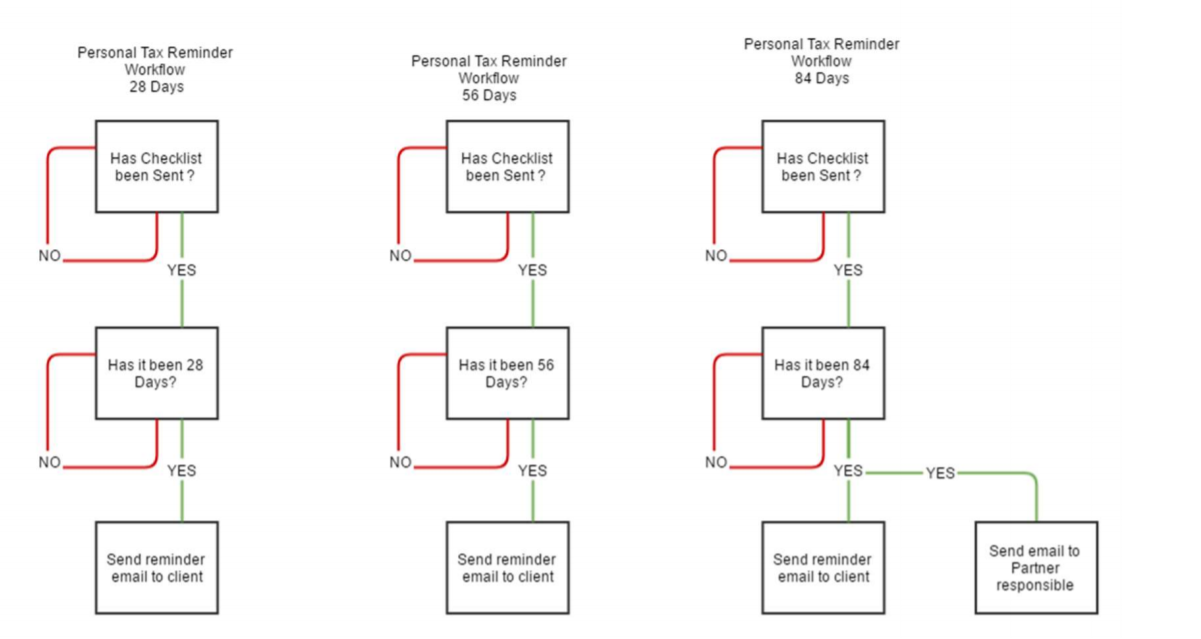
An example of this and included in the system is a personal tax reminder.
There are 3 Workflows in total and work as below.
The trigger is when the check list has been sent to the client and then either 28, 56, 84 days after that status change.
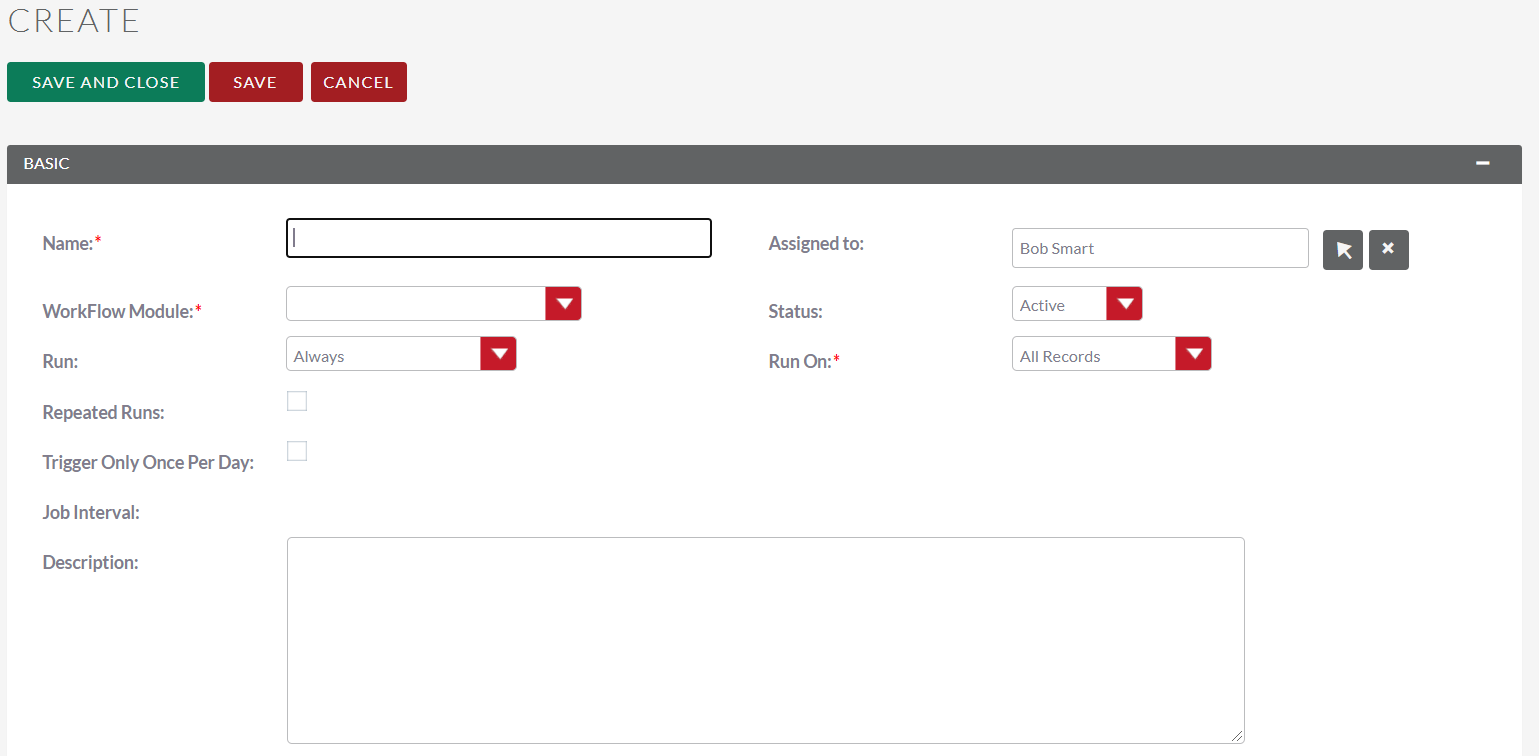
You can create Workflow processes by navigating to the WorkFlow module within FibreCRM.
Click the Create WorkFlow button within the action bar to start creating the process. The first panel allows users to set up the Workflow process.
This allows you to specify the following:
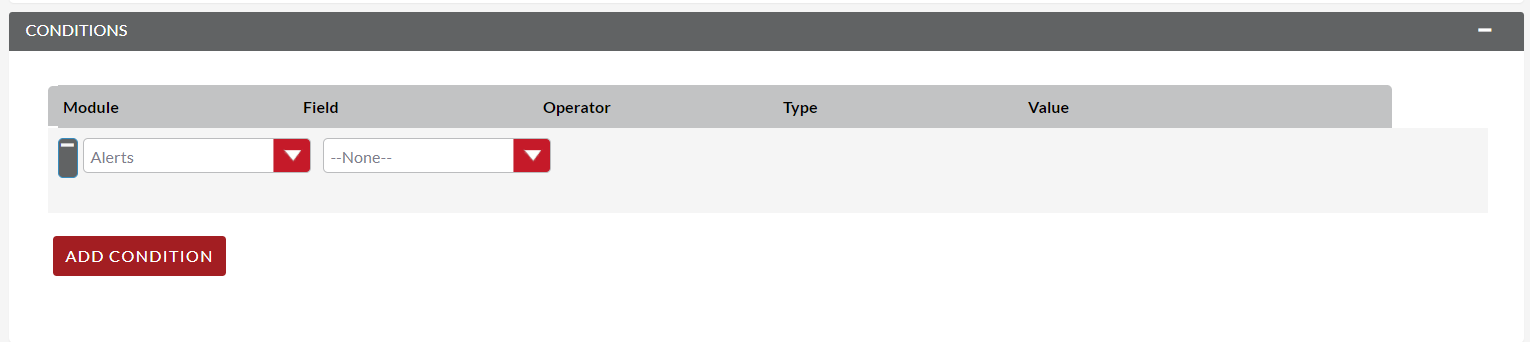
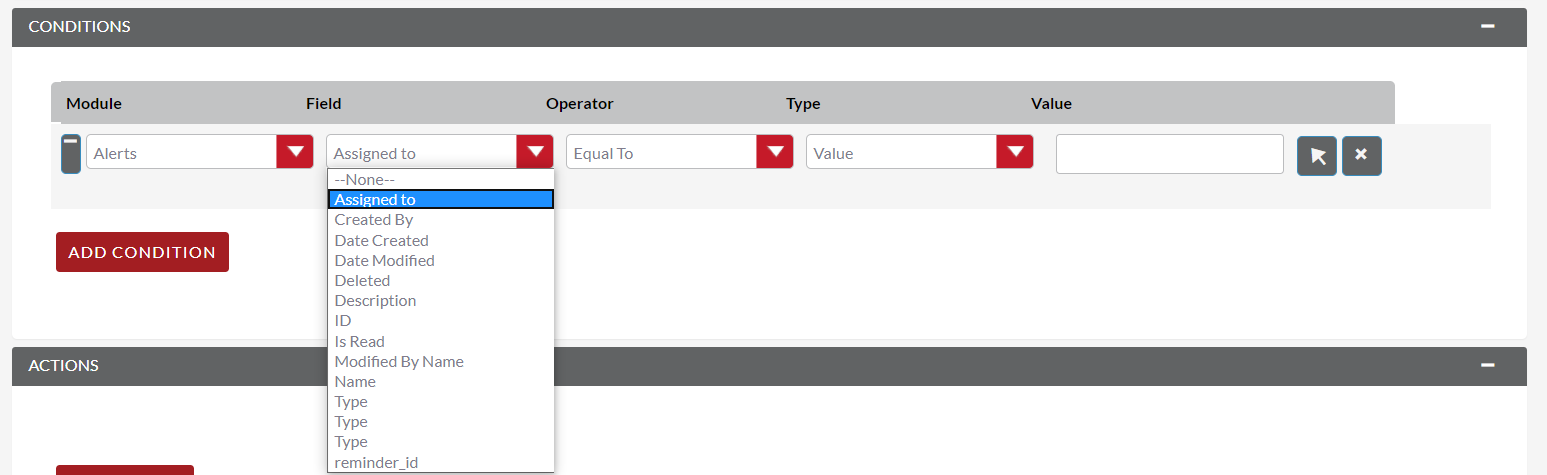
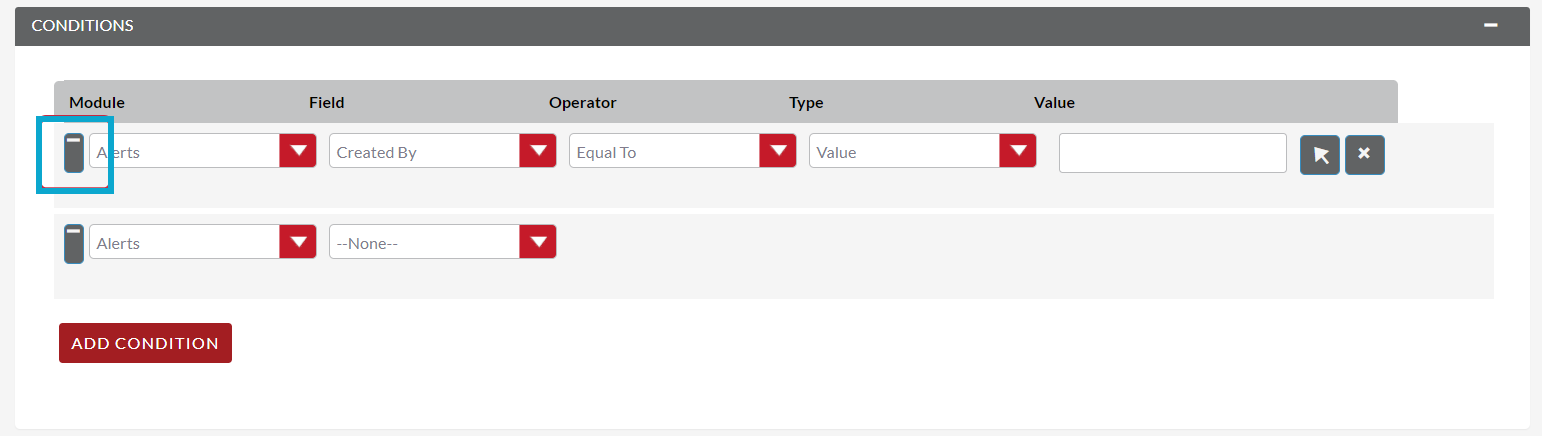
Once set up, you can add conditions to a Workflow process using the Conditions panel. This allows users to specify the criteria that should trigger the workflow actions.
To add a Condition Line you must click the Add Condition button.
Note: You must select your WorkFlow Module on the first panel before adding a Condition Line.
You can have an unlimited amount of Condition Lines. To add another line click the ‘Add Condition’ button again and it will appear. On the line you will have four fields; Field, Operator, Type and Value.
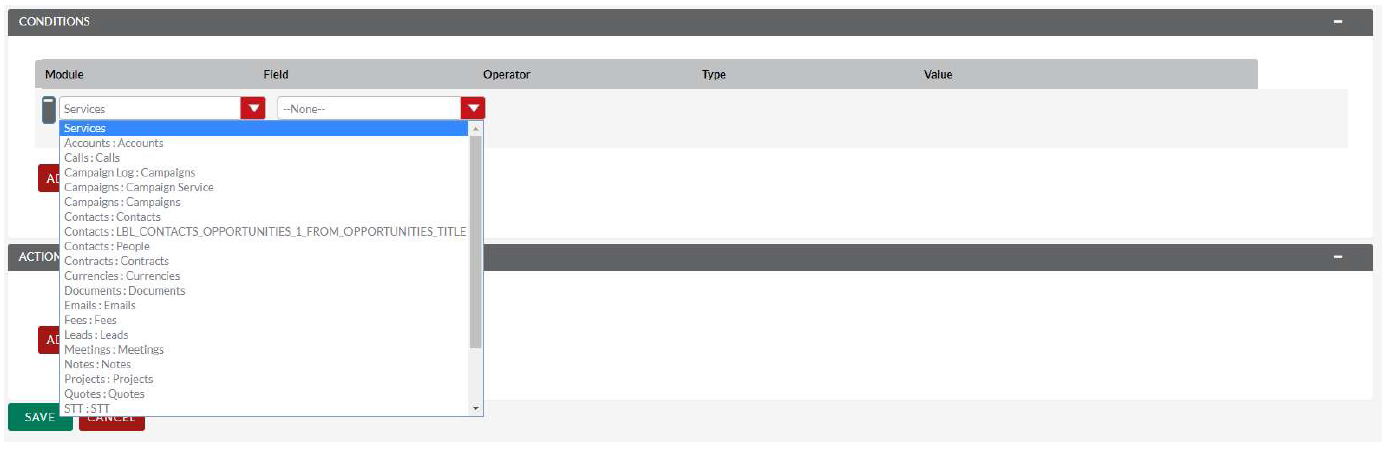
Module
Module is a drop down which will default to the module you’ve set the Workflow to run over. In this example, that’s Services. If you want to add criteria based on information stored in another module (e.g. client type = client), then you’ll need to set this drop down to the module where the information is stored (for client type = client, that would usually be the Organisation module).
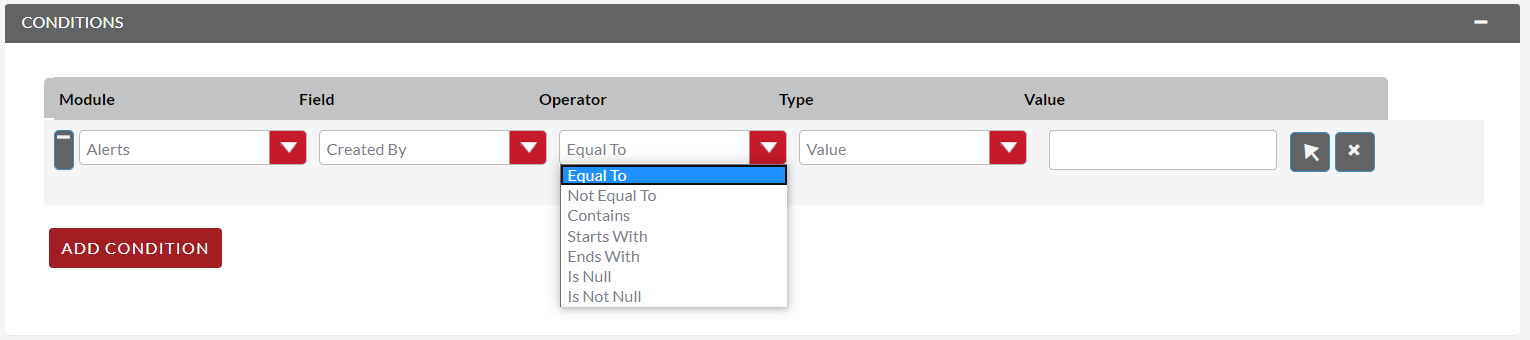
Field and Operator
Field is a drop down which automatically populates with all the fields found in the Workflow Module.
The Field selected will determine the options available for Operator and Type. If the field type is not a number or date then the operators available will be ‘Equal To’ or ‘Not Equal To’. For number and date fields you can also choose from additional logical operators; ‘Less Than’, ‘Greater Than’, ‘Less Than or Equal To’ or ‘Greater Than or Equal To’.
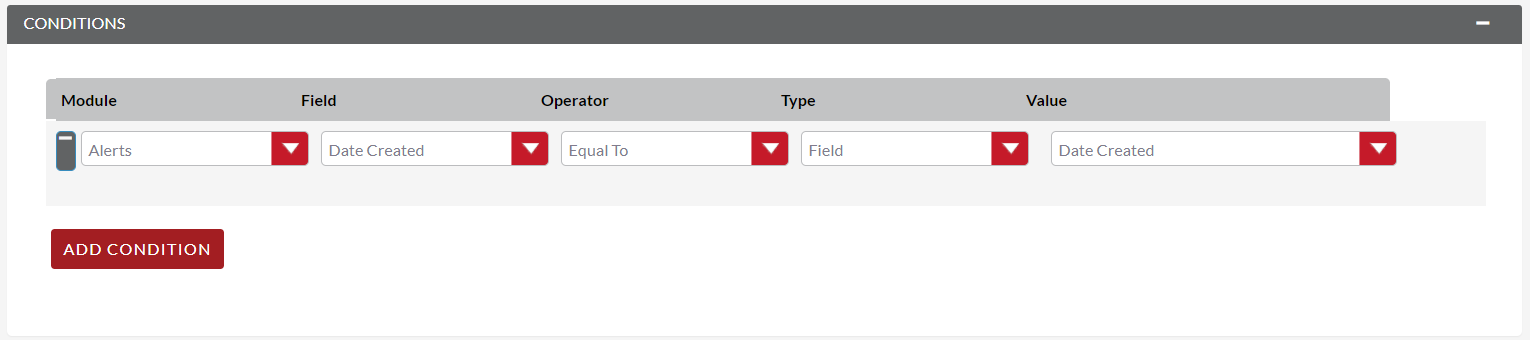
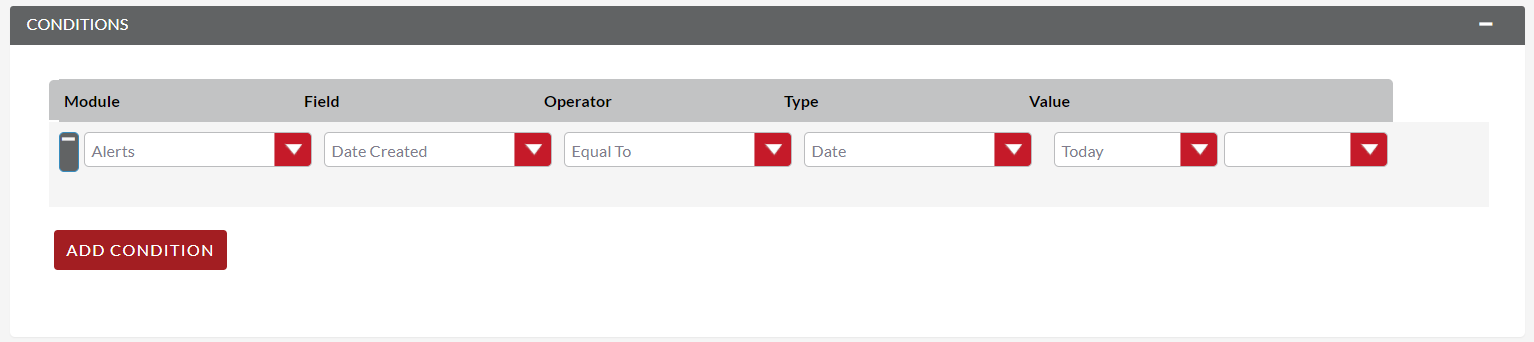
You can specify workflow processes to trigger on different condition types. These are as follows:
Value – This is used to directly compare the Field to a value. The value type offered is dynamic to the field type of the Field selected. For example, if the field type is a drop down then the value field type will be the same drop down list.
Field – This is used to action a workflow process when one field is compared to another field in the record.
Multiple – This can be selected if the Field is a drop down/multiselect. This allows users to specify multiple values to action the workflow from.
Date – This allows you to specify the workflow to occur after/before an amount of time from either another date field or ‘Now’. For example, when the start date of a call is ‘Now + 10 minutes’. This can only be used when the Field is a date field. The amount of time before or after the date can be specified in Minutes, Hours, Days, Weeks or Months.
You can remove Condition Lines by clicking the ‘-‘ button on the left hand side of the condition.
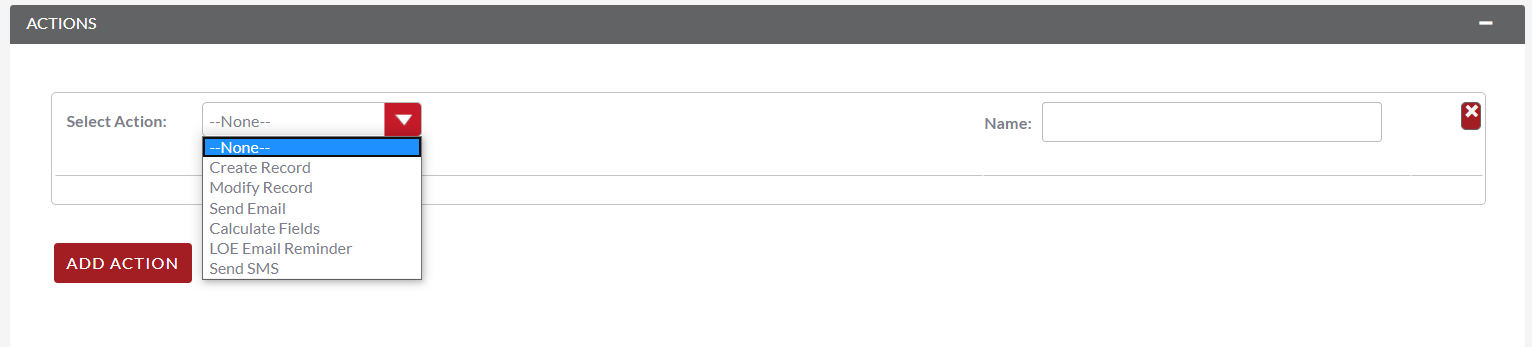
Actions are defined in the third panel. These specify what events should occur when the conditions have been met. You can add an Action by clicking the Add Action button.
This will cause the Action Line to appear.
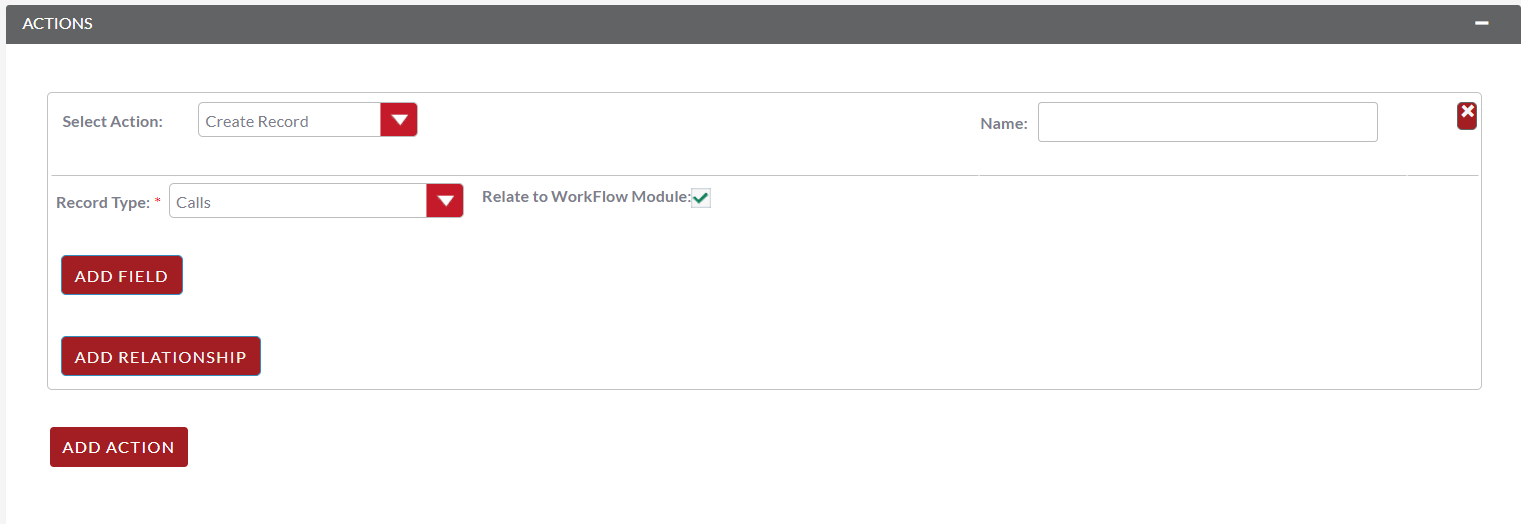
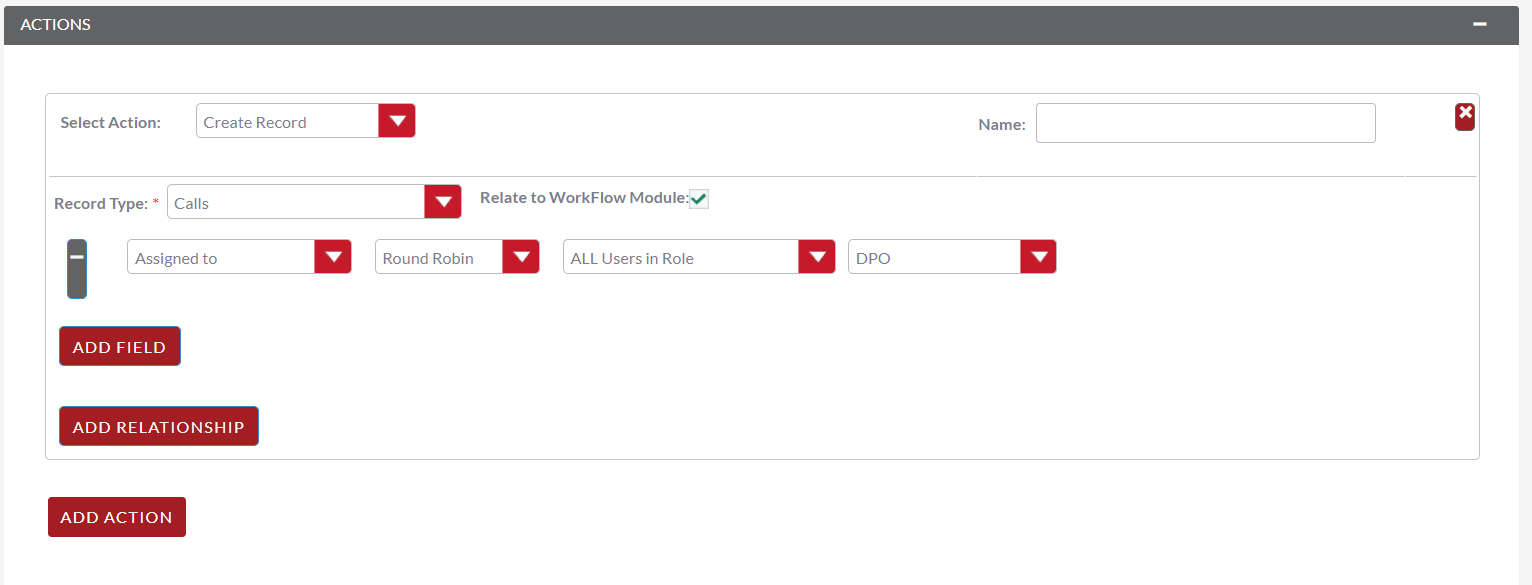
From the Action Line you can Select Action and give it a Name. The actions available are; Create Record, Modify Record and Send Email. You can specify an unlimited amount of actions for each Workflow process.
If you select Create Record you will be prompted to select a Record Type. This is the module type of the record you are looking to create.
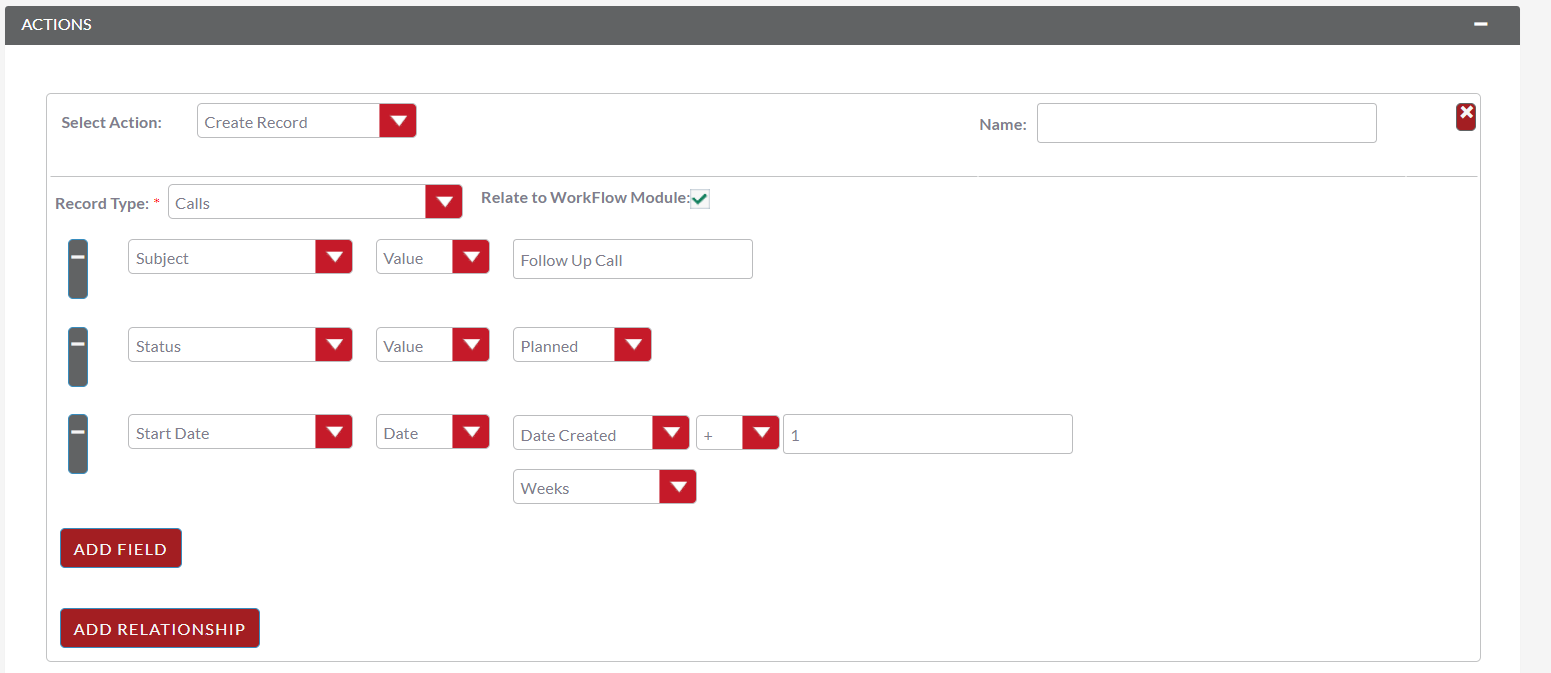
Once selected you can add fields or relationships to this record using the Add Field and Add Relationship buttons.
When adding fields the first drop down in the line will populate with all the fields from that module. The second drop down allows you to specify how the value for that field is going to be derived. For most cases the options are as follows:
Selecting the Assigned-To field also gives you more options. As well as by value and field you can assign a user by:
For each of the above options you can choose if you want you to be selected from all users or users from a specific role. If you have the SecuritySuite module installed you can additionally choose if you want you to be selected from all users from a particular Security Group or all users from a particular security group with a particular role.
When adding relationships you must select the related module from the drop down list then select the record that the new record should be related to.
Note: You must selected the related module using the arrow button – The auto completion on the text field is not currently developed.
This provides the same functionality as Create Record but instead of creating a new record you are modifying the record which met the conditions of the workflow process. With this action, you can modify any field found within the record or you can add a relationship to another record. This is completed in the same way as Create Record except you are not required to specify the Record Type.
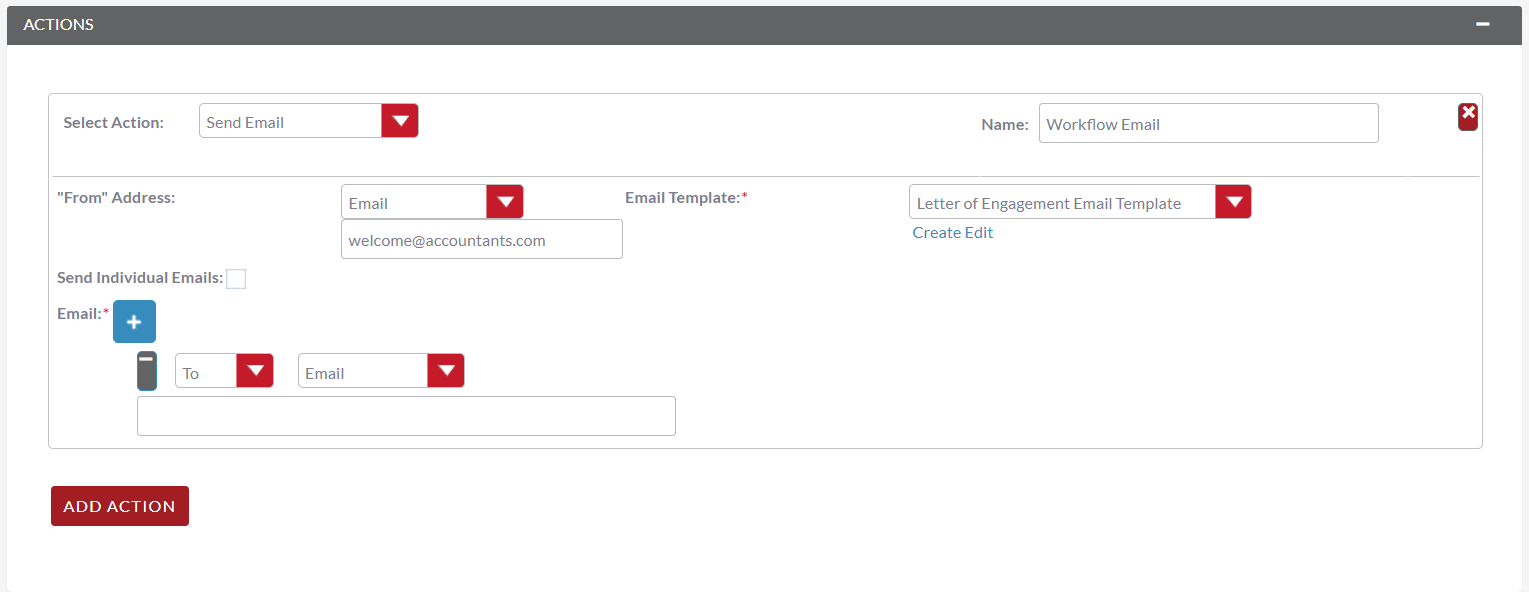
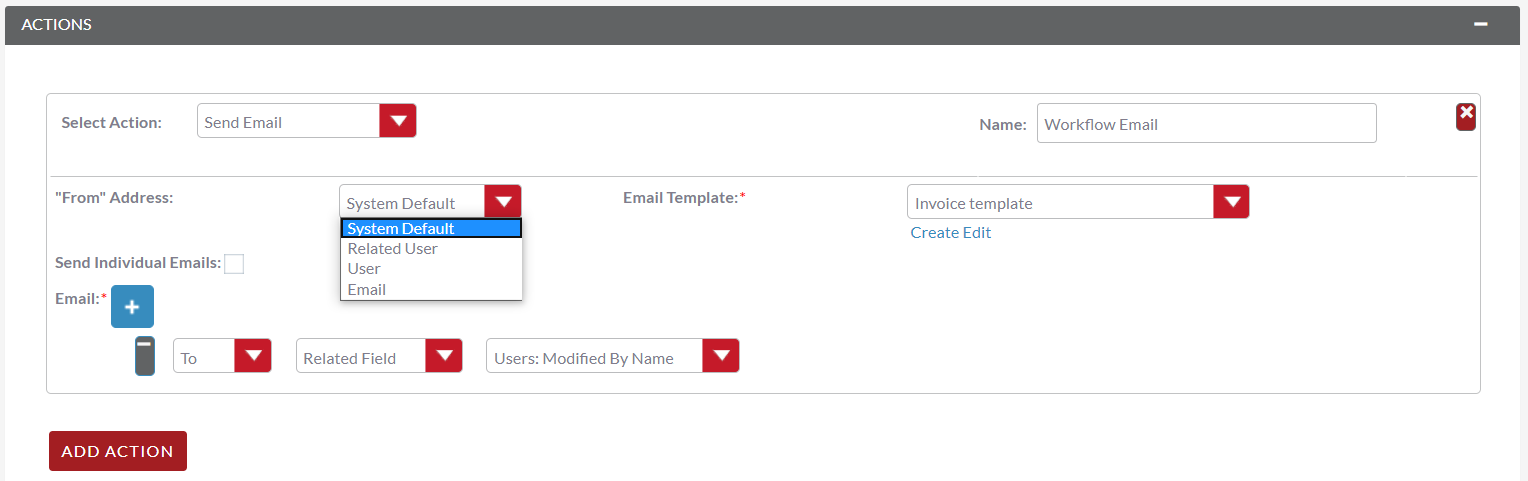
The Send Email action allows users to create workflow processes which will send an email based on a template to individuals. Using this action there are four different types of recipient.
Email – This will send an email to a specific email address. You must specify the email addressand the email template.
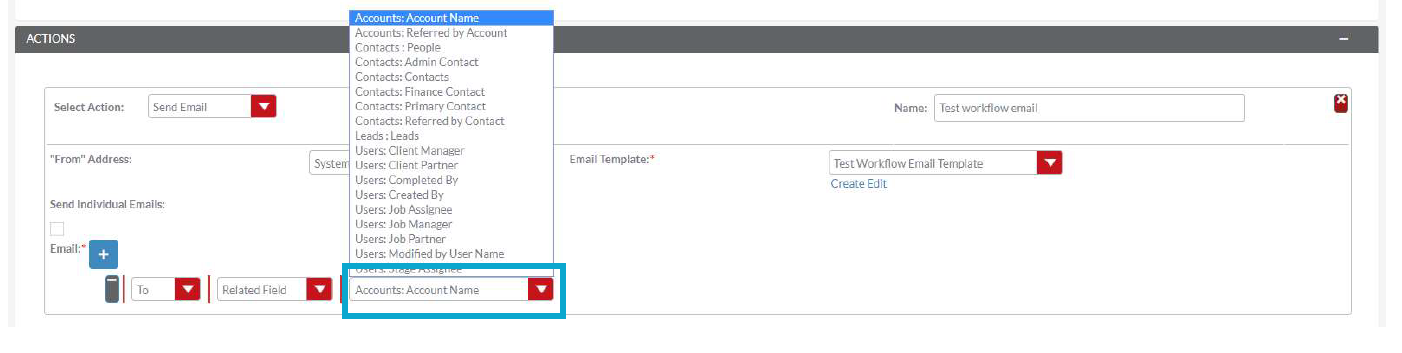
Related Field – You’ll now need to choose where you want it to go, it will go to the primary email address specified on a related module’s record. You can select this from the drop-down. Accounts:Account Name will send the email to the email address on the account. If you want it to go to the primary contact of the account, then chose Contacts:Primary Contact. You will need to check the quality of your data in the CRM – if you chose for the email to go a primary contact, but you don’t have primary contacts for your accounts (or your primary contacts don’t have email addresses) then the workflow will fail.
User – This will send the email to a specified Users email address. You must specify the recipient user and the template of the email.
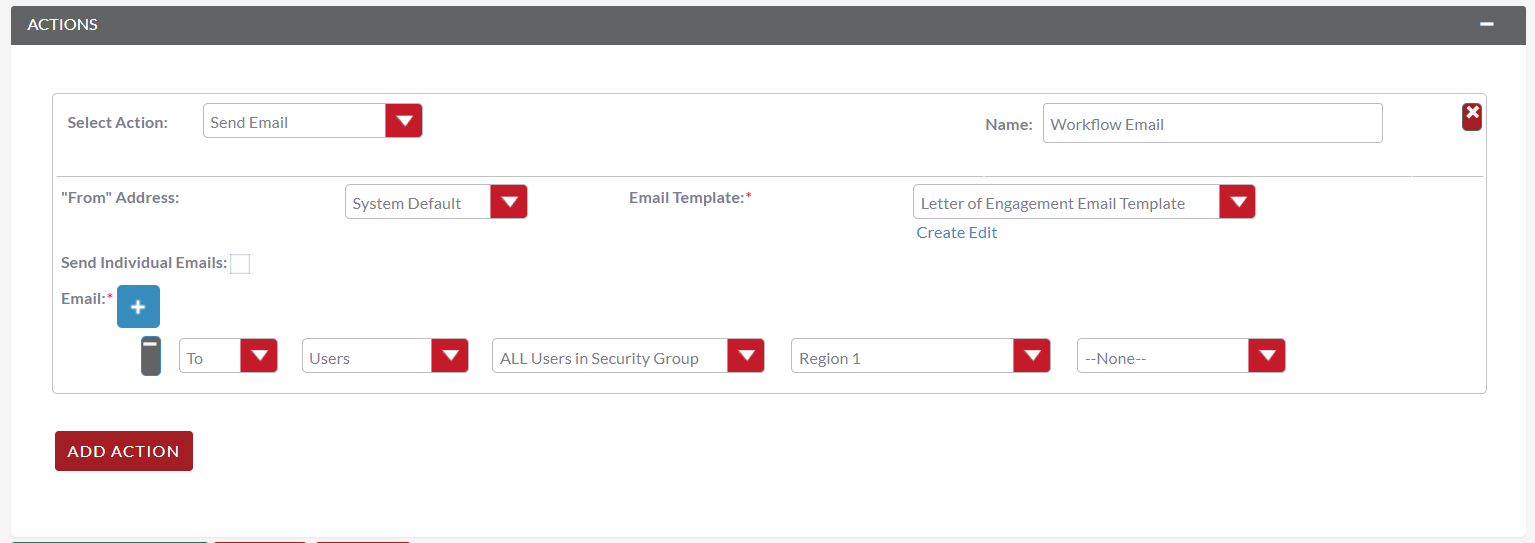
Users – This will send an email to a group of users (from a drop-down list) and the email template. Again, you will need to ensure that the recipients have valid email addresses linked to their login or the workflow will fail.
You can also choose who the email comes from. This will need someone who is in the CRM system and has their email credentials set up. You can choose someone from the drop-down:
The criteria for these drop-downs are the same as above. However, if you chose for the email to come from “Related User”, the options will be dependent on what module the workflow is built over. E.g. if built over services, you can have the email coming from the job assignee, client partner or manager etc. These fields will need to be populated in your CRM, and the related user will need to have their email credentials in the system for the email to trigger successfully.
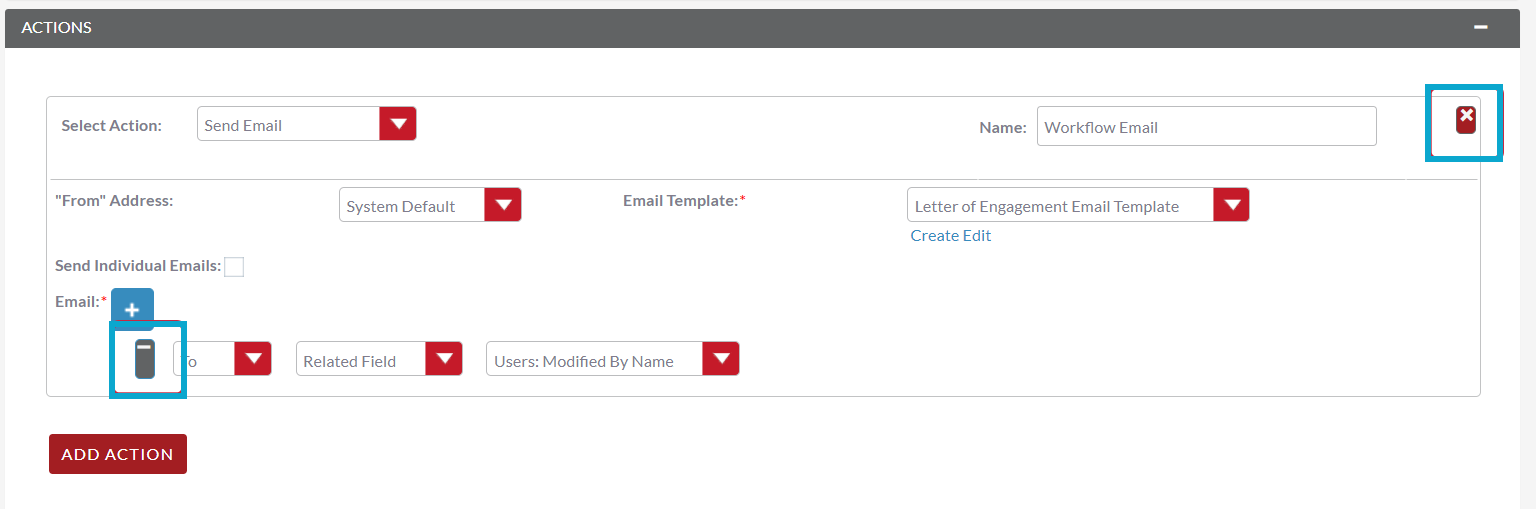
You can remove Action Lines by clicking the ‘X’ button on the top right hand side of the Action.
Removing Field and Relationship Lines
You can remove Field and Relationship Lines by clicking the ‘X’ button on the top right handside of the Action.
Advanced OpenWorkflow allows users to audit your processes. In the Detail View of each WorkFlow record there is a sub-panel called ‘Processed Flows’.
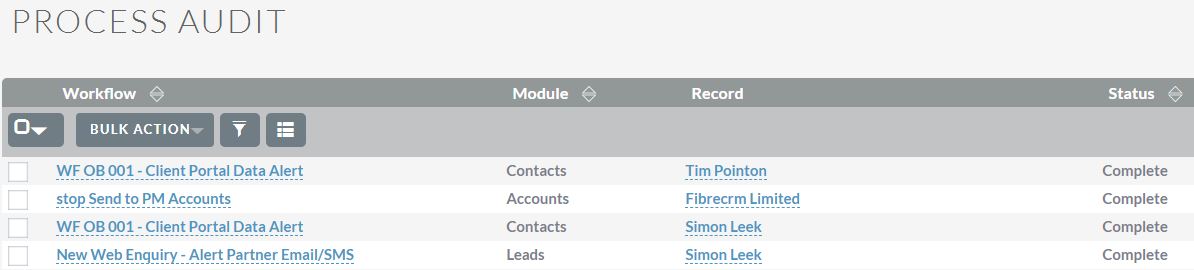
This lists all the workflow processes which have been actioned including details on the record which actioned the flow, its status and the date it was created.
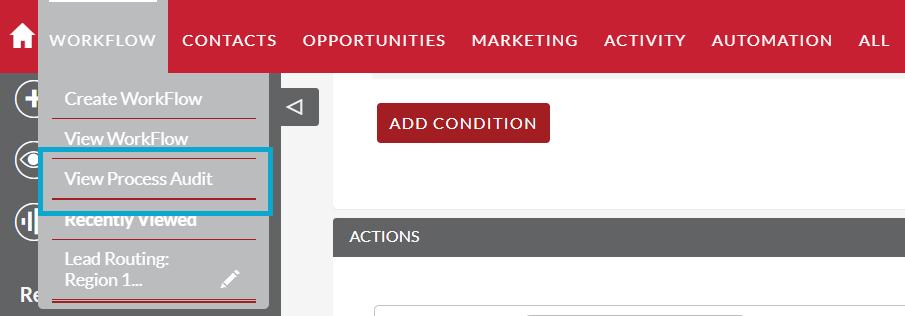
You can view this information at a higher level by clicking the ‘View Process Audit’ button within the module action bar. This will show all the processes that have run for all the Workflow records