How Can We Help?
AML Checks in CRM using Smart Search Integration – User Guide


As part of your new client onboarding process or annual due diligence on existing clients, you can use FibreCRM to conduct your Anti-Money Laundering checks. Integrated with your Smart Search software you can run and view results of a Smart Search checks within FibreCRM. Results can then be stored in FibreCRM which can be used as part of the clients KYC.
Before an AML check can be performed within CRM information on the Person/Organisation needs to obtained and added to the fields in their sensitive data records such as; Address, Proof of Address, ID, Passport and other sensitive pieces of client information. This information will need to be obtained so the AML search can be completed.
To do this you can send a client information request to your client. For information on how to send a Client Information Request and how to save the information and document your client submits please see our user guide: Sending a Client Information Request – FibreCRM Support Portal
Once you have all the information and documents from the client that you require you can then move on to conducting an AML check.
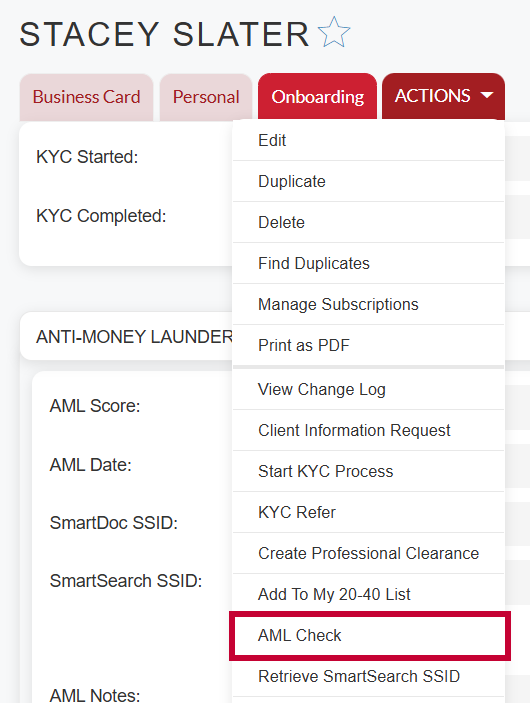
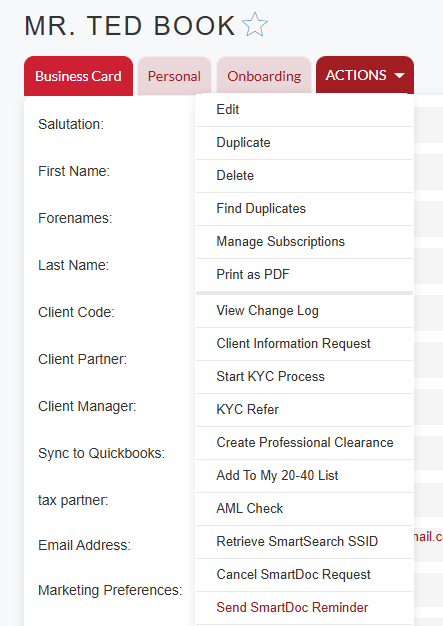
To conduct a Smart Search Checks in FibreCRM, first navigate to the Person record you wish to conduct the AML check against. In the Person record select the AML Check option in the Actions Menu.
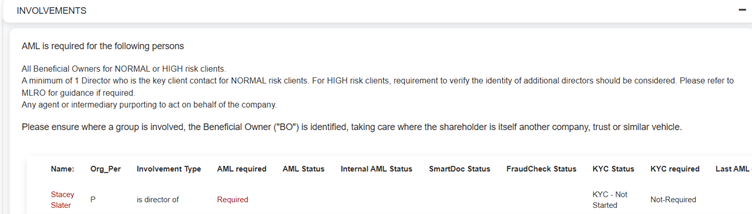
Or if you’re conducting this via the Involvements Subpanel on an Organisation KYC form or Person/AML Subpanel in a Person KYC form click the Required button.
Note: The option to run an AML Check in the Actions Menu the consent given tick box will need to be ticked in the Onboarding Tab. The AML role must also be assigned to the User who is conducting the search and login details for Smart Search added to their CRM user account. For more information on roles please see our user guide: SmartSearch adding user details and AML roles
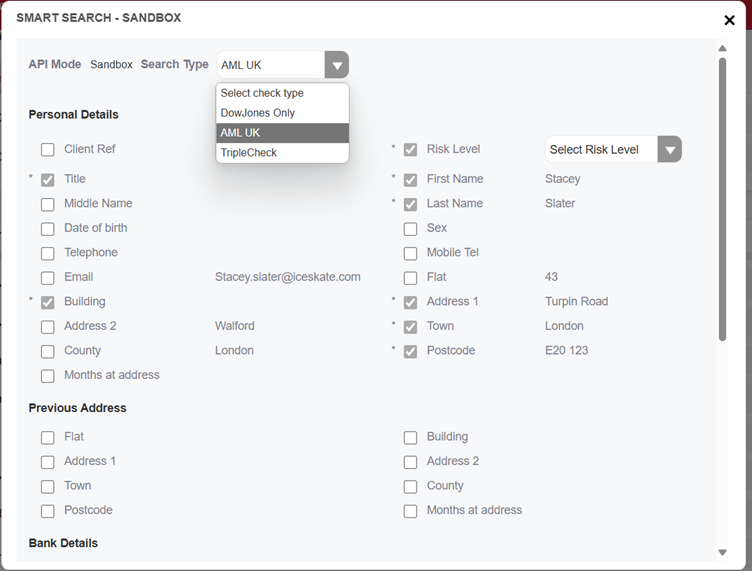
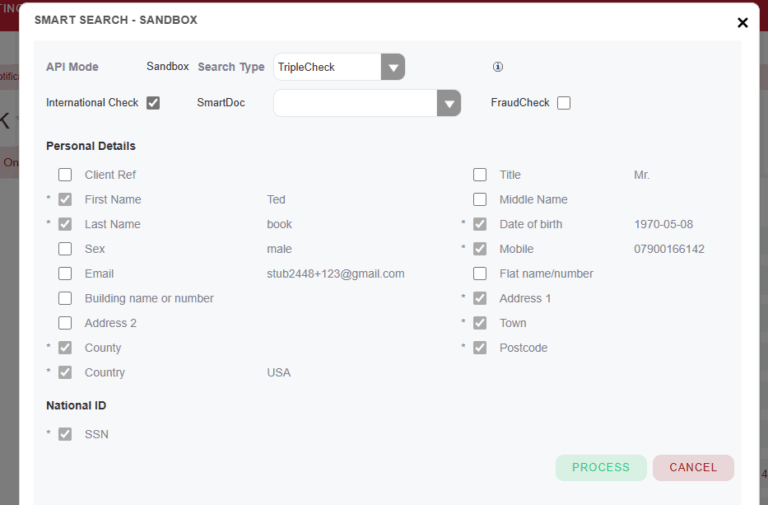
Once selected a pop up box will appear where you can select what type of Search Type you’d like to conduct in the drop down which could be AML Check, Triple Check or Dow Jones only.
A search may have been set as the default search depending on your system/profile settings.
AML Check – this provides the identification, verification and screen of the person using the parameters for the person record.
SmartSearch TripleCheck has 3 components which can be run together or independently, select the options you require.
AML Check – this provides the identification, verification and screen of the person using the parameters for the person record.
SmartDoc – Using documents such as the persons passport or driving licence to validate details which can be combined with Facial recognition for likeness.
This feature can use data held in the CRM Sensitive data for the person or it can be sent to the client for them to provide the documentation. If sent to the client you can also request to have them upload a selfie for facial recognition. The client uploaded documents will also be stored in the CRM
FraudCheck – Identify and verify individuals in order to highlight false identities
This could be just a stand alone AML Check from the search type or as part of a smart search triple check. The check itself is exactly the same.
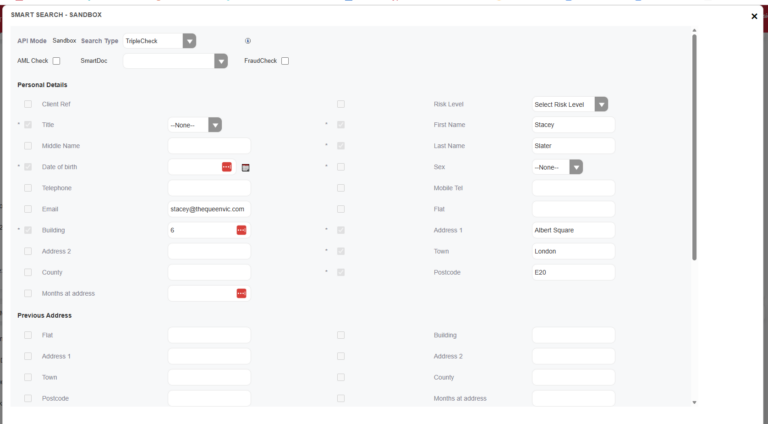
If you select AML check in the Personal details you’ll see a list of fields that could be sent up to Smart Search for the AML check.
You’ll need to choose the Risk Level using the drop down option.
Within the list of fields, Mandatory Fields that are required for the search have a * next to them. You won’t be able to run the check if these fields are not filled in.
For the other fields you are able to untick any field boxes you don’t wish to run through Smart Search, some of these fields may have been ticked by default which will have been set up by an Admin user for your system.
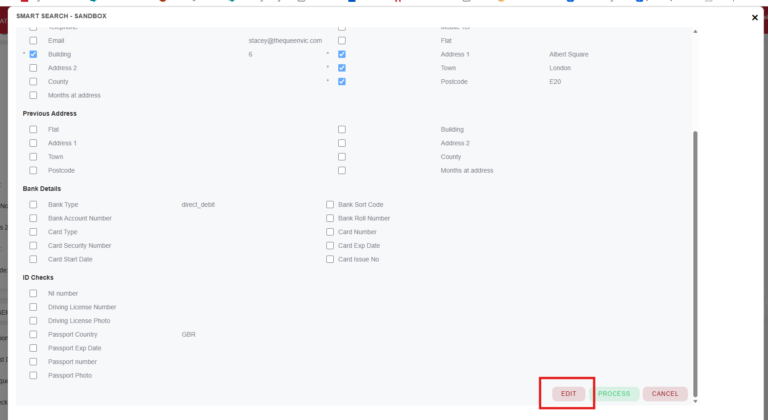
f you need to change any information before you run the checks, select the Edit option located at the bottom of the screen. You can then type in or update any of the information in the AML check details, such as the address information, date of birth or any information that is currently missing.
Once you have made the changes, click Save. The updated information will also update the client record and will be available for the AML check.
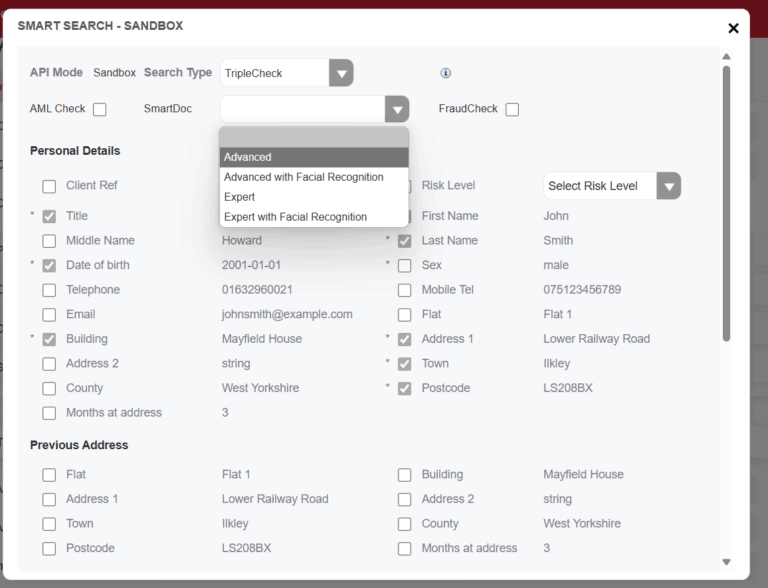
For the Smart Doc option you will need to use the drop down for the type of search you would like. There are four options available which are Advanced, Advanced with Facial Recognition, Expert and Expert with Facial Recognition. Choose the one you require from the drop down.
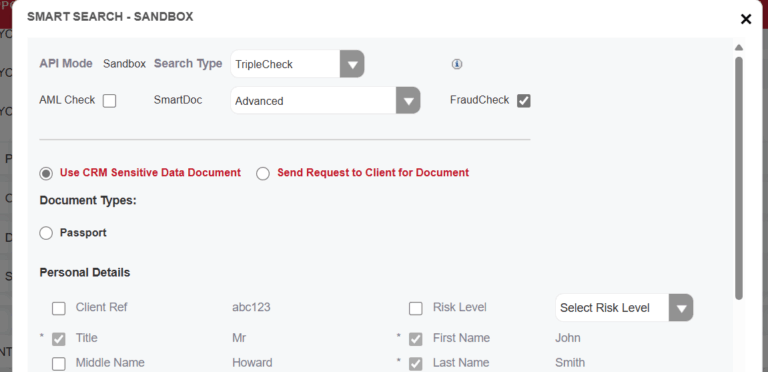
Once selected 2 options will appear below these will be; Use CRM Sensitive Data Document or Send Request to Client for Document.
If you’ve selected Advanced or Expert, the Use CRM Sensitive Data Document option will allow the Smart Doc to use documents that are stored in the sensitive data module for the client. These document may have been acquired by a client information request or by adding manually into the system. Once selected you will see Document Type options which will display what documents are available for you to choose for the triple check. Select which documents you’d like to use for the Smart Doc by using the tickboxes. If you need to add any additional documents for this add them in the sensitive data section for the client. If you have none of these documents the option will default to Send Request to Client for Document.
If you’ve selected Advanced with Facial Recognition or Expert with Facial Recognition this will also default to Send Request to Client.
With the Send Request to Client option you will see a Send Request to Client via dropdown where you can choose between Email or SMS for the request. Below that you can choose what document types you are going to request from the client. When the smart doc comes back from this request the supplied document will also be stored in the Sensitive Data section for the client.
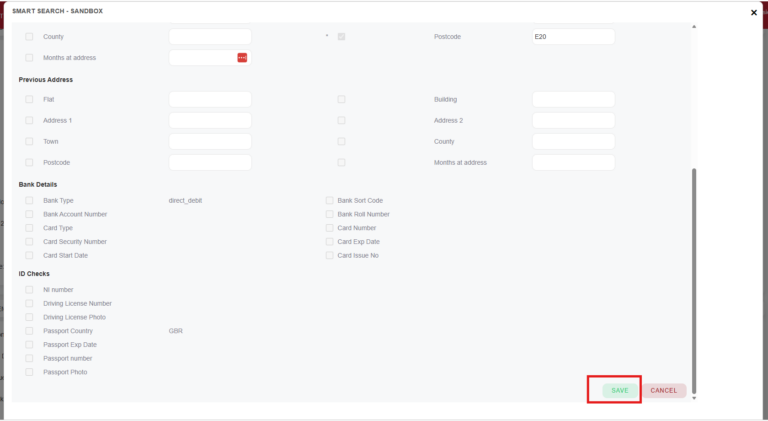
You can also conduct Fraud Checks to do this select the Fraud Check option and once processed you will receive a Fraud Check result in the AML record and attached PDF report.
Once you’ve selected the options you require click process the searches will then take place.
If you have sent a Smart Doc request to a client at this point the request will go out either by Email or Mobile depending on the option you have selected to conduct the SmartDoc.
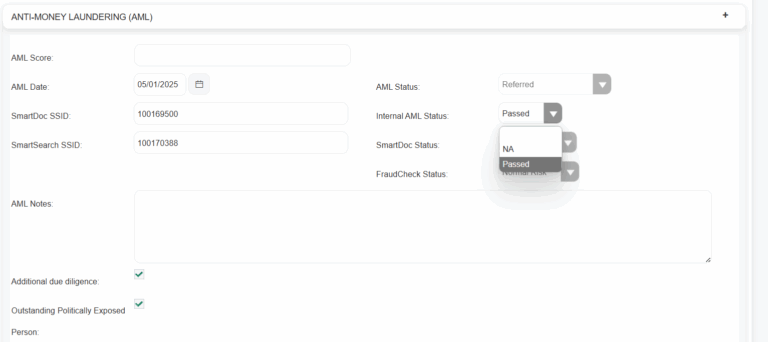
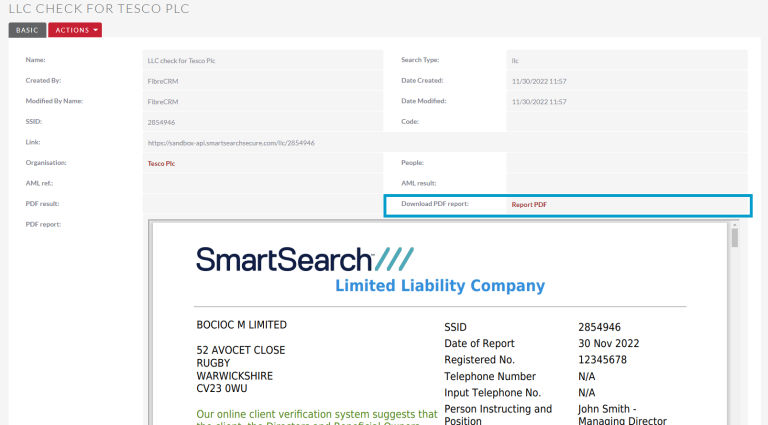
Once the check has been processed an AML check record will be created for the Person record here you can view results of your chosen check. The results for the check will appear with a SmartSearch report. You can download a copy of the report in PDF format by clicking Report PDF in the Download PDF Report section.
In the record you will see 3 SSID fields for the different types of checks these will be populated if you have conducted that type of check. Opposite those fields are the Result field which will display each of the checks results, the results are also colour coded.+ In the Smart Doc field if the Smart Doc request has been sent to the client you will see the field will display Pending until the client has completed the request. Once completed you will be notified that this has been completed.
In the Search Type field, you will be able to see what types of check was conducted on the client.
The results for the checks will also be able to view in the Person record either in the AML fields in the Onboarding tab, in the AML check history subpanel or the KYC Involvements Subpanel/Person/AML Subpanel in the KYC forms.
If you have sent the Smart Doc request to the client the documents they have submitted for the Smart Doc such as the image of the passport will be saved in the sensitive data record related to the person record automatically.
If you send a Smart Doc request to the client you can send a Smart Doc reminder from that individuals person record. In the Actions Menu of the Person record select the Send Smart Doc Reminder option. In the Send Request To Client Via Drop Down you can select between Email Address and Mobile to send the reminder to, this however will default to the selection you chose when you initially sent the Smart Doc request. Once ready click Send Notification and the reminder to the client will be sent.
You also have the option to cancel the SmartDoc request if needed from the Actions Menu
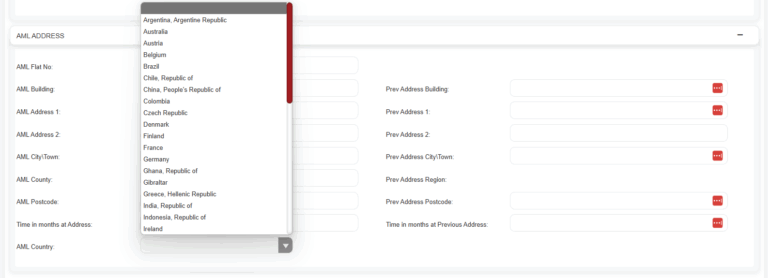
Smart Search International Checks can also be conducted in FibreCRM for both individuals and businesses. Fibre can automatically distinguish whether you need AML UK or an International Search by using the AML Country Address Field.
To conduct an international smart search, go to the individuals person record. Check the AML address country field and fill in the country if it doesn’t have information in already:
To conduct the AML search select AML check from the Actions Menu or via the Required field in the KYC forms in the Involvements subpanel (Organisation) or Person/AML subpanel (People).
Depending on the Country that the client is related to different required fields may appear that will be need information in for you to conduct the check such as the National ID Card which can be found in the sensitive data record of the person. If you need to add any information go into the record and update the fields and then conduct the check again.
A list of all required documents for each country available in the International Check is available here: https://support.fibrecrm.com/wp-content/uploads/2026/01/SmartSearch-International-Checks-National-IDs.xlsx
Just like the AML UK when you’re ready to process select the Process button, your results will appear once the check is complete.
Note: If you are sending a Smart Doc and requesting information directly from the client when doing an International Search, you will need to send the request via Email.
Within a Person record you also have the internal AMLl field. To sign off a KYC form in Fibre a pass for the AML results needs to appear on the form. So this field has been implement to allow you to overrule the Smart Search result (such as the client coming back as refer) with your internal result. Please note this Internal AML field should only be used to overrule the AML, SmartDoc or Fraud Check results for sign off.
To enter an Internal AML result go to the drop down in the field and select Passed and then click Save & Close. The internal AML Status field will then update with your internal pass result and will allow you to sign off the KYC.
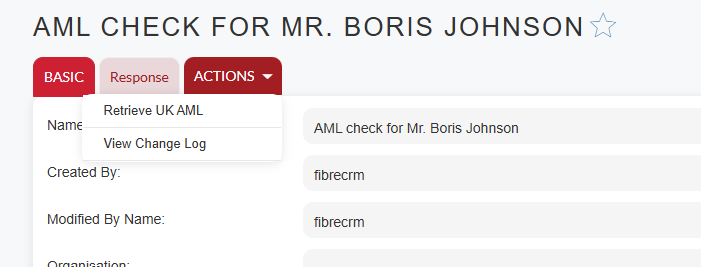
If an AML Check comes back as a Refer or Fail you will need to login to Smart Search and deal with the search there. Once your procedures regarding a Refer or Fail have been completed you can add the updated report back into the CRM. To do this go the AML check record which contains the original AML result.
In the Actions Menu select Retrieve UK AML.
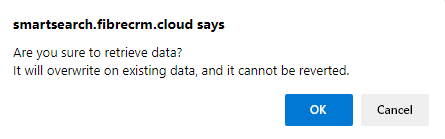
A pop up box will appear asking if you would to like retrieve the report data and letting you know it will update the record, click Ok. This will bring through the updated search report and update the each Search Type field depending on what has been conducted in that search. The retrieving of the search will also update the fields in the Person record as well with the latest search.
If a client with outstanding due diligence is cleared then the Outstanding due diligence flag and associated details of PEPs SIPS etc in their record will be cleared and their AML status will update from Passed with Warnings to Passed.
For Smart Doc client submissions these are run on a scheduler so will not update instantaneously on client submission. If you are aware that a client has submitted their smart doc request and don’t want to wait for the scheduler to update the field then you can use the AML retrieve button to bring in the latest result ahead of the scheduler. This will also pull in the documents that the client has submitted into the relevant fields in the sensitive data record related to the person.
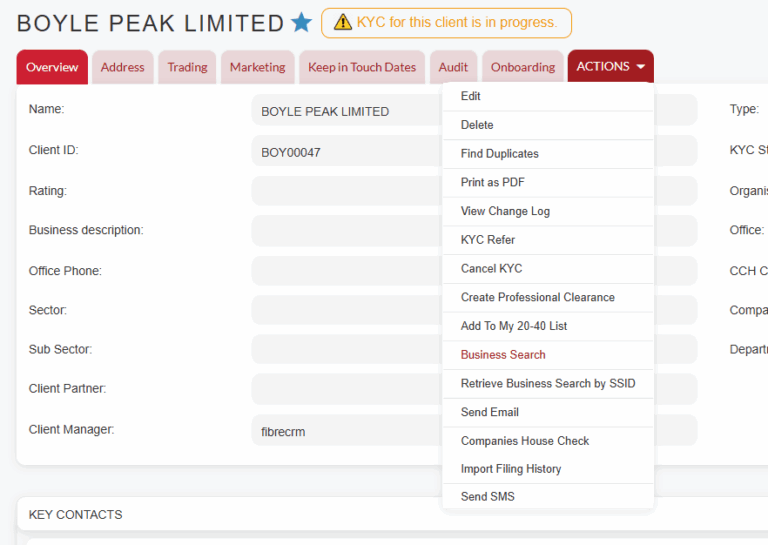
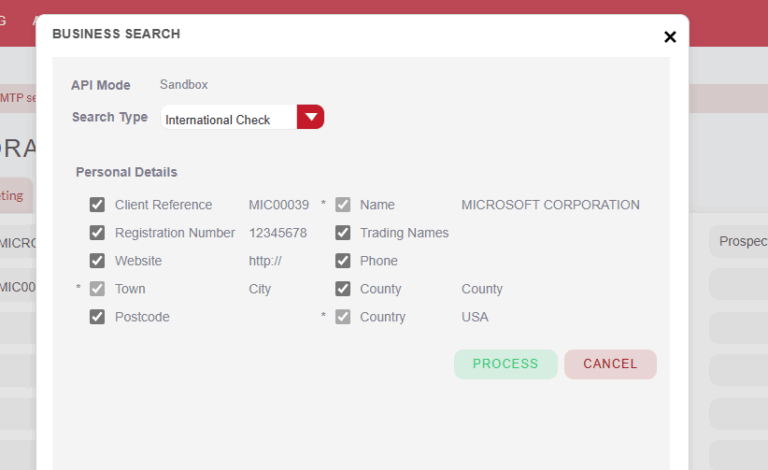
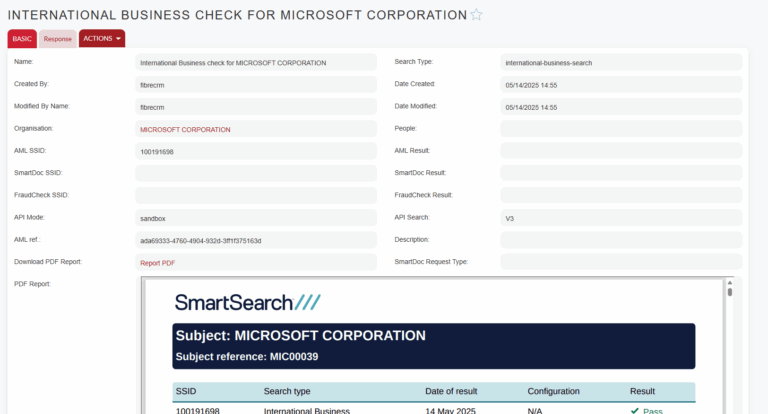
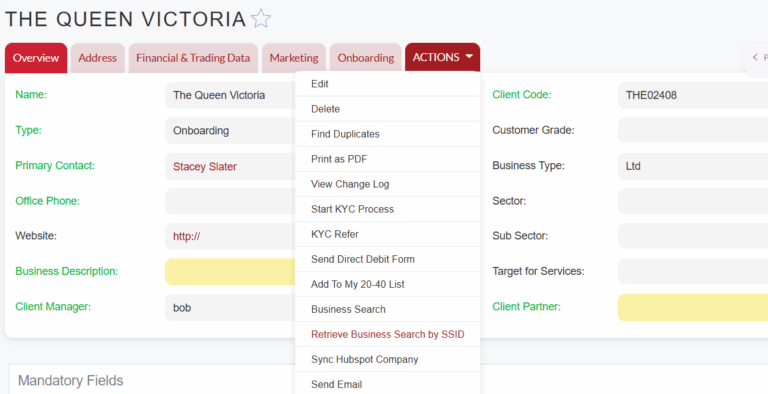
To conduct a Business Search on an Organisation using Smart Search, navigate to the Organisation record you wish to conduct the Business Search against. In the record select the Business Search option in the Actions Menu
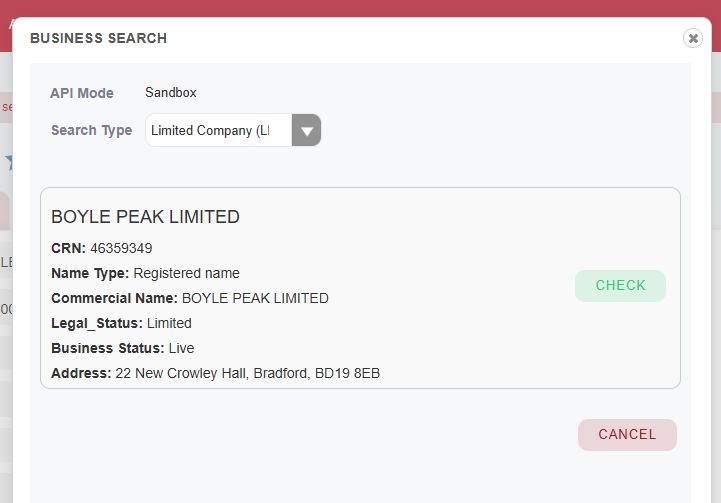
In the Business Search pop up box select the Search Type from the drop down menu. Check the details are correct in the details section and when ready click Process.
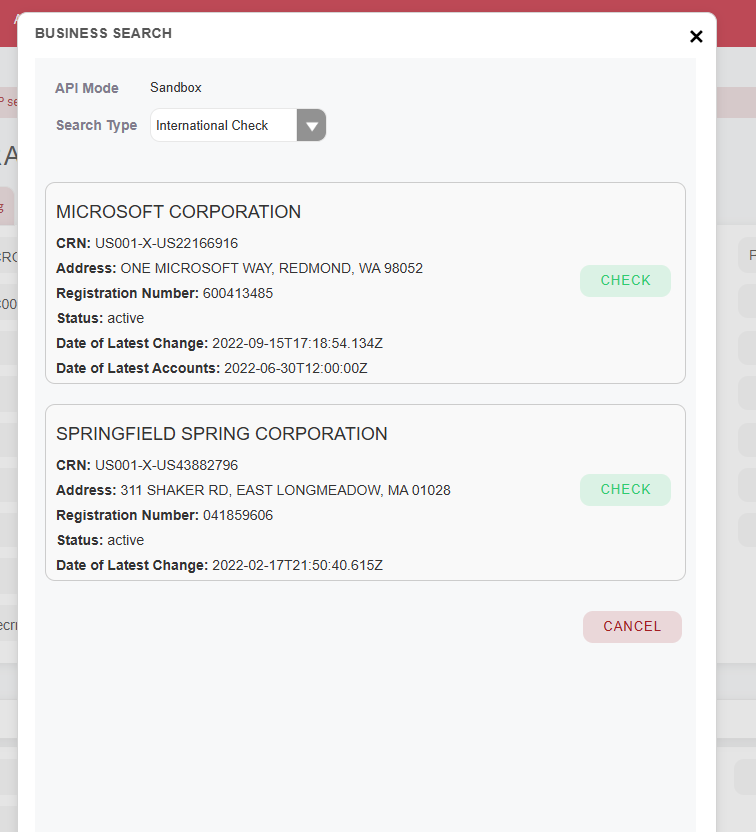
You’ll then be taken to the select Company page. Select the company that matches the organisation you’re conducting a business search on. Select Check
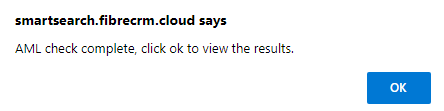
A pop up box will then appear saying that the AML check is complete. Click OK to view the results.
A record will then be created, in the record you’ll get a report containing the information from the Business Search.
Smart Search International Checks can also be conducted in FibreCRM for businesses. Fibre can automatically distinguish whether you need AML UK or an International Search by using the International Check Country Field.
To conduct an international smart search, go to the individuals person record. Check the International Check Country Field and fill in the country if it doesn’t have information in already:
To conduct the AML search select AML check from the Actions Menu.
In the pop up you’ll now see the search type is International Check choose that from the drop down and select Process.
The pop up will then show a list of potential matches for the organisation choose the correct one and select Check.
A pop up will the tell you the check is complete, click OK and you’ll be taken to the business search record where you can view the check information.
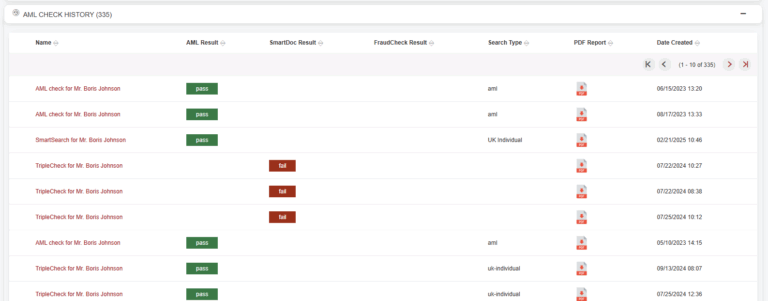
You can see all Smart Search checks that are in the system by going to AML check history module. In the module you’ll be able to see the checks that have been completed against which clients and their results, a link to the PDF report of the check and the SSID codes for the different types of checks as well.
You can also view any SmartSearch Checks that have occurred by scrolling down to the AML Check History Subpanel in the relevant record. To view click the blue hyperlink on the result you would like to view this to will take the result page.
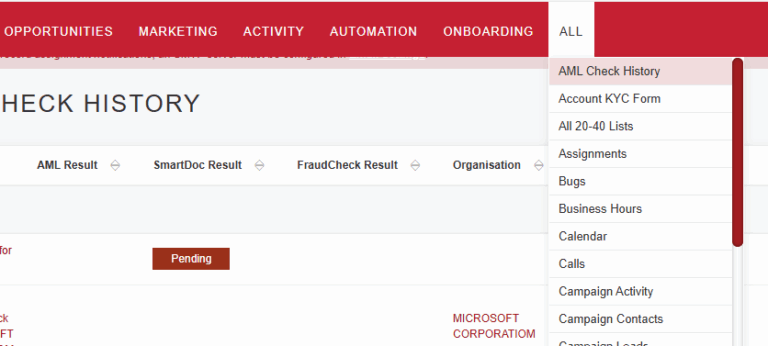
You can also view AML checks by selecting Onboarding or All option in the Navigation Menu and clicking AML Check History.
All AML checks performed from within FibreCRM will be listed, you can use the filter system to search for a specific person/organisation. Select the hyperlink under the name column to view the details.
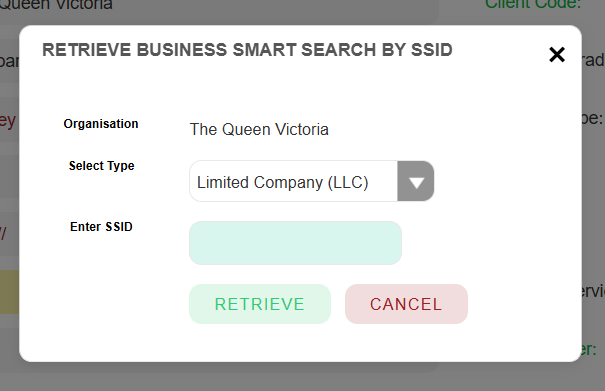
You have the ability to add previous/historical AML searches that were conducted in Smart Search on an individual or organisations. To do this navigate to the Client Record and in the Actions Menu select Retrieve SSID.
A pop up box will then appear. The first field will show the name of the Person and below you will have the Enter SSID field where you can enter the SSID number (which can be found in Smart Search) of the search you would like add to the CRM. Then click Get AML Record.
This will create an AML record in the CRM which can be viewed in the AML Check History subpanel on a Person or Organisation.