Creating + Amending KYC Forms
Introduction
As part of the Onboarding Module in FibreCRM you can
complete KYC Forms as part of your onboarding process. The KYC forms
your practice completes can be customised within the CRM to make them suitable
for your firms onboarding process. This document will cover how to create a KYC
form and also how to edit an already created form.
Creating a KYC Form
To create a KYC form, first navigate to your username in the top right hand corner and in the drop down menu select Admin.

In Admin scroll down into FibreCRM Modules and
select KYC Form Builder.

In the KYC Form Builder you can name your new KYC form in the Enter Form Name box. In the Select Form Type drop down you can choose if the form is for an Organisation or a Person. Once done click Create.

In the KYC Form Builder you can name your new KYC form in the Enter Form Name box. In the Select Form Type drop down you can choose if the form is for an Organisation or a Person. Once done click Create.
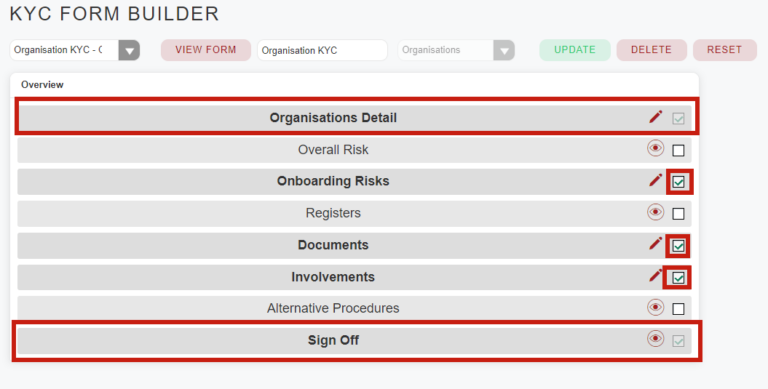
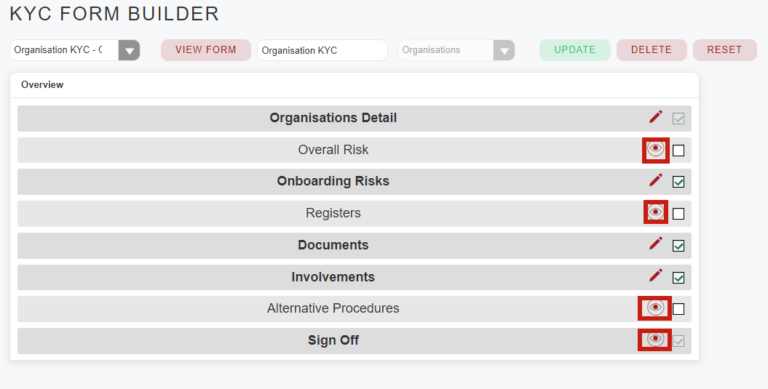
Sections that can’t be edited will have a View Icon for you to see what a section looks.
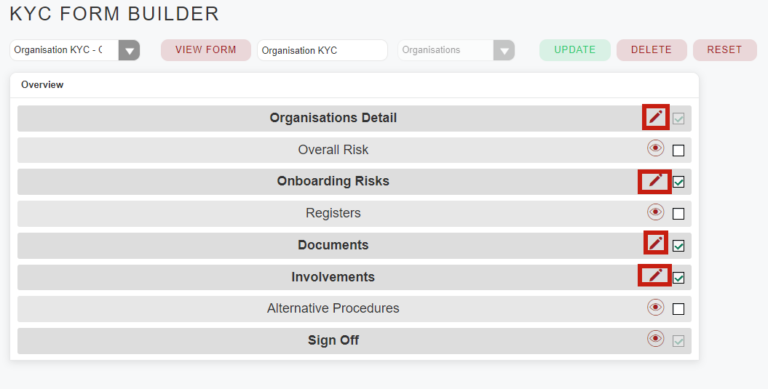
Sections that can be edited/customised by you will have the Edit Pencil icon next to the tick box. There are 4 sections that you are able to edit.
Organisation/Person Details
The first is the Organisation/Person Detail section, in this section you can select which fields that are in the Organisation/Person record are added to the KYC form.
Once you’ve selected this section to edit you’ll be taken to the edit page. On the left hand side a List of Fields and also the options to Add Rows and Add Panels. On the right handside there will the Overview section and a blank panel labelled ‘New Panel’.
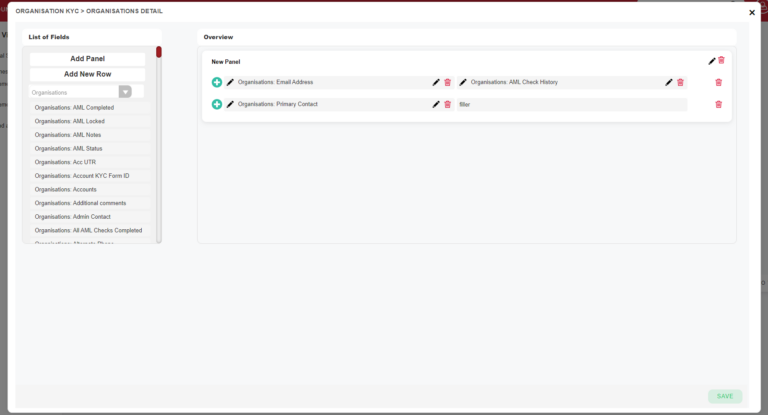
You can rename the New Panel to something more suitable for the KYC form by selecting the Pencil icon. In the name box, enter what you like to call the Panel and then click Save.
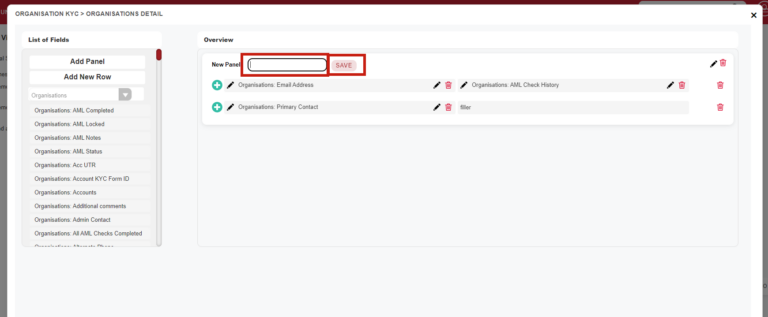
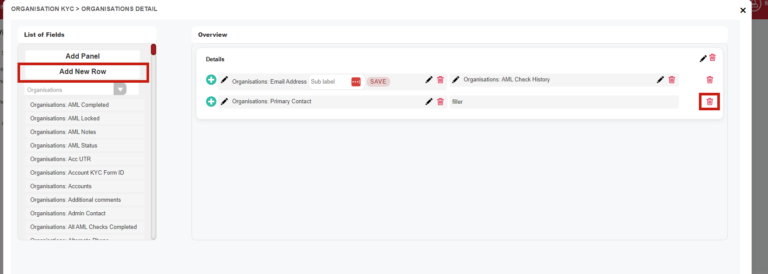
Select Add New Row to add fields to the Panel. This
will give you a row which will contain two fields from the Organisation/Person
record. You can add fields by dragging and dropping your chosen field from the List of Fields into the row. Once added you can add a Sublabel to the field using the Pencil icon. To remove the field either drag and drop it back to the List of Fields or select the Delete button.
You can add multiple rows to a panel. To delete any rows select the Delete button and to reorder any rows drag and drop the rows.
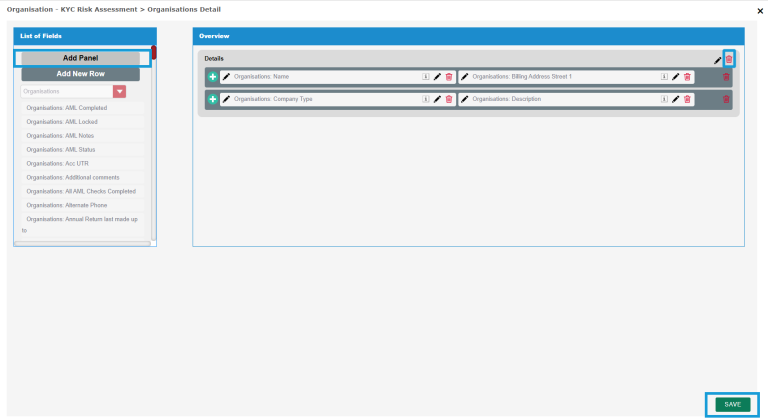
More Panels can be added to the form by selecting the Add New Panel option. To delete a panel select the Delete button and to reorder any panels, drag and drop the selected panels. Once done click Save.
Onboarding Risks
The second section you can customise is the Onboarding Risks which is where a user would complete Onboarding Forms. For information on how to create Onboarding Forms please see our user guide: Onboarding Forms User Guide – FibreCRM Support Portal
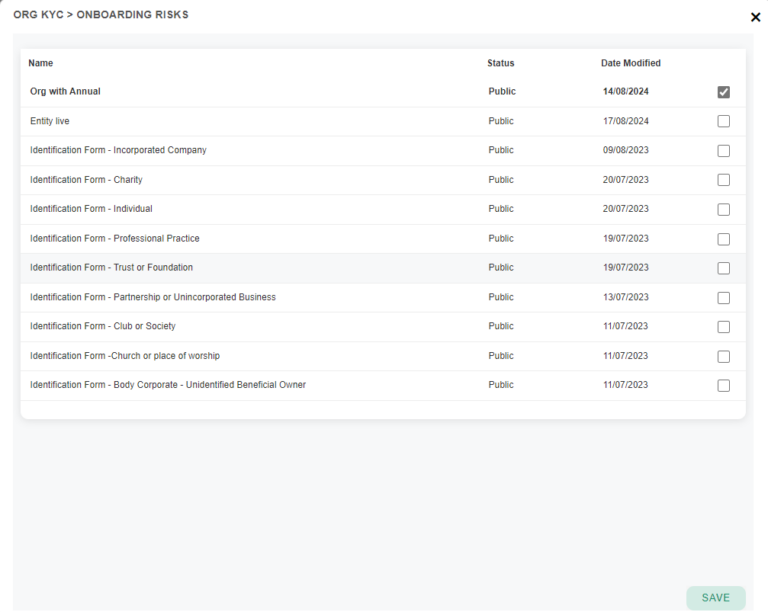
When customising this section you can select which Onboarding Forms pull through automatically to be completed in the KYC form.

To do this select this section to be edited using the Pencil
icon. You’ll then be taken to a list of available Onboarding Forms. Use the
tick boxes to select which forms you would like to see, you can choose multiple
Onboarding Forms. Once done click Save.
Documents
The final section that can be customised on your KYC form is the Documents section. The Documents section is where you can include relevant documents for the Organisation/Person in your KYC form.
When editing this section a list of all Documents will be shown. If you’re creating an Organisation KYC form the documents listed will be more tailored for a business such as Certificate of Incorporation, Group Structure, Register of Directors etc.
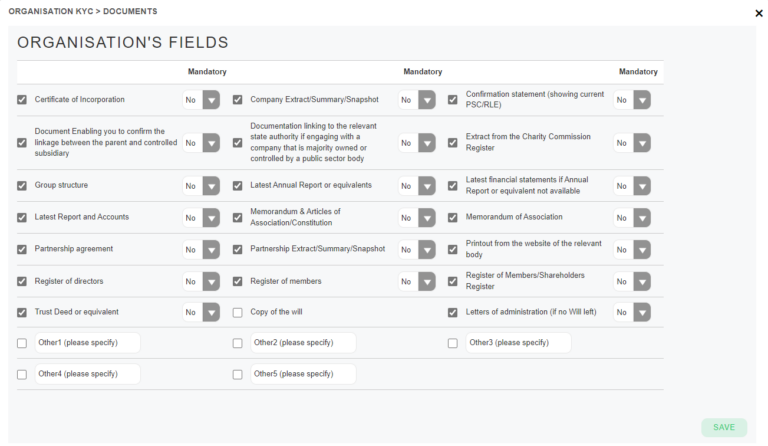
If you’re creating for a Person KYC form these documents
will be more tailored to the individual such as ID, Passport Photo, Utility
Bill etc.
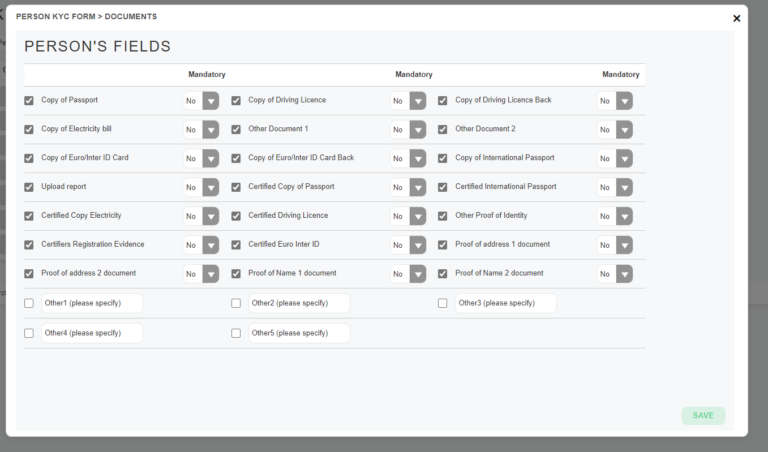
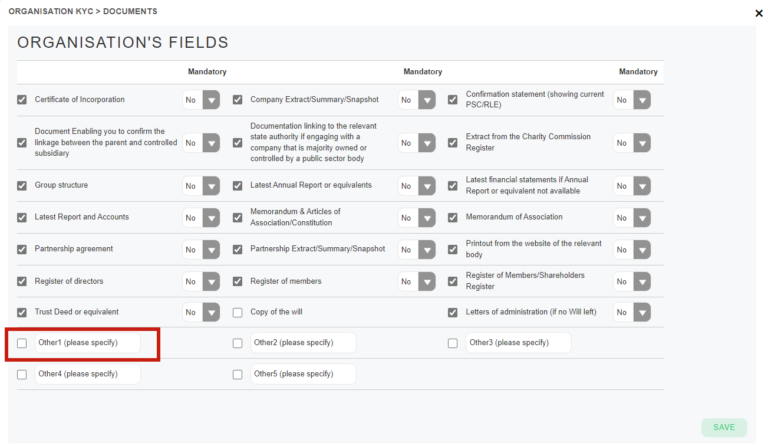
Use the Tickboxes to select which documents you would like to add to the form. At the bottom of the list you have empty Other fields where you can add other documents that are not listed but you need for your KYC form. Delete the text in any of the Other boxes and type in a heading for that document. Again select the tick box to make it active on your KYC form. Once done click Save.
Involvements
The final section that can be customised on your KYC form is the Involvements section. Here you will be able to edit the text that is labelled is shown in the involvements sections and also what fields information containing involvement information are showing.
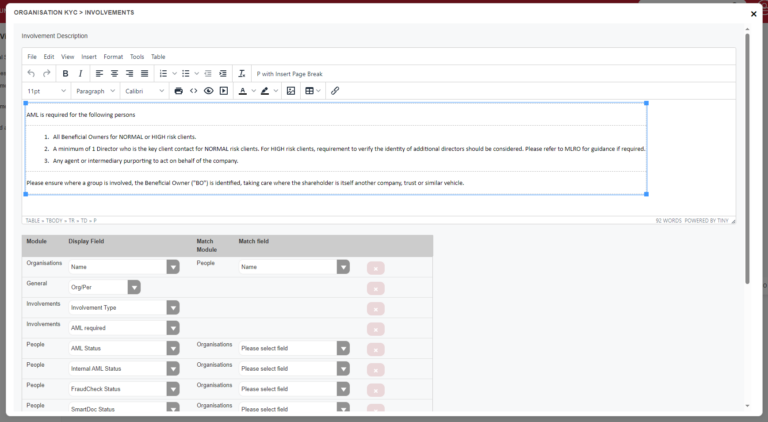
In the Involvement Description box you can customise the text that is displayed in the involvements section on the KYC form to make it more relevant to your firm. To make changes type in the text box – try and keep to the formatting that is already there in the box.


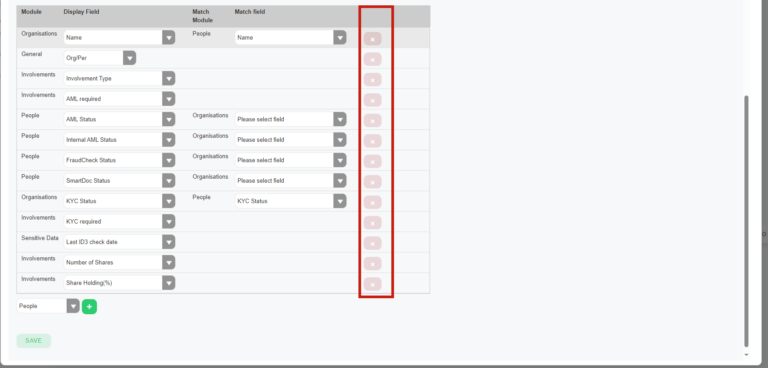
Below the involvement description you can select which you can choose what fields of information you’d like to display in the involvements panel.
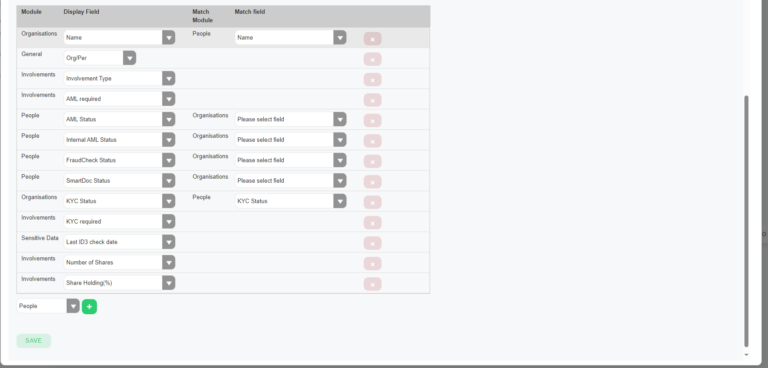

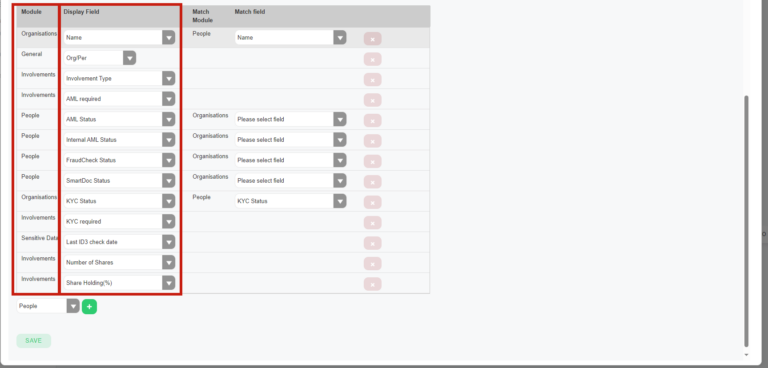
In the Module column this will show you which module the field shown is related to. In the Display Field column use the drop the down to select which field you’d like to display related to that Module.
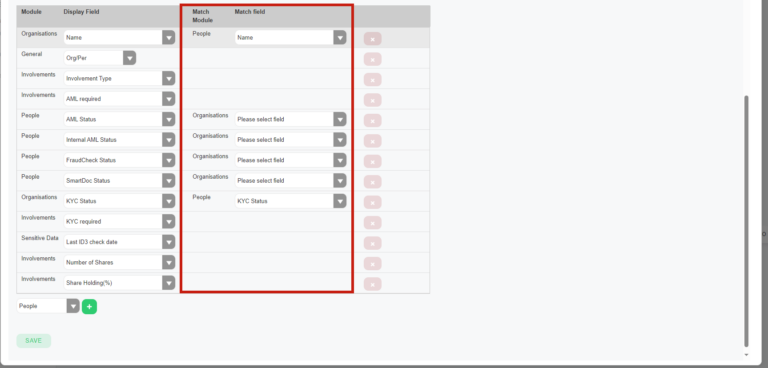
You can match Person/Org module fields using the Match Field column. This is useful as you can match same fields for People/Orgs such as the Name field which will display in 1 column on the Involvement subpanel. Use the drop down in the match field column to match the field in the display field.
You can change the order of the fields listed by dragging and dropping each line into the place you would like it.
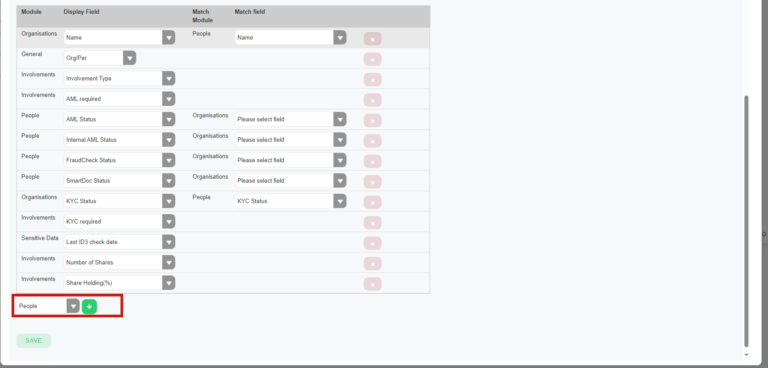
To add anymore additional fields scroll down to the bottom of the screen and choose the Module from the dropdown. Once selected click the green + button and it will be added to the list.
To remove any fields listed click the Red X button on the right hand side.
Click Save once done.
Saving the KYC Form
Once you have completed and customised your created KYC Form
click Update.
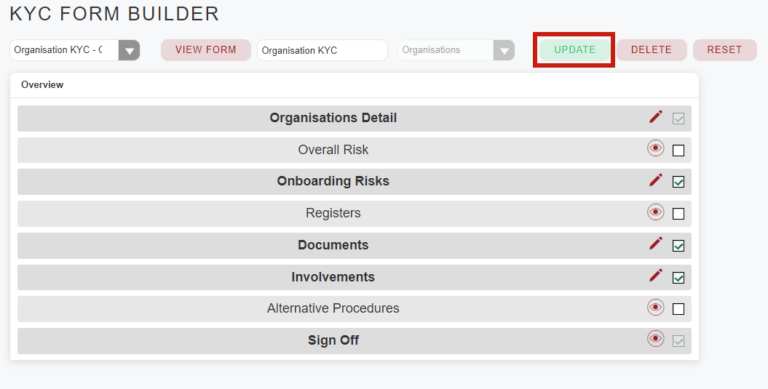
The form will now be available for a User to pick when conducting a KYC on an Organisation or Person.

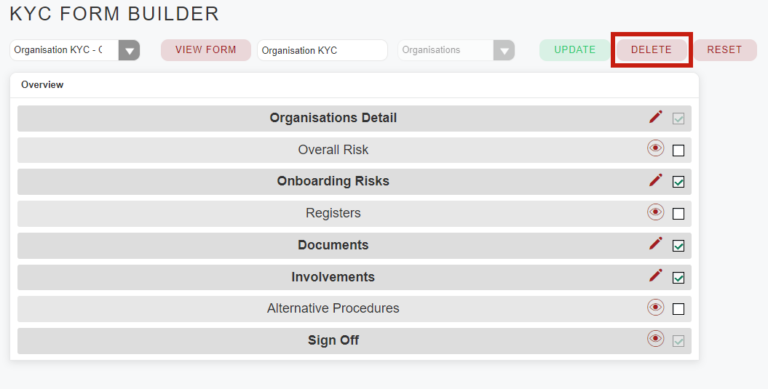
To delete the KYC form select the Delete button and to
reset the form to the default settings click Reset.
Editing a KYC Form
If you need to edit a KYC form, first navigate to your
username in the top right hand corner and in the drop down menu select Admin.

In Admin scroll down and select KYC Form Builder.

In the KYC Form builder choose which form you’d like to edit using the drop down menu and then select View Form.
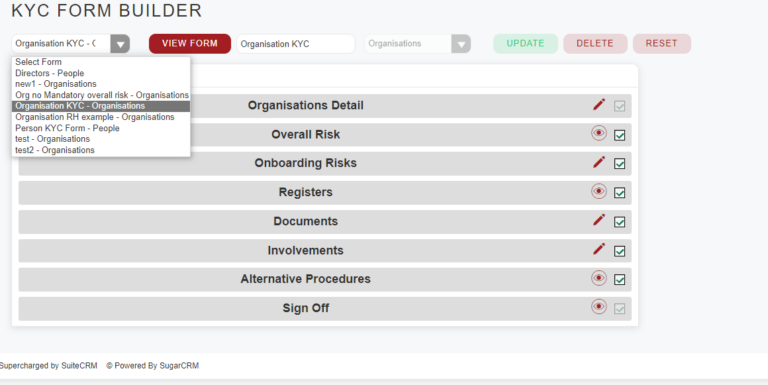
You can alter which sections are showing using the tick
boxes to toggle on and off.
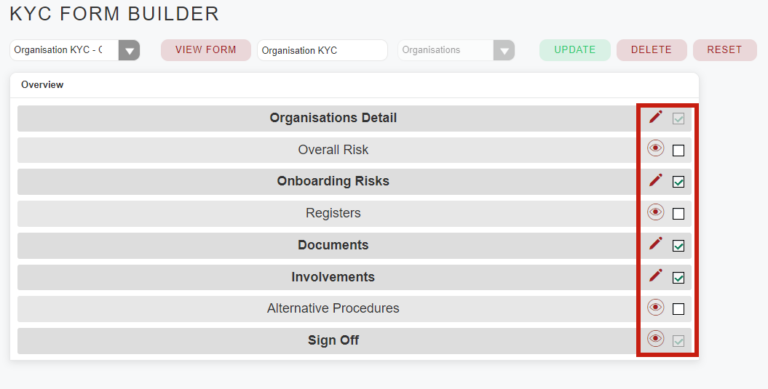
Once you’ve made all the changes to KYC form you require click Update.

To delete the KYC form select the Delete button.

