Creating and Processing a Lead in FibreCRM – User Guide
Updated
Creating a Lead
Lead Records represent the early stage prospective clients within the CRM. They can be related to a Person, Organisation, Meeting or Call. Lead records may also originate from outside of CRM. For example, a website Contact-Us form, an email marketing subscriber or from Microsoft Outlook.
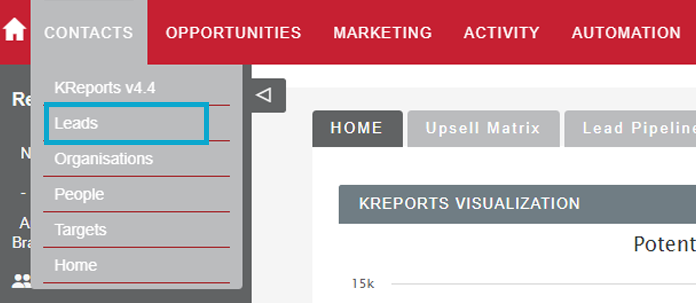
To begin creating a Lead record in the CRM, start by navigating to the Leads Module in the Contacts Menu.
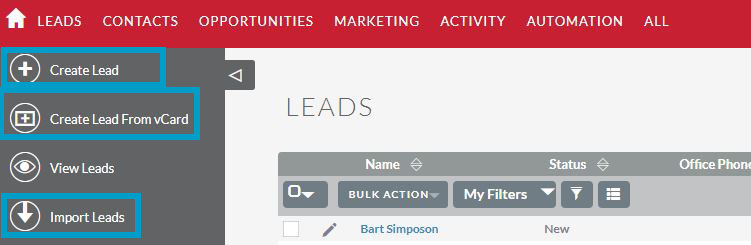
You will notice that there are multiple options for creating a Lead in the menu on the left hand side, these are:
Create Lead – This is the most common method for creating a lead record from scratch.
Create Lead From vCard – This method is used when a vCard file has been provided or information is generated using the business card scanner.
Import Lead – This method is used for importing multiple leads from a CSV File.
For this example, we’ll be using the Create Lead option.
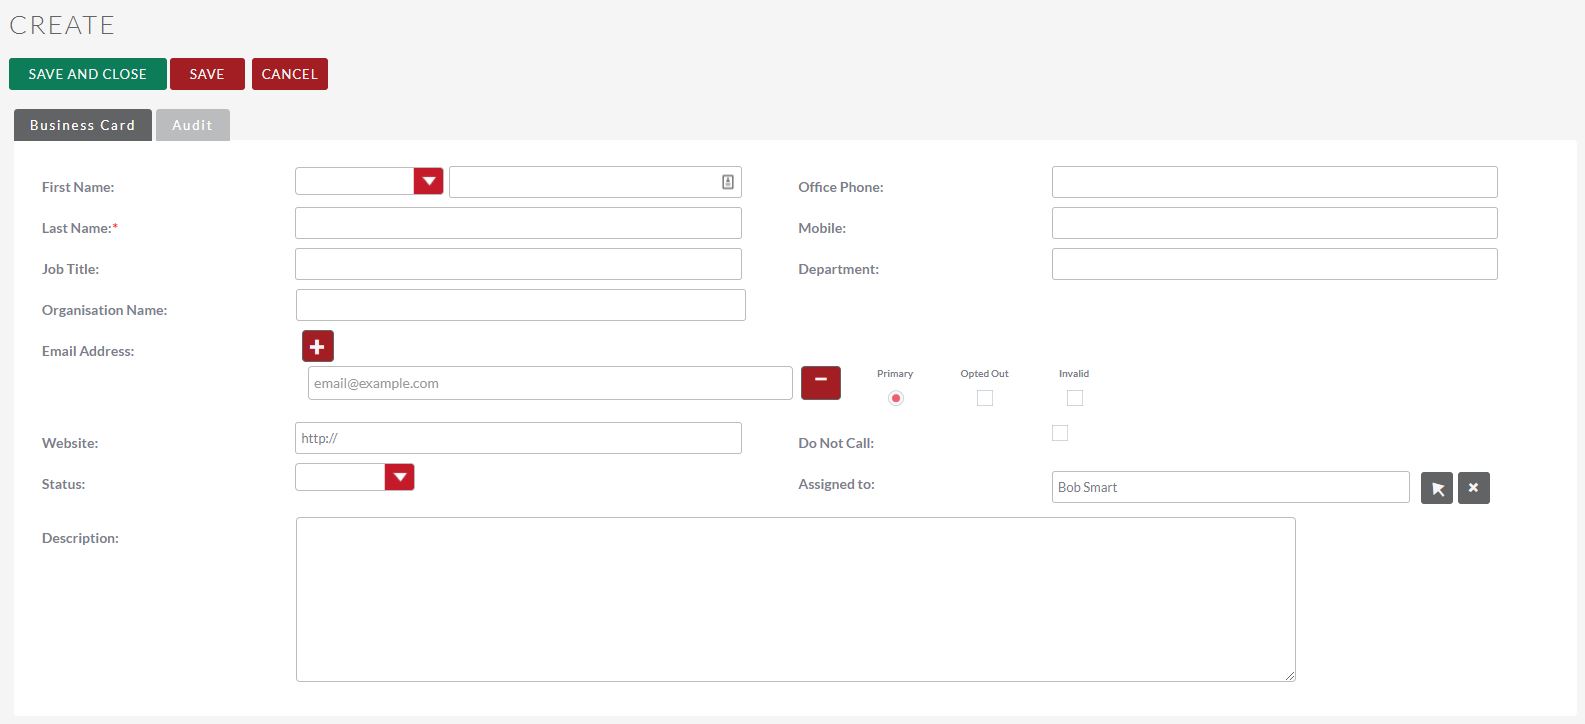
For CRM users in UK the first thing you’ll see after the selecting the Create Lead option is Lawful Basis selection box (if the GDPR module is optionally enabled) . You will need to select a Lawful Basis for the purpose of GDPR Compliance. For further information on Lawful Basis please contact your CRM manager.
On the Business Card tab of the Lead creation screen – you’ll be able to enter all the relevant contact information for that lead. For example; Name, Email, Phone, Website, Organisation & Job Title. You can use the status field to mark the Lead as it progresses.
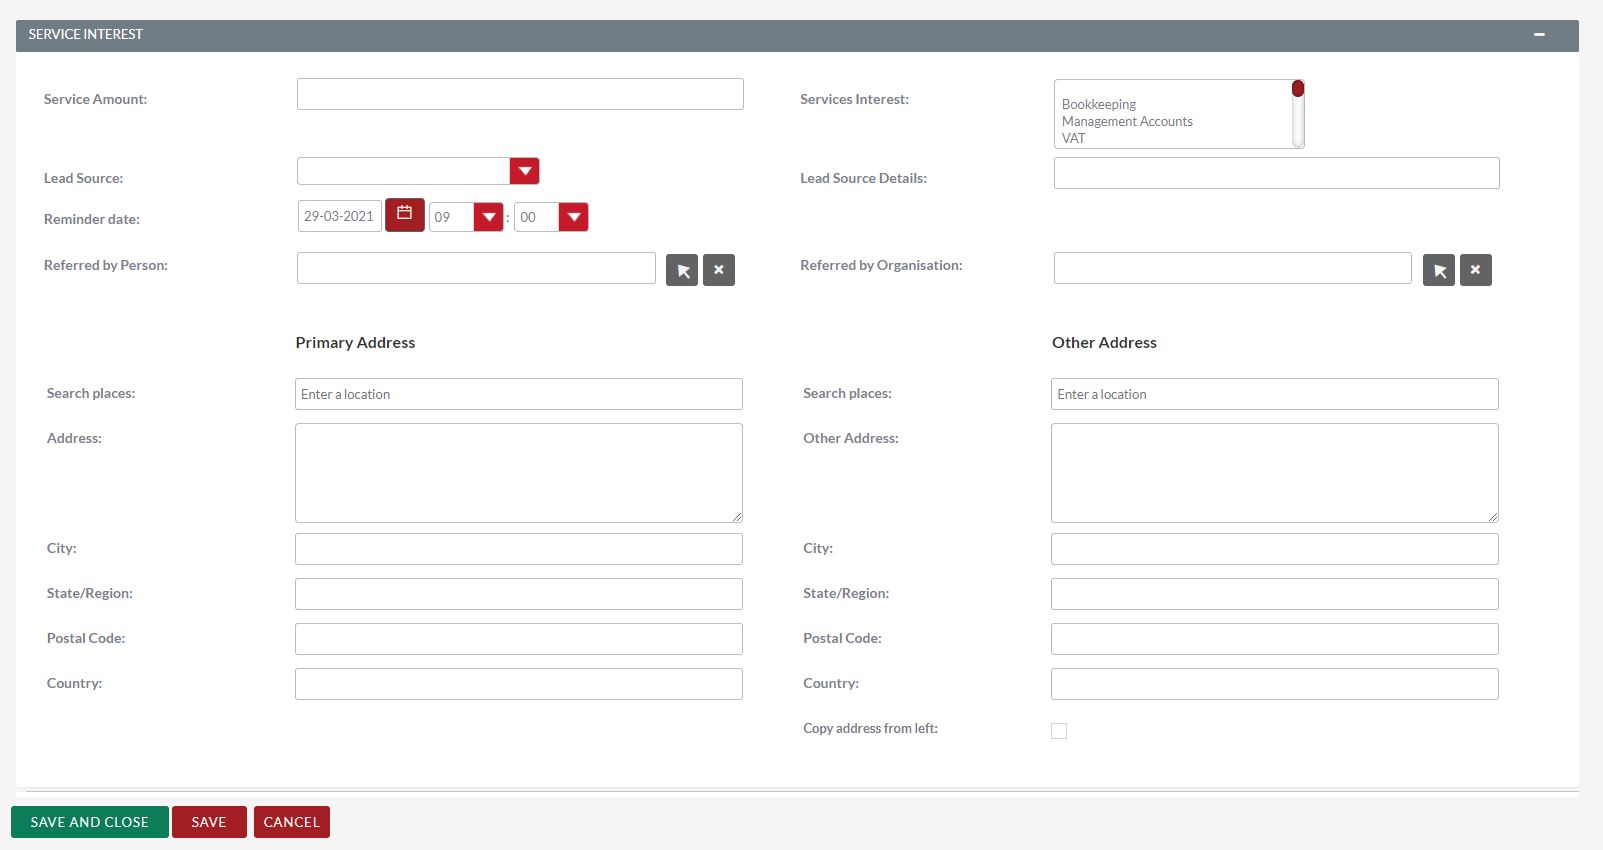
Below is the Service Interest section. Here you can enter details in what services the Lead might be interested in. The Lead Source lets you select where the lead was sourced. You can choose from options such as Customer Referral, Website, Trade Show or an Employee. You can also enter more information in the Lead Source Details. In the case of Referrals, you can specify if the referral was made by an existing Person or Organisation that already appears within the CRM. Finally you can enter Addresses for the Lead at the bottom. Once you’ve entered all the details you require hit Save & Close.
Editing a Lead
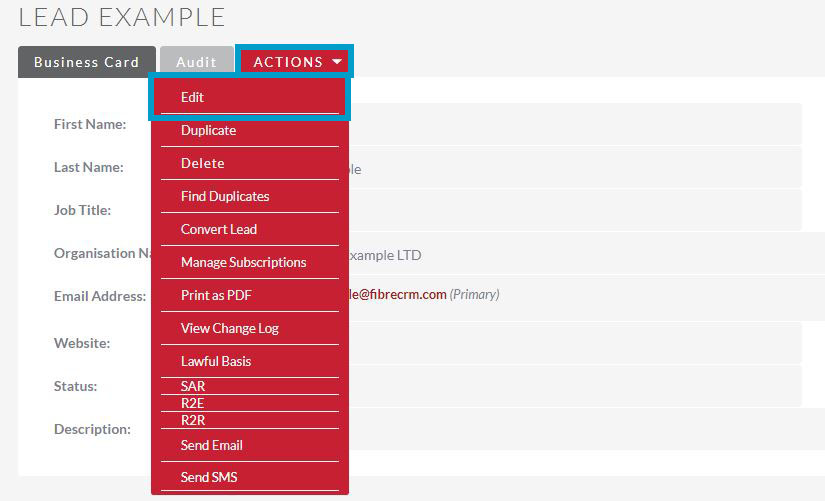
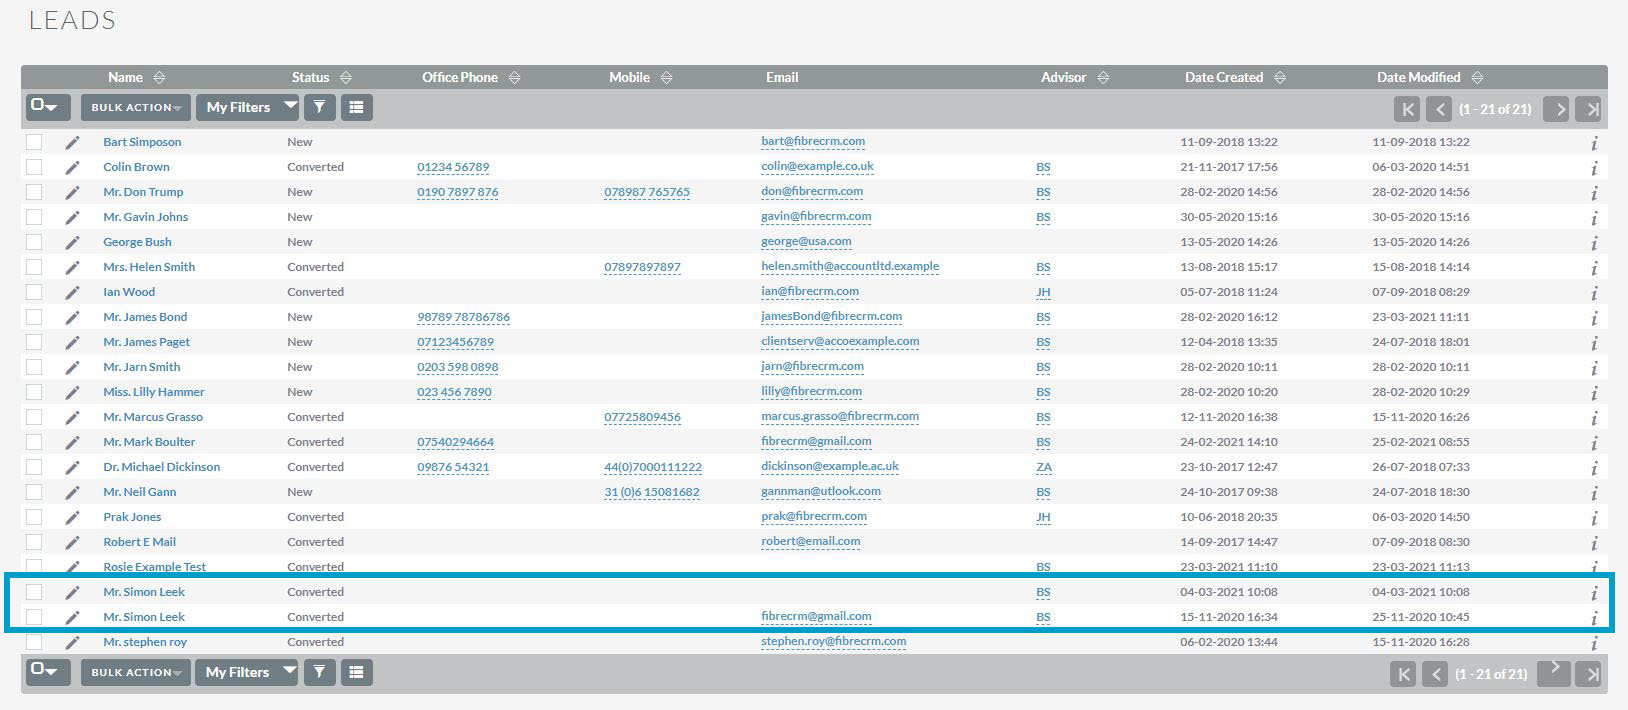
To edit a Lead, navigate to the Leads module and use the search filter to find the Lead you would like to edit. Once you’ve found the correct record click on the Actions Button and select Edit. Make the changes you wish to make and then hit Save & Close once again.
Converting a Lead
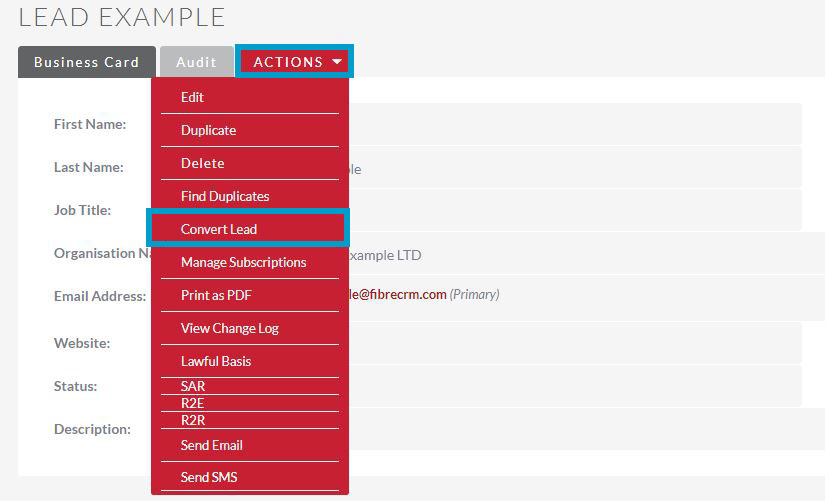
When the lead has been qualified in, it is ready to be converted. This means that from the Lead record; Person, Organisations & Opportunity records can be created for that Lead – or linked if the Person or Organisation already exist within the CRM. You can convert a Lead by using the Actions Menu and selecting Convert Lead.
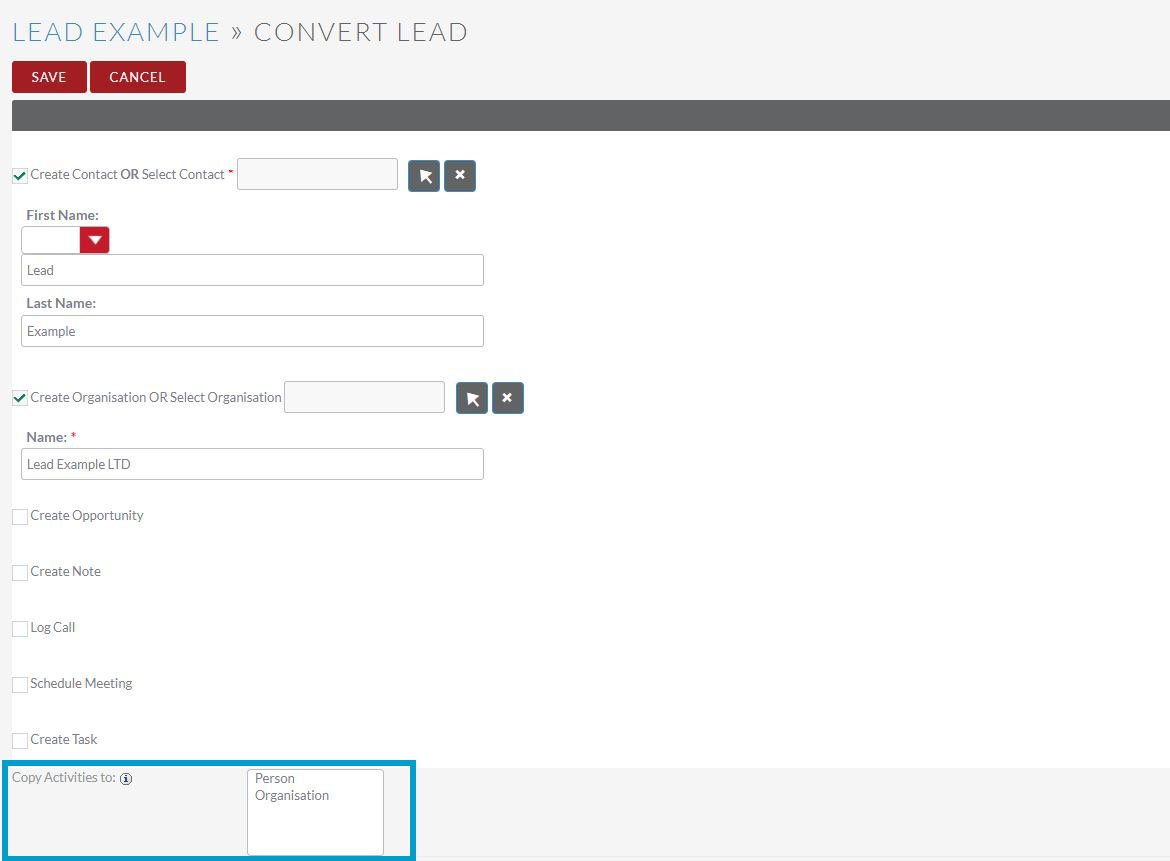
On the Lead Conversion Screen you’ll see options to create or select a Person record and create or select an Organisation record. You’ll also be able to create other records such as an Opportunity (If the Lead is ready to do so) as well as Notes, Calls, Meetings & Tasks relating to the management of this new prospective client relationship.
Once you’re happy with this, you can view the actions to be executed in the section at the bottom of the screen. If these are all correct, hit Save.
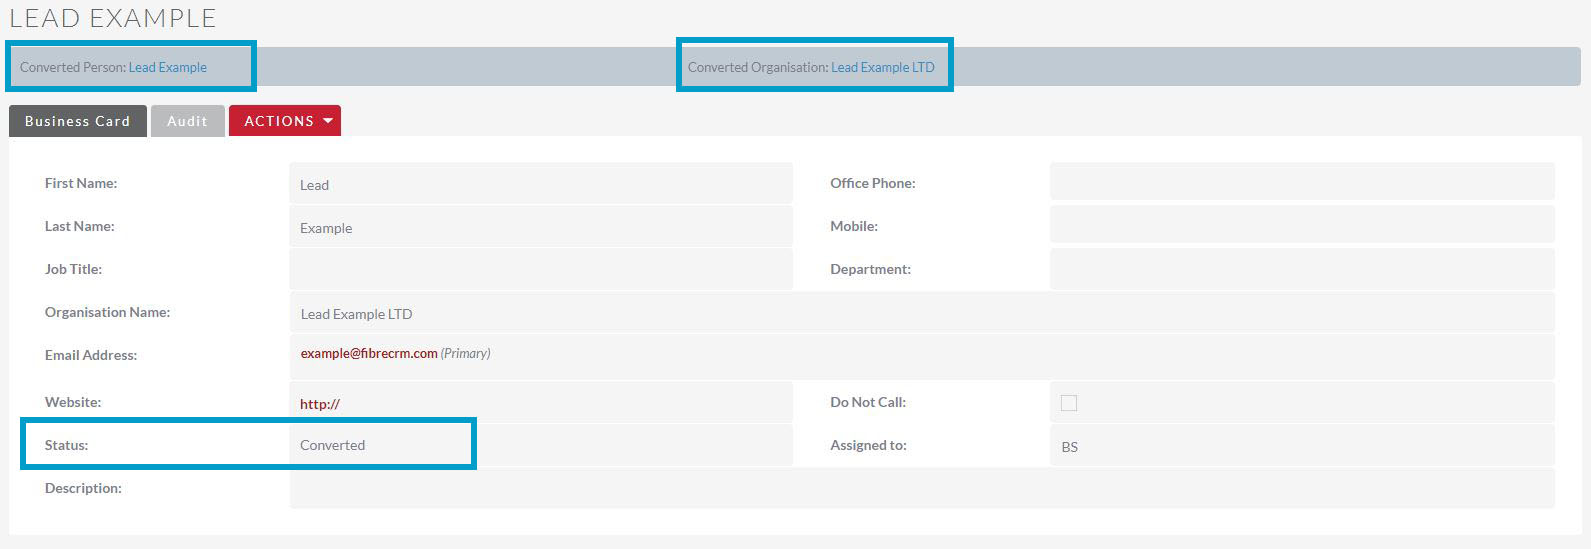
Once converted the Lead record will display the linked Person & Organisation records associated with that Lead and the Lead Status of the Lead Record will be set to Converted.
A person may exist multiple times as a Lead. For example, Joe Bloggs might make multiple enquiries over a period of time. Having this historical record of Leads/Enquiries helps marketing statistics. Keeping Leads in a separate area to your ‘main’ data keeps your CRM data clean.
Cheat Sheet
To download the Converting a Lead Cheat Sheet click here
Table of Contents
We use cookies to assess how people are using our website, only necessary cookies are enabled. Cookie settingsACCEPTREJECT
Cookie Policy
Privacy Overview
This website uses cookies to improve your experience while you navigate through the website. Out of these cookies, the cookies that are categorized as necessary are stored on your browser as they are essential for the working of basic functionalities of the website. We also use third-party cookies that help us analyze and understand how you use this website. These cookies will be stored in your browser only with your consent. You also have the option to opt-out of these cookies. But opting out of some of these cookies may have an effect on your browsing experience.
Necessary cookies are absolutely essential for the website to function properly. This category only includes cookies that ensures basic functionalities and security features of the website. These cookies do not store any personal information.
Any cookies that may not be particularly necessary for the website to function and is used specifically to collect user personal data via analytics, ads, other embedded contents are termed as non-necessary cookies. It is mandatory to procure user consent prior to running these cookies on your website.
Functional cookies help to perform certain functionalities like sharing the content of the website on social media platforms, collect feedbacks, and other third-party features.
Performance cookies are used to understand and analyze the key performance indexes of the website which helps in delivering a better user experience for the visitors.
Analytical cookies are used to understand how visitors interact with the website. These cookies help provide information on metrics the number of visitors, bounce rate, traffic source, etc.
Advertisement cookies are used to provide visitors with relevant ads and marketing campaigns. These cookies track visitors across websites and collect information to provide customized ads.