KYC Settings
Introduction
As an Admin of FibreCRM you have the ability to set certain settings for your KYCs processes in the system these include; Setting Default Emails, Zip File Options, KYC Person Disable and Sign off Options.
KYC Settings
To access and set the KYC settings first navigate to your Username in the top right hand corner and in the drop down options select Admin.

In Admin scroll down to the FibreCRM Modules section and then select KYC Settings.

KYC Default Emails
During the KYC process in FibreCRM email notifications may occur when the KYC has been referred or to alert the Onboarding Agent if there is a status change . These emails differ depending on what type of action has occurred.

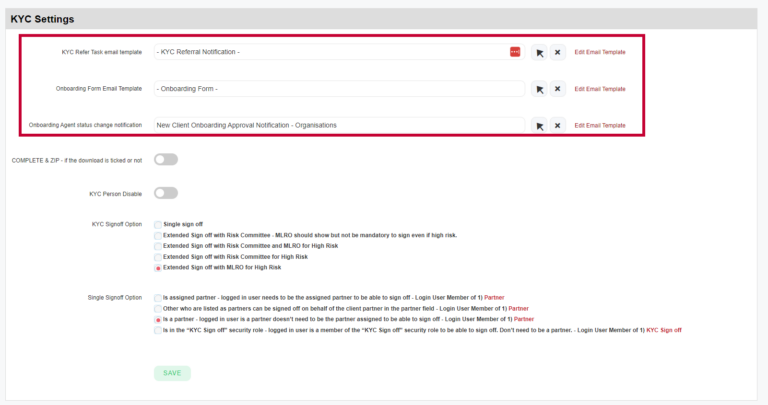
In the KYC settings you will have 3 options to select Email Templates for:
1. KYC Refer Task email template – This email will contain information about the KYC referred to a user with a task related to it and will be the default email for a KYC refer.
2. Onboarding Form Email Template – When an onboarding form has been referred, this email will be the default template the referee receives when the onboarding form has been referred to them.
3. Onboarding Agent status change notification – When a KYC status has been changed this will be the email the onboarding agent receives to notify them.
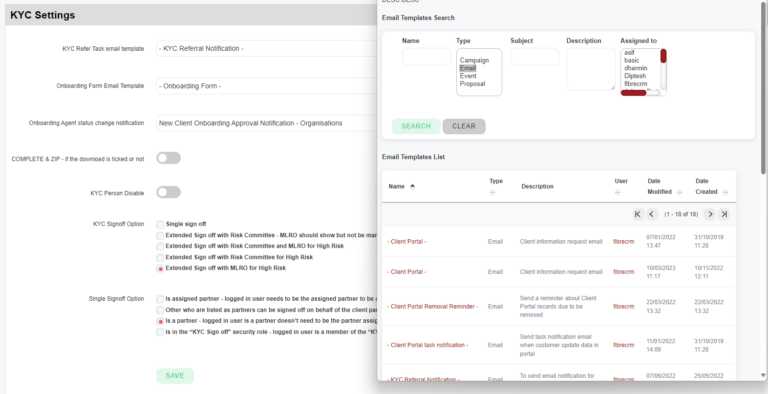
To select an Email template choose the Select Arrow and in the pop up select your email template.

You can make any amendments to the email template using the Edit Email Template button you will be taken to the template button

Note: There are default email templates to choose one, however if you would like to create your own please see our email templates user guide: Creating and Editing Email Templates – User Guide – FibreCRM Support Portal
KYC Person Disable
You can disable Person KYCs by switching the toggle to on. Once toggled on, Users will not have the ability to start KYC in a Person record.

Default Expanding of the KYC Panels
You have the ability to set the different panels in the KYC form to be opened or closed by default for all users. If the Expand KYC Panel toggle is switched on all users will see all KYC panels on a KYC form open by default each time they go to the onboarding tab of a record. Users will still have the ability to close them if they need to but once the page refreshes it will revert back to open.


Complete & Zip File Options
You can disable Person KYCs by switching the toggle to on. Once toggled on, Users will not have the ability to start KYC in a Person record.
Selecting a KYC Sign Off
To complete a KYC in CRM, the KYC needs to be signed off. In FibreCRM there are four options to choose from for how the Sign Off process works. As an Admin of the CRM you have the ability to select which KYC Sign Off option you’d like to use for your system.
In the KYC Sign Off Option section, here you have 5 options to choose from. Select the option you require by using the select boxes to the left hand side of the options:
- Single Sign Off – Choosing this option means you on the KYC form you will have one signing section on the KYC form.
- Extended Sign Off with Risk Committee + MLRO not mandatory – This option is a 2 tier sign off so requires the KYC Sign Off box to be signed but all the On Behalf of the Risk Committee box. The MLRO box will also be available but is not a mandatory field to sign off even if it is high risk.
- Extended Sign Off with Risk Committee and MLRO for High Risk – If you choose this option it will require further sign off from the Risk Committee and then MLRO if the Risk Assessment and/or any involvements are deemed high risk.
- Extended Sign Off with Risk Comittee for High Risk – If you choose this option it will require further sign off from the Risk Committee if the Risk Assessment and/or any involvements are deemed high risk.
- Extended Sign Off with MLRO for High Risk – If you choose this option it will require further sign off from the MLRO if the Risk Assessment and/or any involvements are deemed high risk.
Note: For MLRO or Risk Committee Sign off on the KYC form, it requires users to be a part of their respective security role. For more information on Roles and Security Groups please see this user guide: Security Groups & Roles – User Guide – FibreCRM Support Portal

Once you’ve selected your KYC Sign Options you will then need to scroll down to the next set of option you will then have a further 4 options to choose who will be able to do the initial sign off:
- Is Assigned Partner – The user needs to be the assigned Client Partner of the record in order to be able to sign off. Role Needed – Partner
- Sign Off on Behalf of Client Partner – Others who are listed in the partner role can sign off on behalf of the listed Client Partner of the record. When the KYC Sign Off box is ticked the assigned Client Partner signature will appear even if another user has ticked it. Role Needed – Partner
- Is a Partner – Logged in user can sign off the KYC does, they do not need to be the assigned Client Partner. In the KYC Sign Off box their Username will appear as the partner who has signed off. Role Needed – Partner
- KYC Sign Off Security Role – Any user that is in the KYC Sign Off security role will be able to sign off the KYC. They do not need to be a Partner.
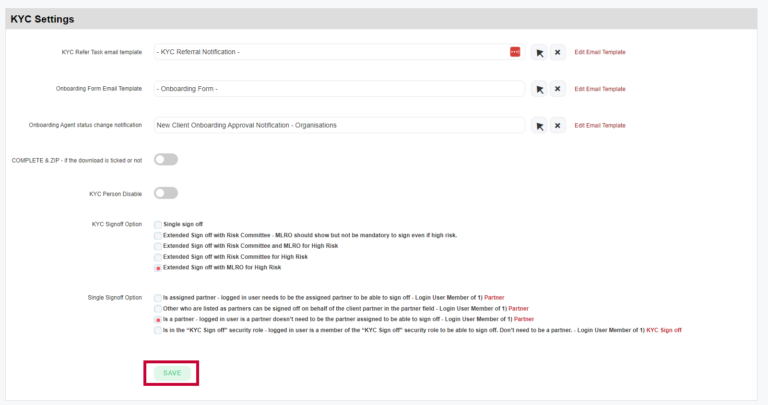
Select the option you require by using the select boxes to the left hand side of the options. Once done click Save. The sign off option you’ve chosen will then be applied to your KYC Forms.

Note: Sign off requires users to be a part of either in the Partner or KYC Sign Off role depending on which option you select. For more information on Roles and Security Groups please see this user guide: Security Groups & Roles – User Guide – FibreCRM Support Portal
Once you’ve set all your settings click Save. The settings you have chosen will now be applied to your KYC process.

